DMN Designer
Use the Flowset DMN Designer to edit decision requirements diagrams (DRD), decision tables and literal expressions in IntelliJ IDEA. The DMN Designer will appear when you open an existing .dmn file. If you create a new decision table via Flowset Studio, it will open automatically in the Designer.
DRD Editor
The DRD editor allows building diagrams directly in the IDE.
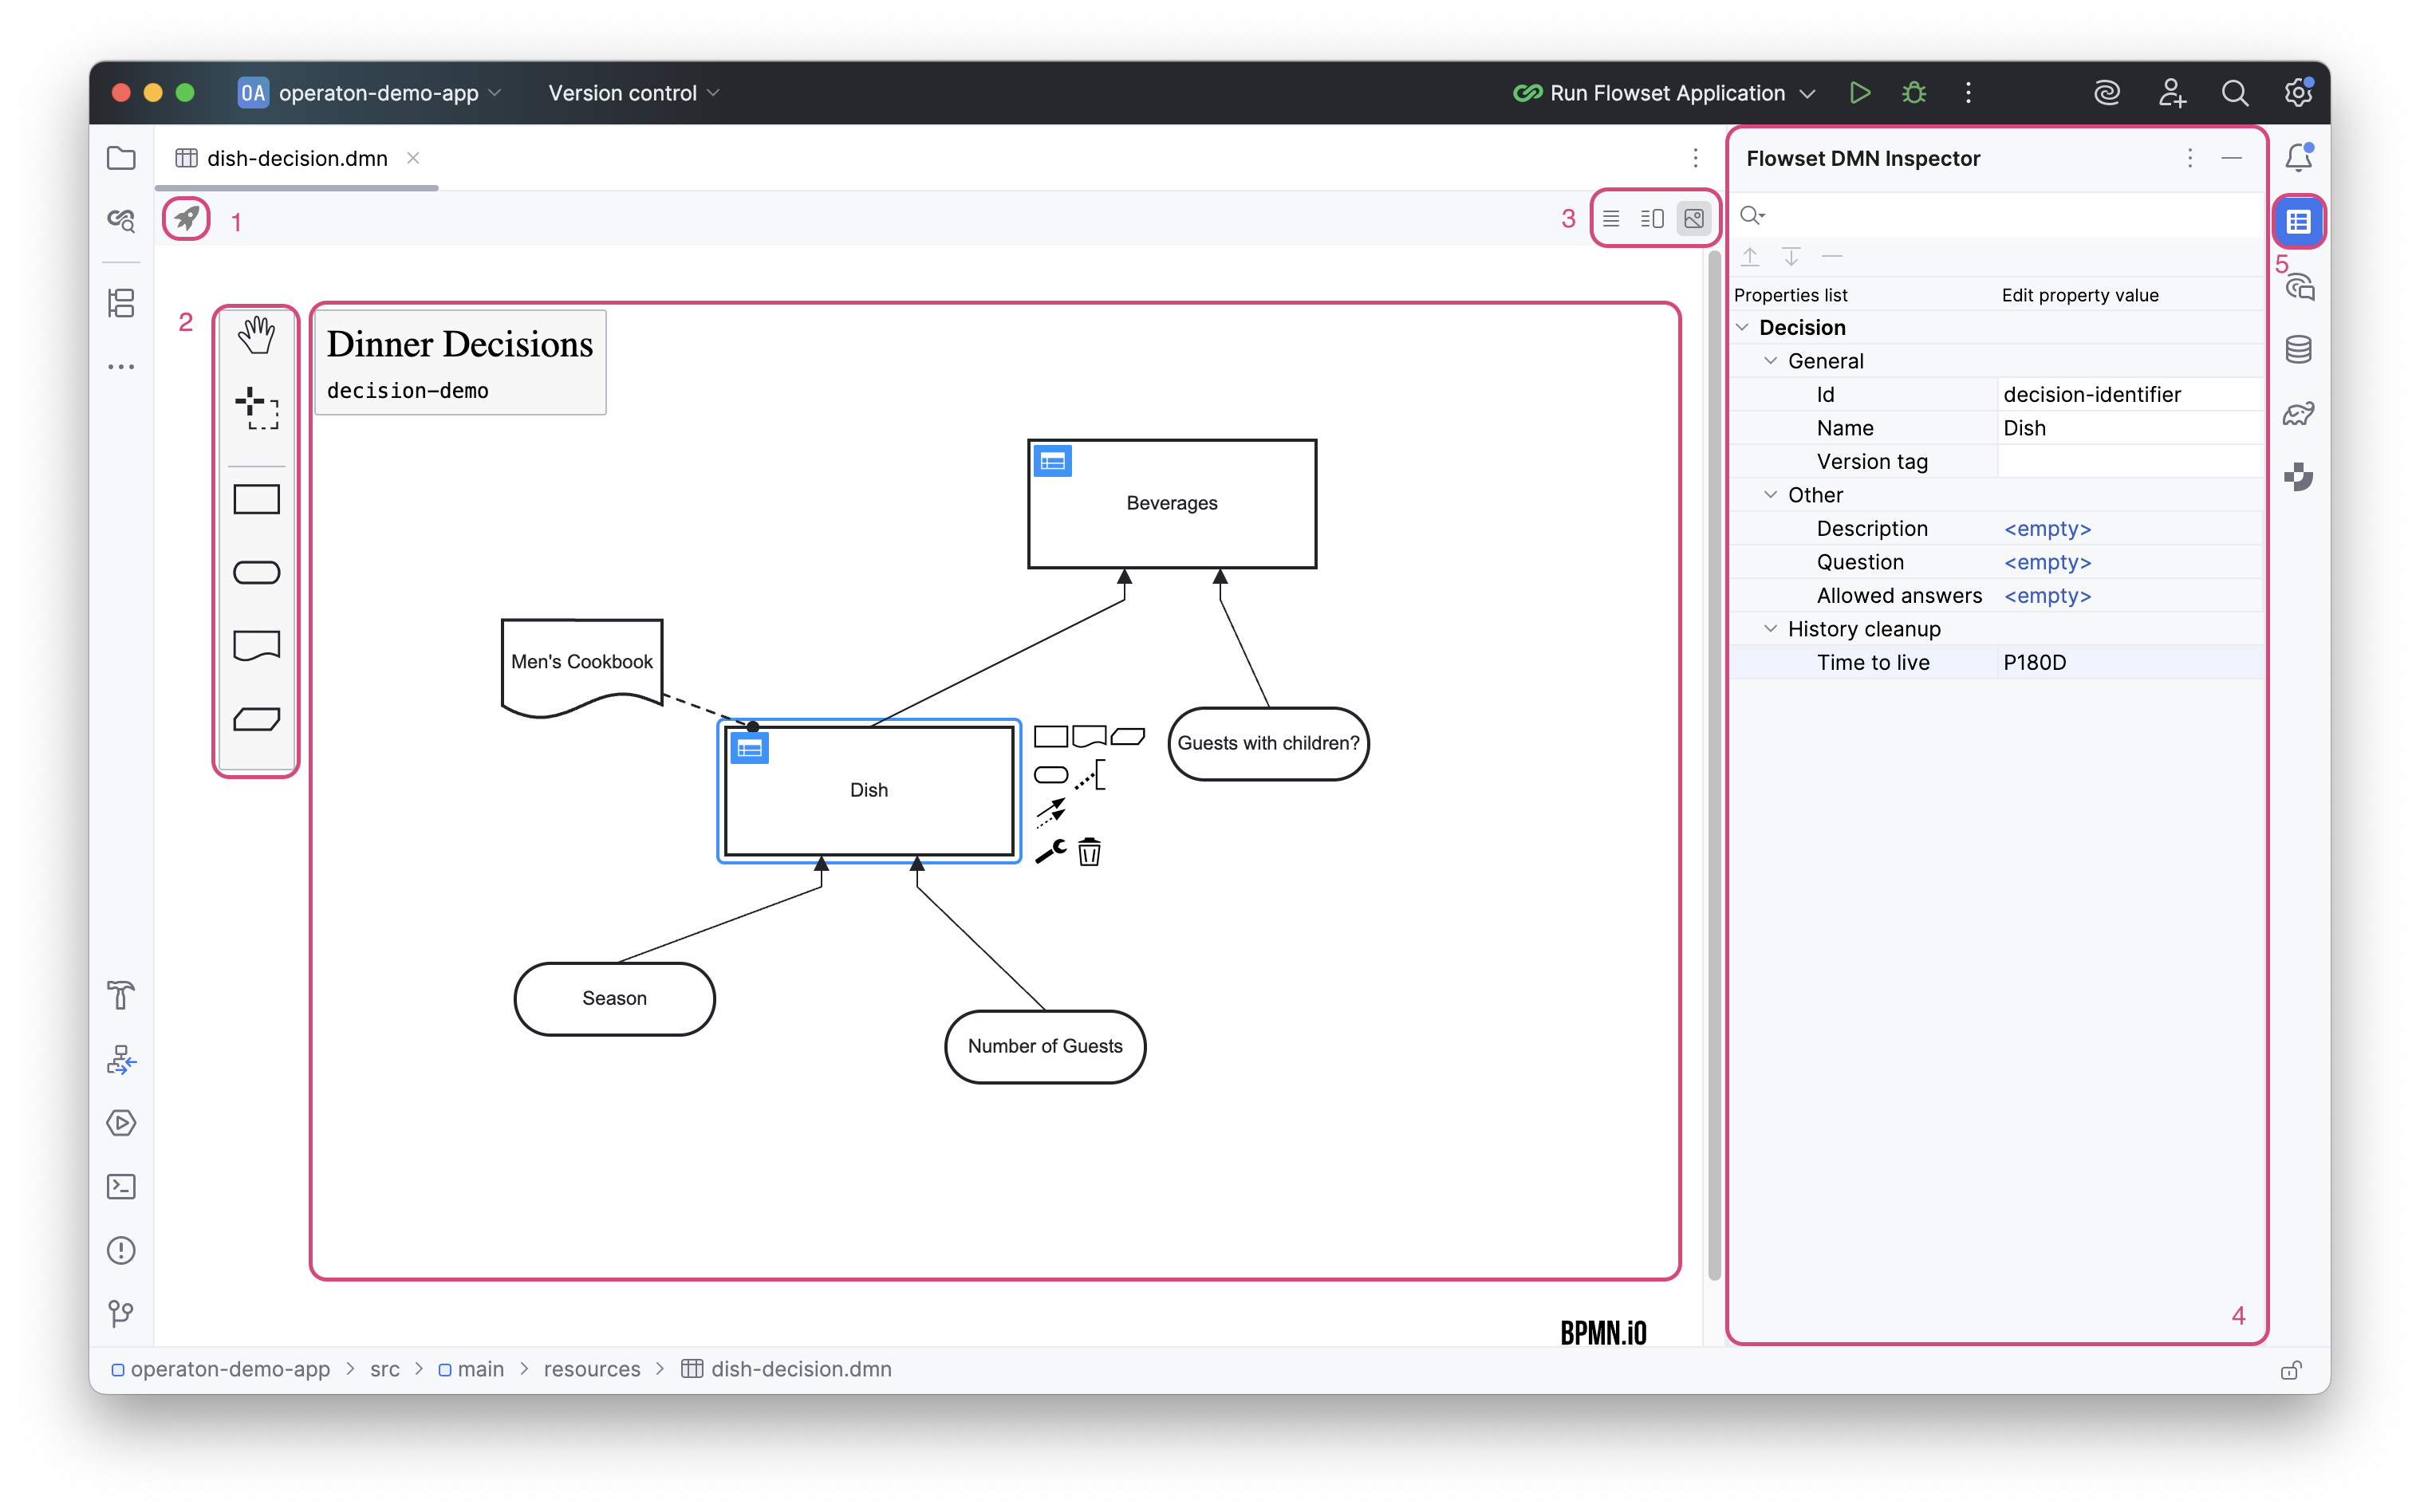
The DRD editor interface consists of:
Canvas |
Workspace for creating a DRD. |
|
DMN Actions |
(1) |
Panel of available actions for the DRD. |
Components Palette |
(2) |
The Components Palette provides a complete set of elements for building diagram. |
Editor Modes |
(3) |
Panel for selecting the view mode. Three view modes are available: XML only, XML and diagram, diagram only. |
DMN Inspector |
(4) |
The inspector panel displays the attributes of the selected element and allows editing them. |
Visibility Button |
(5) |
Visibility toggle for the inspector. |
Basic Operations
Add Element |
Drag and drop a new element from the Components Palette to the Canvas. |
Select an element |
Click on the element. |
Change element type |
Select the element on the Canvas and click the wrench icon. |
Add a new Input Data |
Click the Input Data tool in the palette and then click on the canvas. |
Connect two elements |
Click on source element, select an arrow tool, and drop arrow onto a target element. |
Move an element |
Click and drag the element to a new location on the canvas. |
Delete an element |
Select the element and press the Delete key or click the trash can icon. |
Open the Decision Table Editor |
Click on blue icon in top left corner of element. |
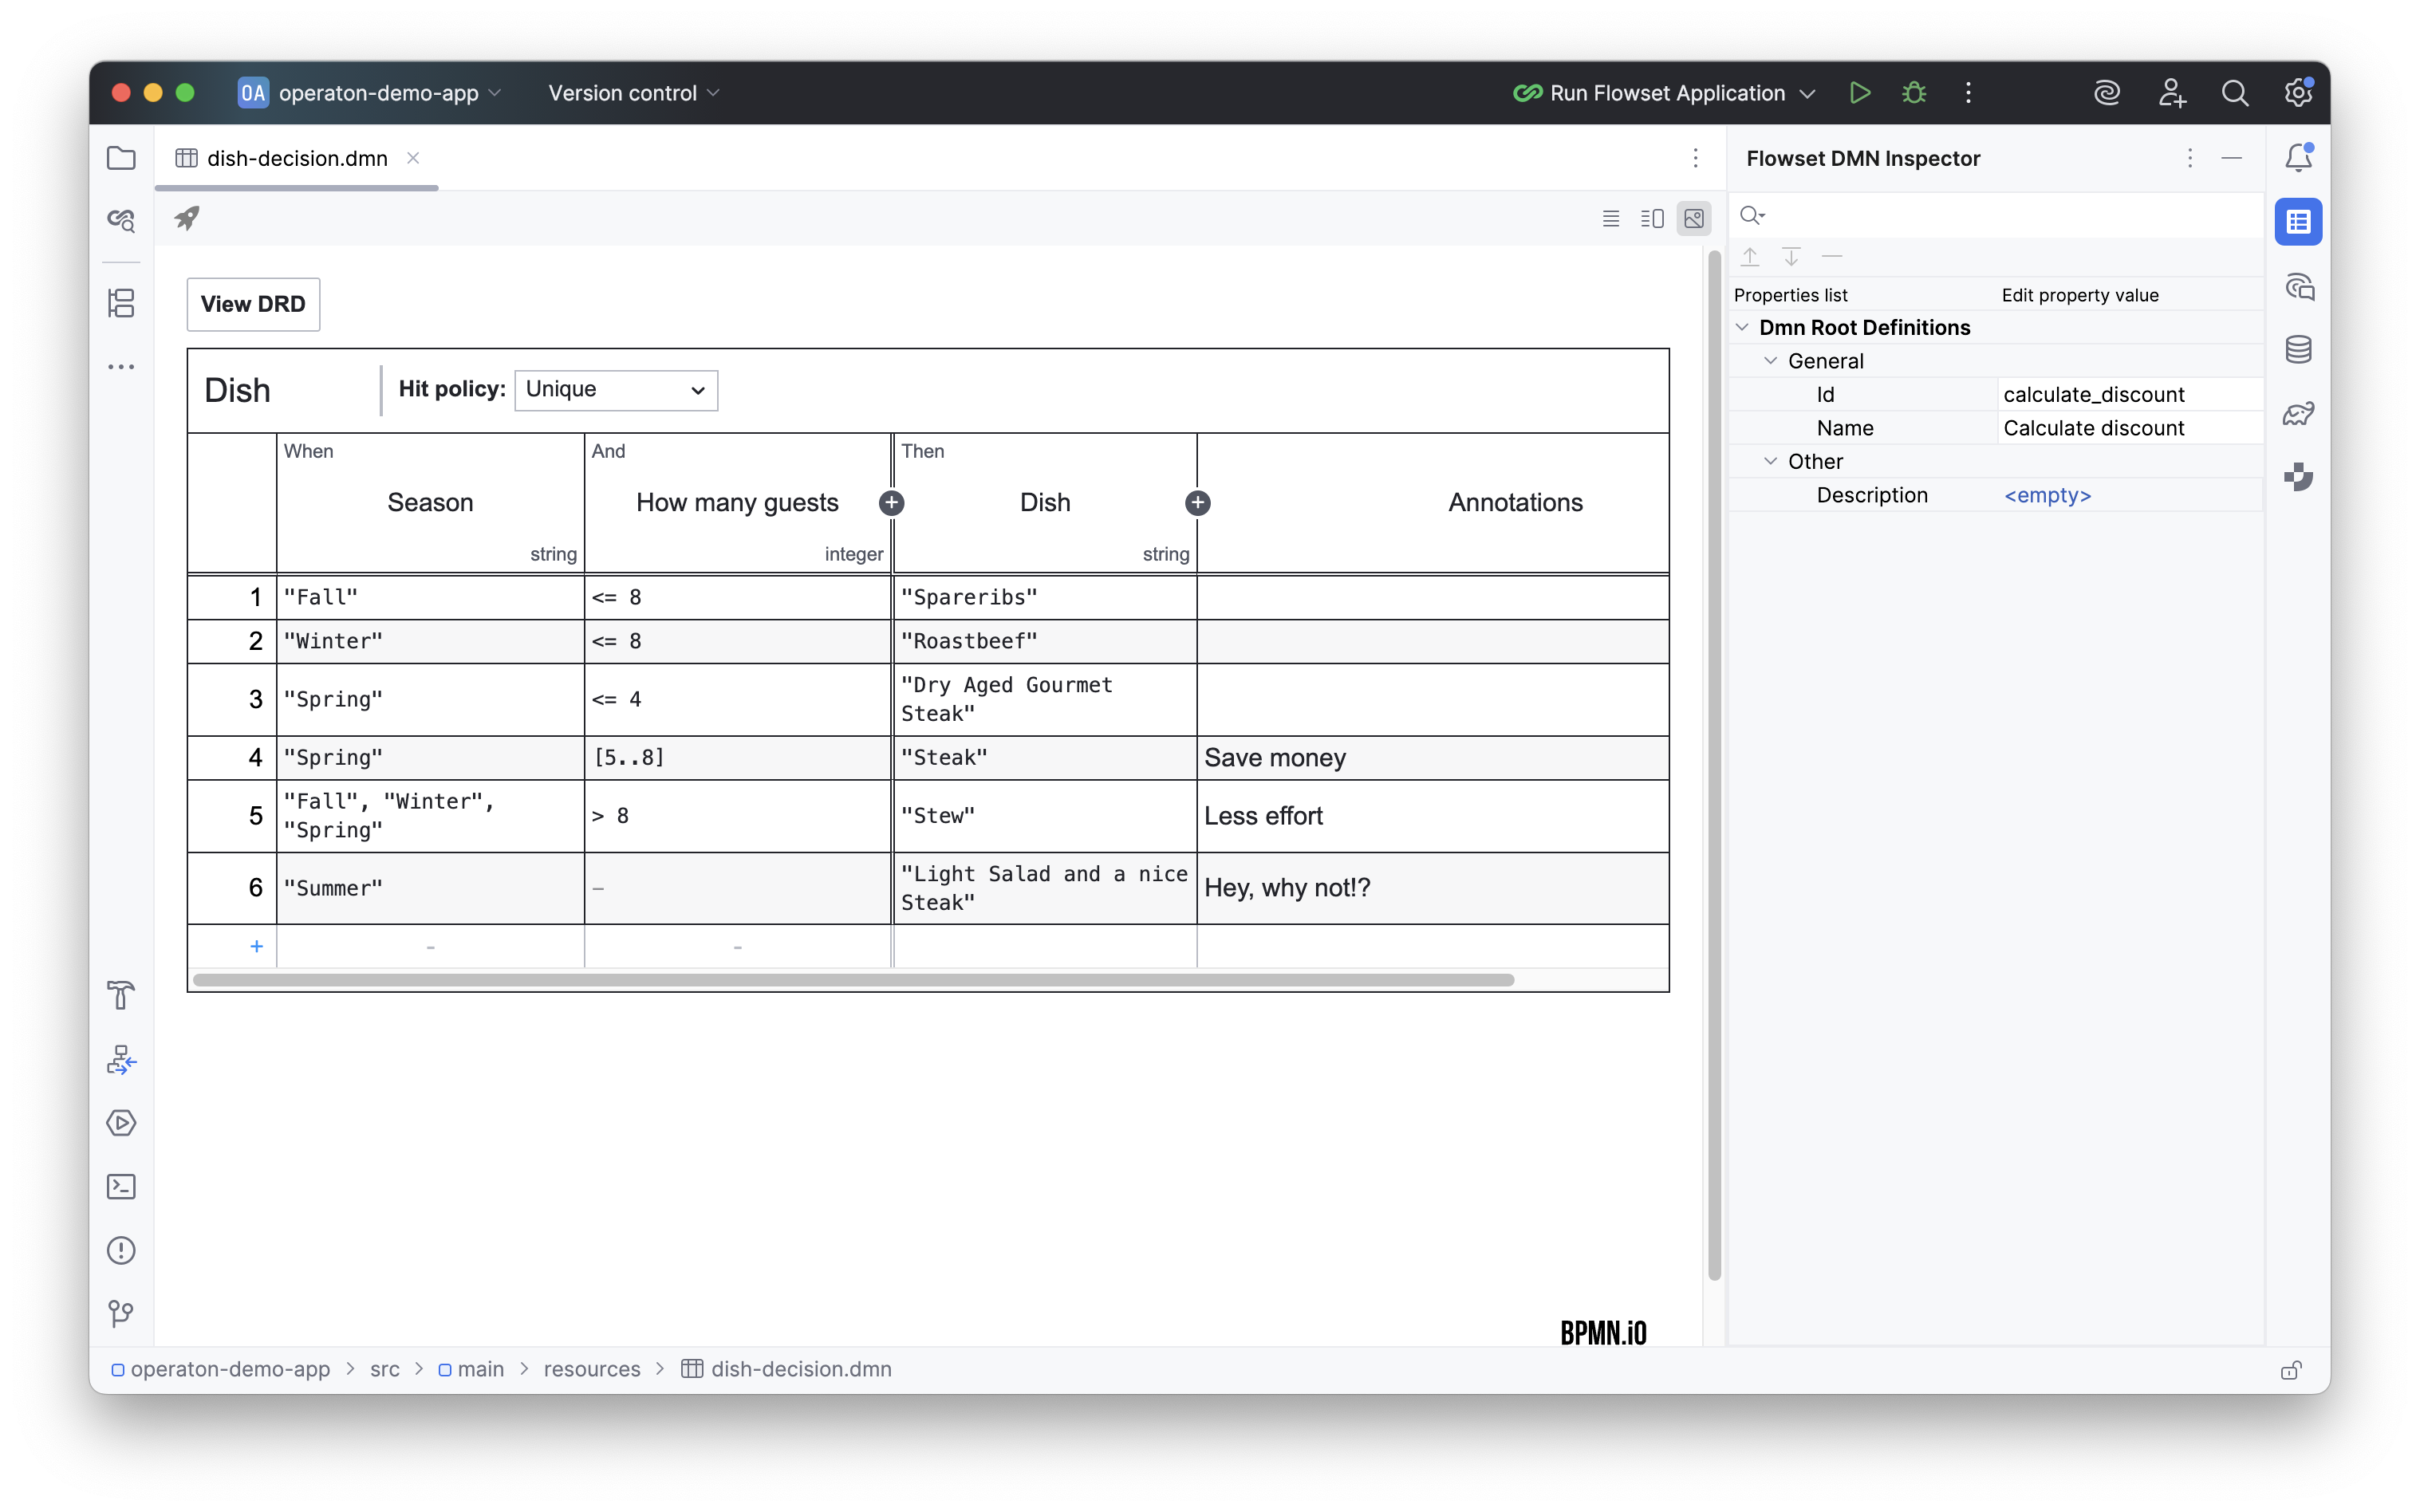
Decision Table Editor
The decision table editor enables you to work with decision tables directly in the IDE. Its interface is similar to that of the DRD editor.
Basic Operations
Add a new Rule (row) |
Click the Plus (+) button at the bottom-left of the table. |
Insert a Rule above |
Right-click a rule number and select Add rule above. |
Insert a Rule below |
Right-click a rule number and select Add rule below. |
Delete a Rule |
Right-click the rule number and select Remove rule. |
Add a new Input/Output |
Click the Plus (+) button in the Input or Output column header. |
Delete an Input/Output |
Right-click in the respective column header and select Remove input column. |
Edit a cell |
Double-click the cell or select it and start typing. |
Apply changes in a cell |
Press Enter or click outside the cell. |
Rename an Input/Output |
Double-click the name in the column header |
Change the Hit Policy |
Click the hit policy indicator (e.g., |
Navigate between cells |
Press Tab to move to the next cell, Shift+Tab to move to the previous cell. |
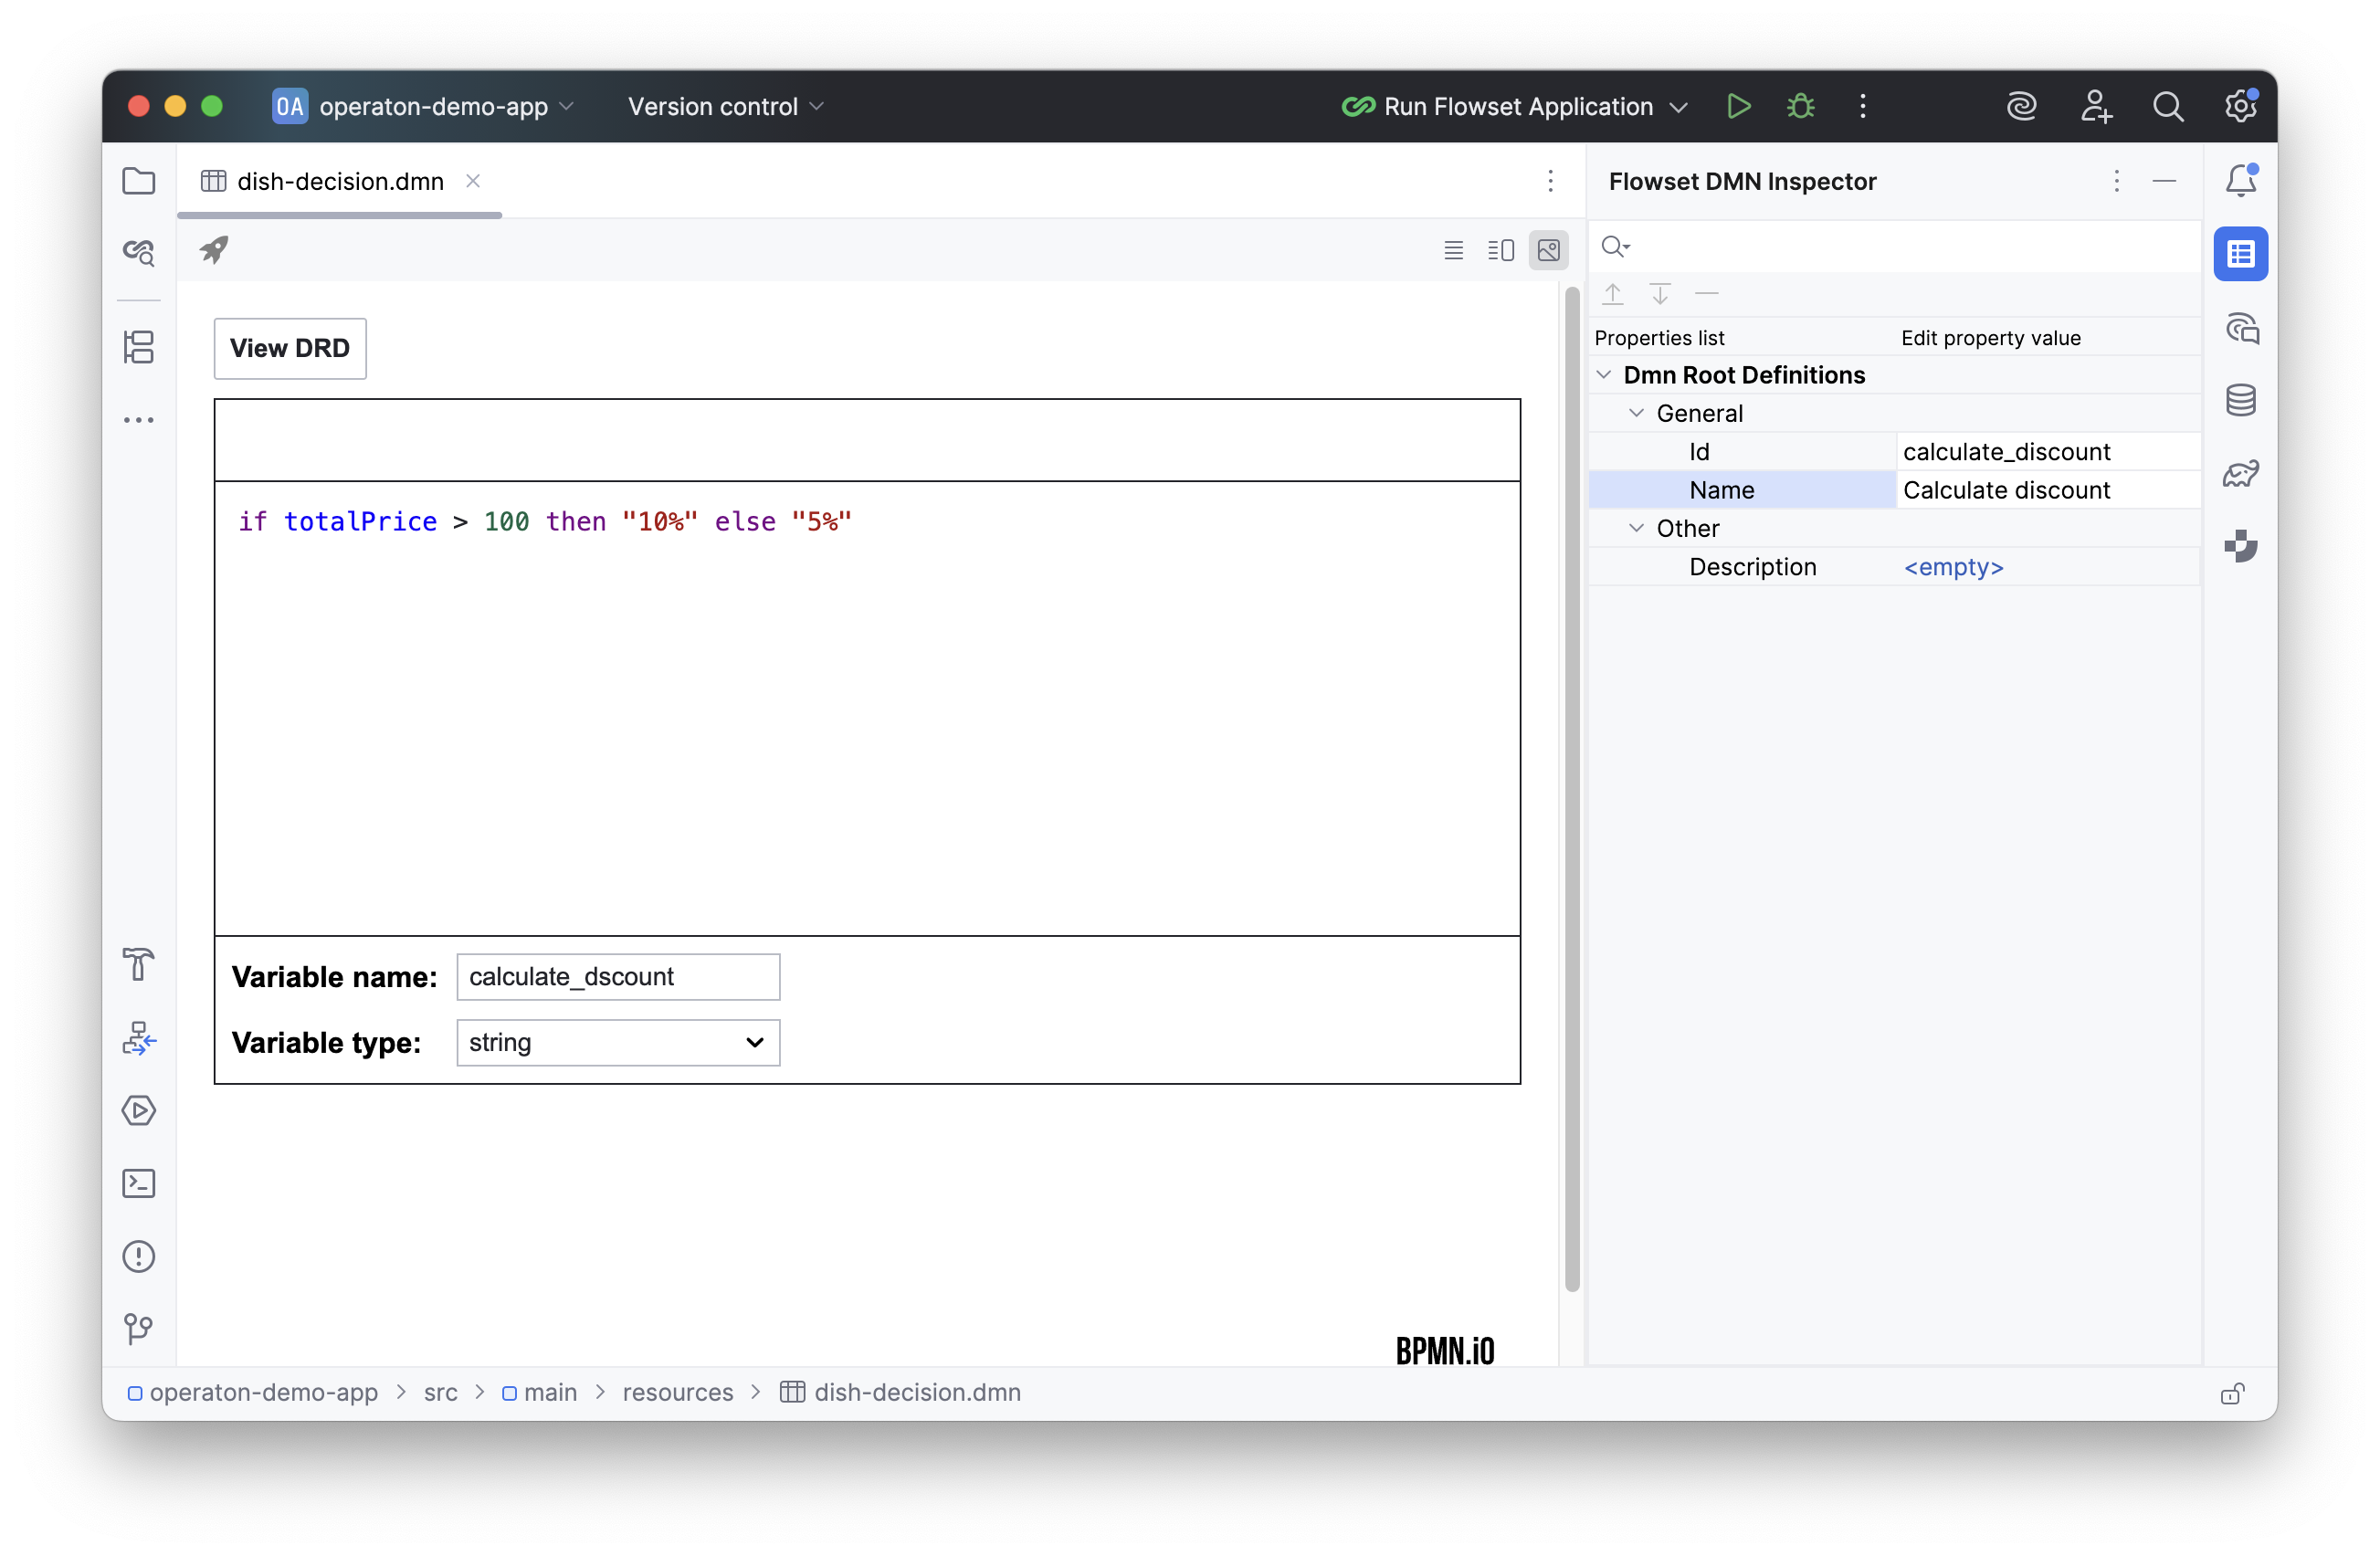
Literal Expression Editor
The Literal Expression editor enables you to work with literal expressions directly in the IDE. Its interface is similar to that of the DRD and decision table editor.
Basic Operations
Access the Editor |
In the Decision Requirements Diagram (DRD) view, click the blue icon on a decision element that has been morphed into a literal expression. |
Edit the Expression |
Click inside the expression editor and type the logic. |
Define/Edit Variable Name |
Edit the |
Define/Edit Variable Type |
Specify the |
Deployment
The DMN Editor allows deploying the DMN to a remote Camunda/Operaton engine. To invoke the deployment wizard, click the rocket icon in the Editor Toolbar (DMN Actions panel). A correctly configured connection to an external engine is required.
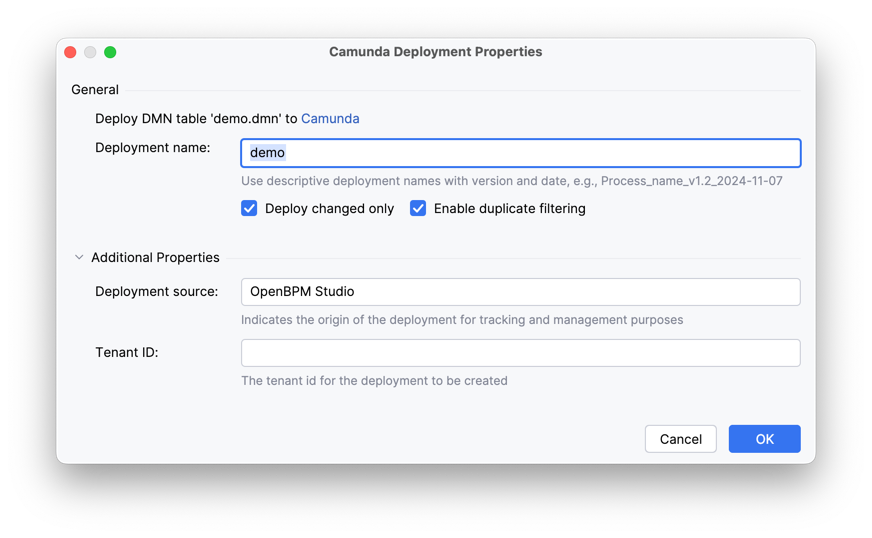
Deployment name |
A unique name for identifying the deployment package. Allows easy finding and administration of a specific process version in the system. |
Enable duplicate filtering |
Filtering at the individual file level. Skips redeployment of unchanged resources (e.g., BPMN diagrams) within a deployment. Saves database space by preventing duplicate creation. |
Deploy changed only |
Filtering at the entire deployment package level. If no file in the deployment has changed, the operation is entirely ignored. Ensures idempotence, excluding unnecessary process version creations. |
Deployment source |
The source from which the deployment was initiated (e.g., 'Flowset Studio'). Used for auditing and tracking deployment origins. |
Tenant ID |
The tenant identifier for a multi-tenant architecture. Allows isolating processes and data for different clients or departments within a single Camunda cluster. |