Quick Start
In this guide, you will go through the entire path: from installation to process modeling.
Let’s get acquainted with Flowset using the demo process “Business Trip Request”.
Want to try Flowset Control immediately? Use the public demo stand and explore the interface in minutes.
Demo standPrerequisites
Before you begin, make sure you have the necessary tools installed (detailed instructions are provided in separate sections):
-
Flowset Studio — an environment for modeling BPMN diagrams and forms.
-
Flowset Control — a web interface for process monitoring and administration.
Demo Process
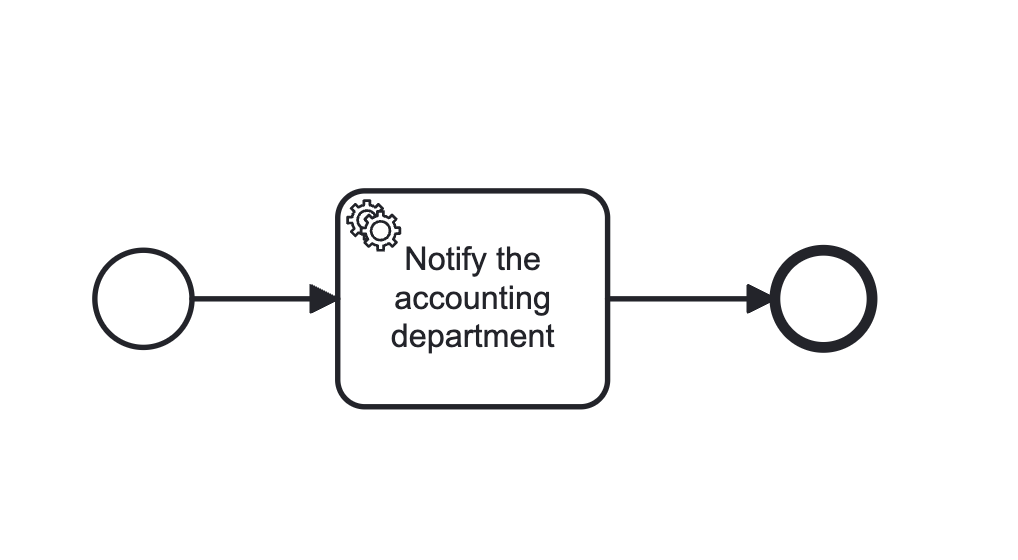
We will model a business trip request process consisting of three elements:
-
Start Event with a start form (Camunda Form) — the employee enters the data.
-
Service Task (
JavaDelegate) — emulates notifying the accounting department (logs the data). -
End Event — ends the process.
Step 1. Creating a diagram in Flowset Studio
First, let’s create a simple Spring Boot application using the Flowset Studio plugin.
| You can find the installation instructions for Flowset Studio at the link. |
-
Launch Studio and create a new application with an embedded BPM engine.
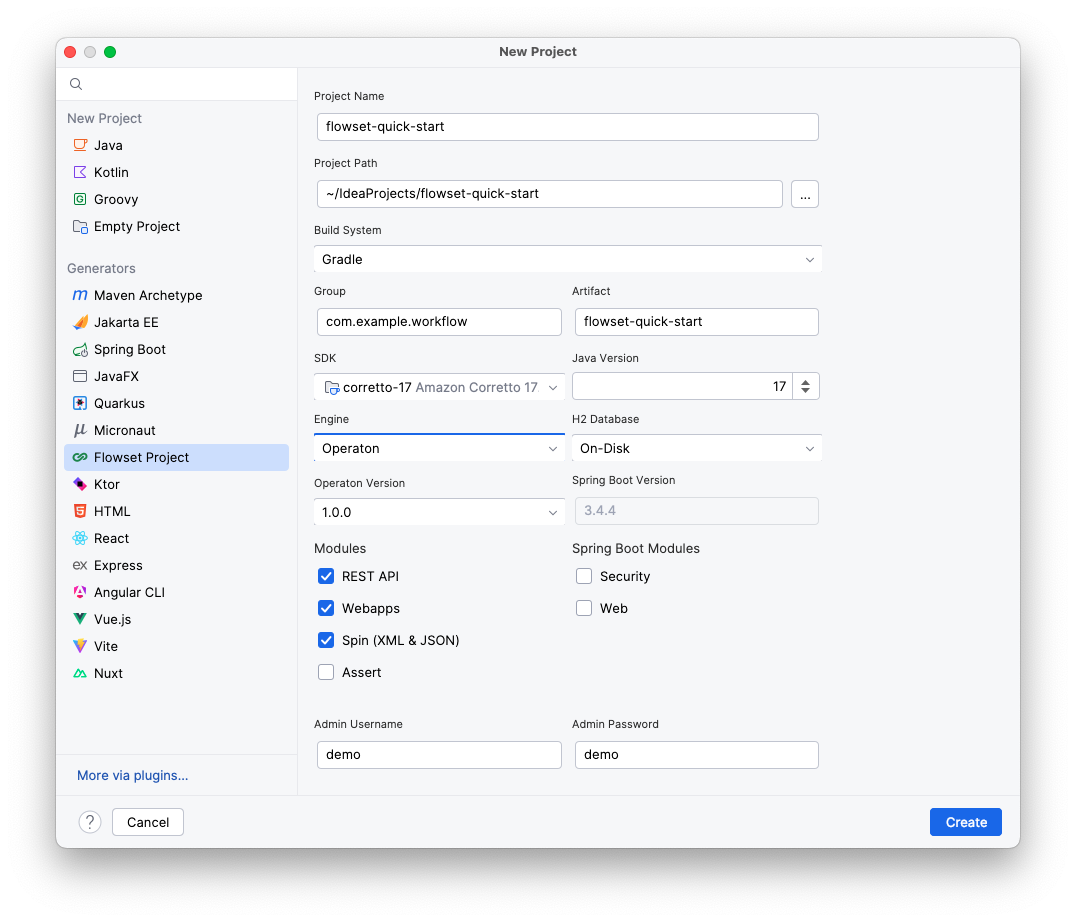
You can currently choose between Camunda or Operaton. -
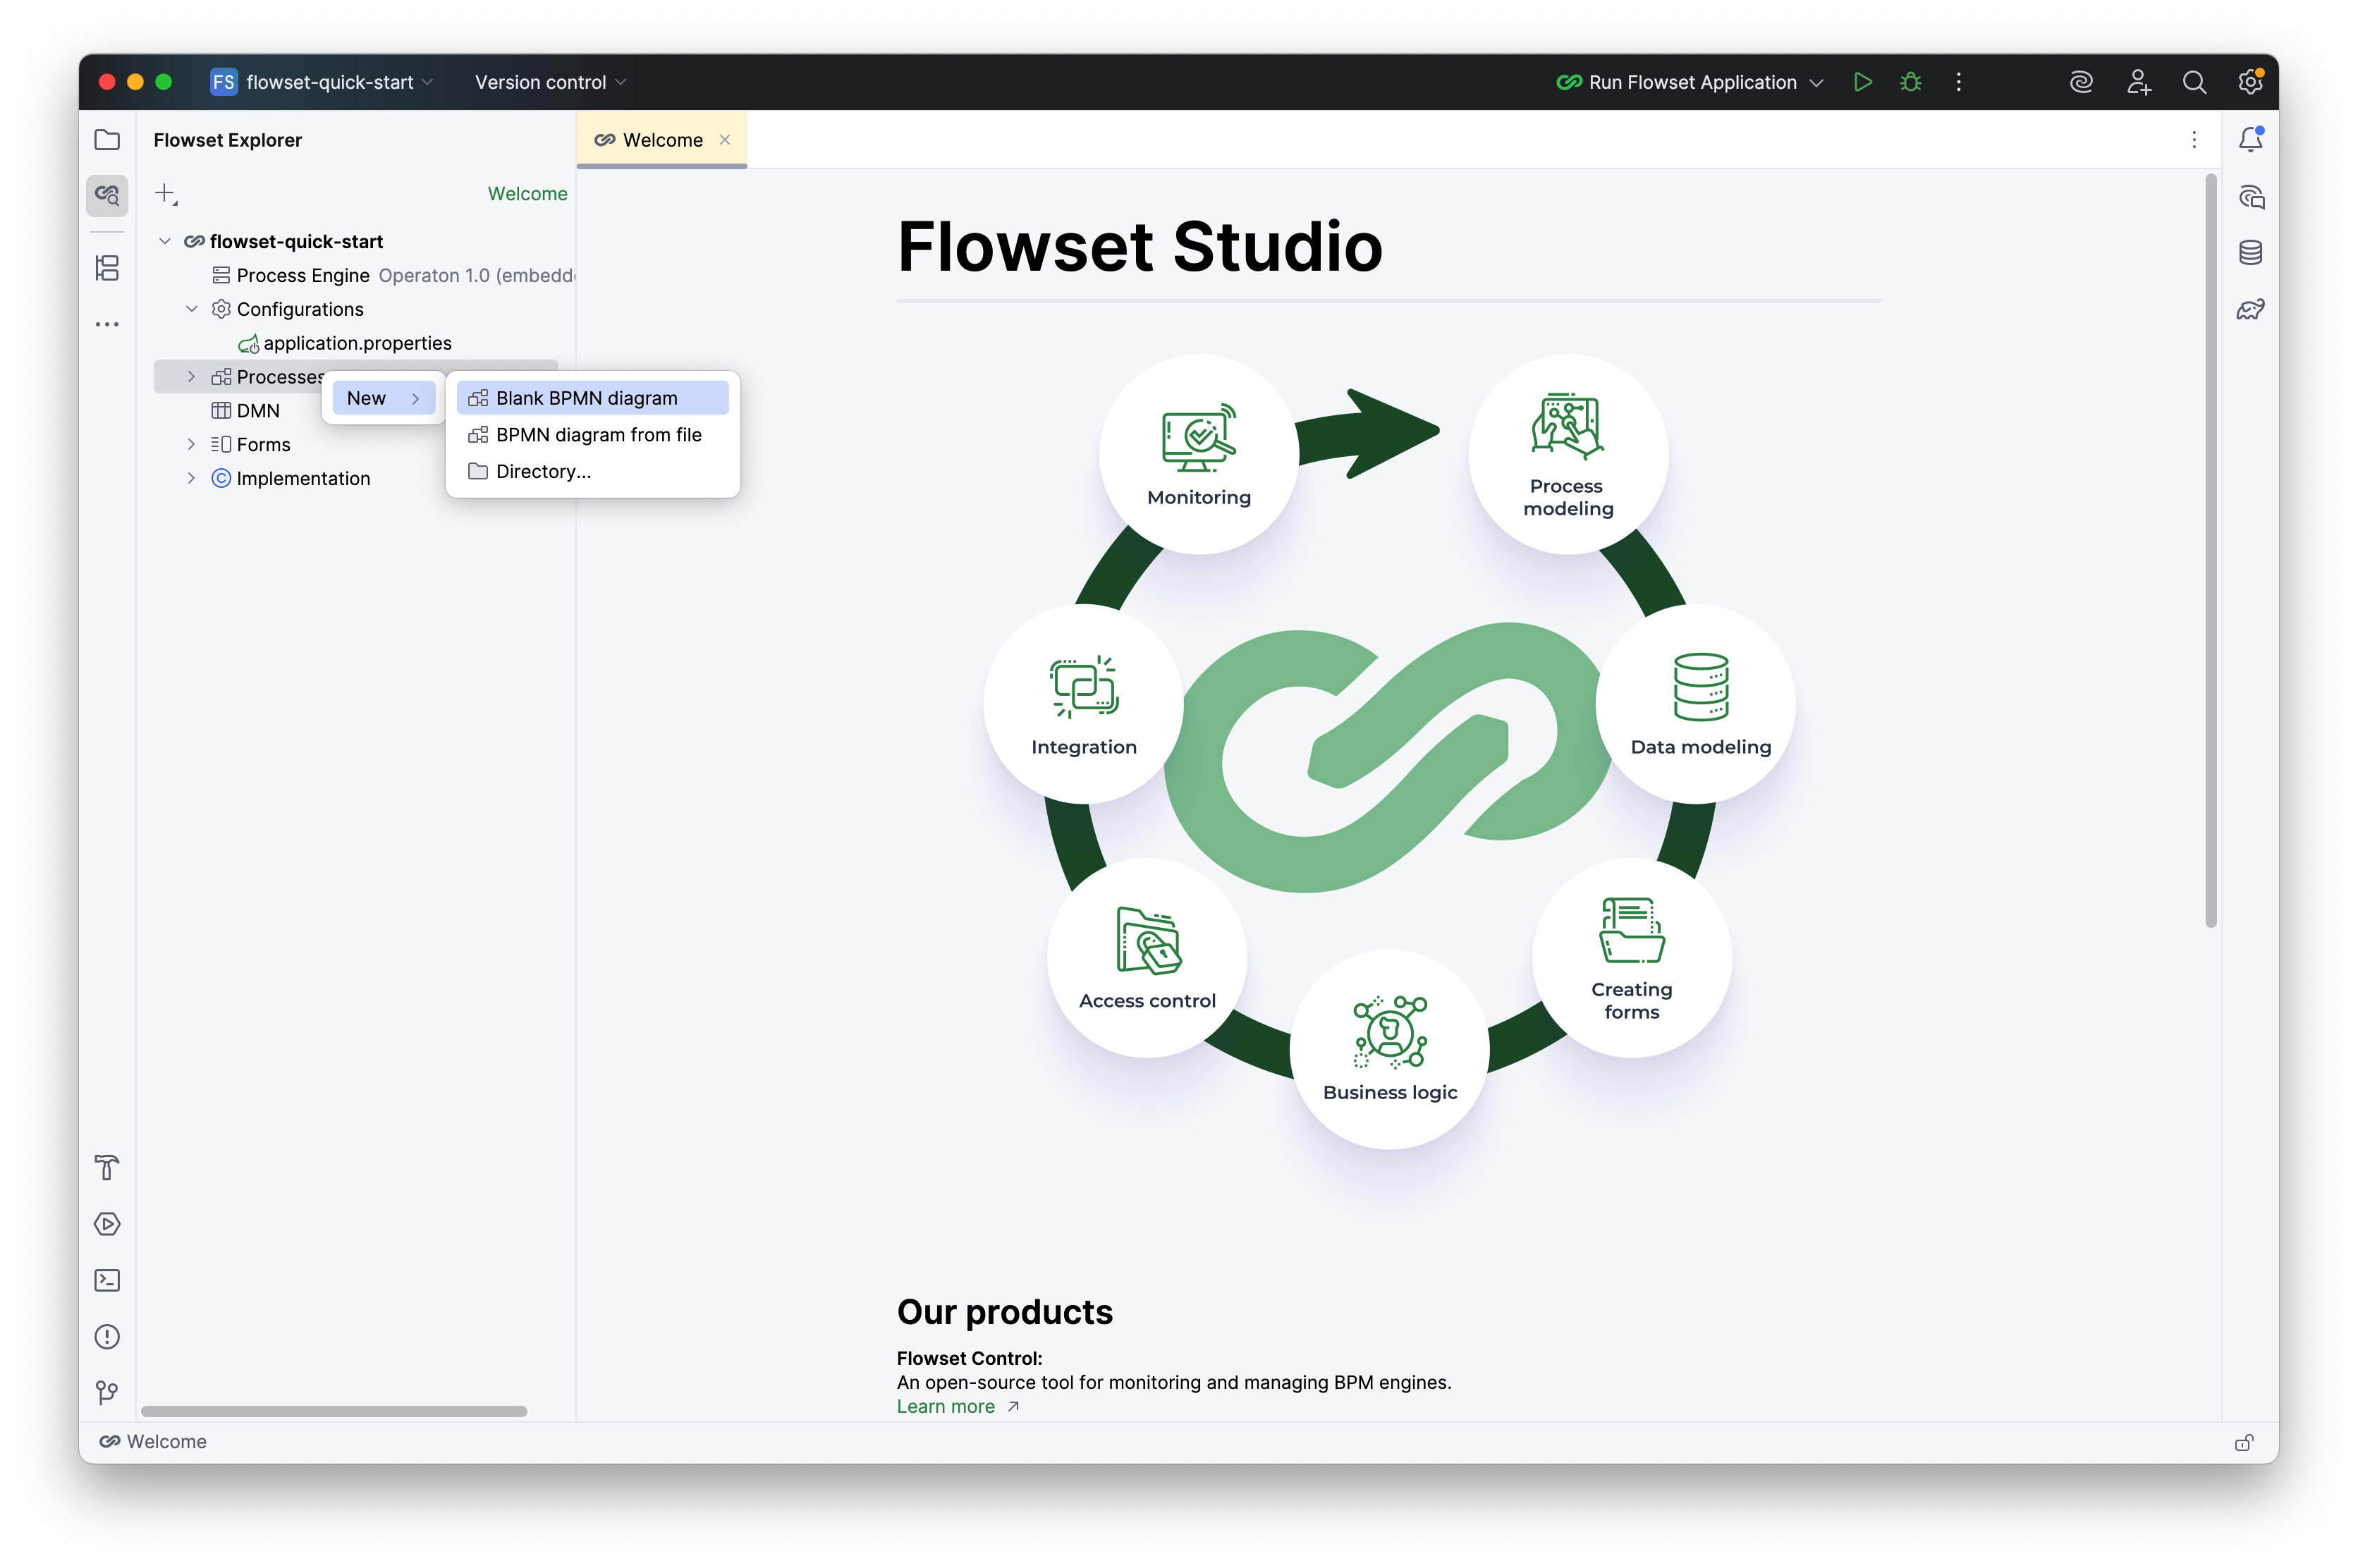
In the Flowset Explorer, select: Processes → New → Blank diagram.
-
Specify the parameters:
-
Process ID:
business-trip-process -
Process name:
Business trip process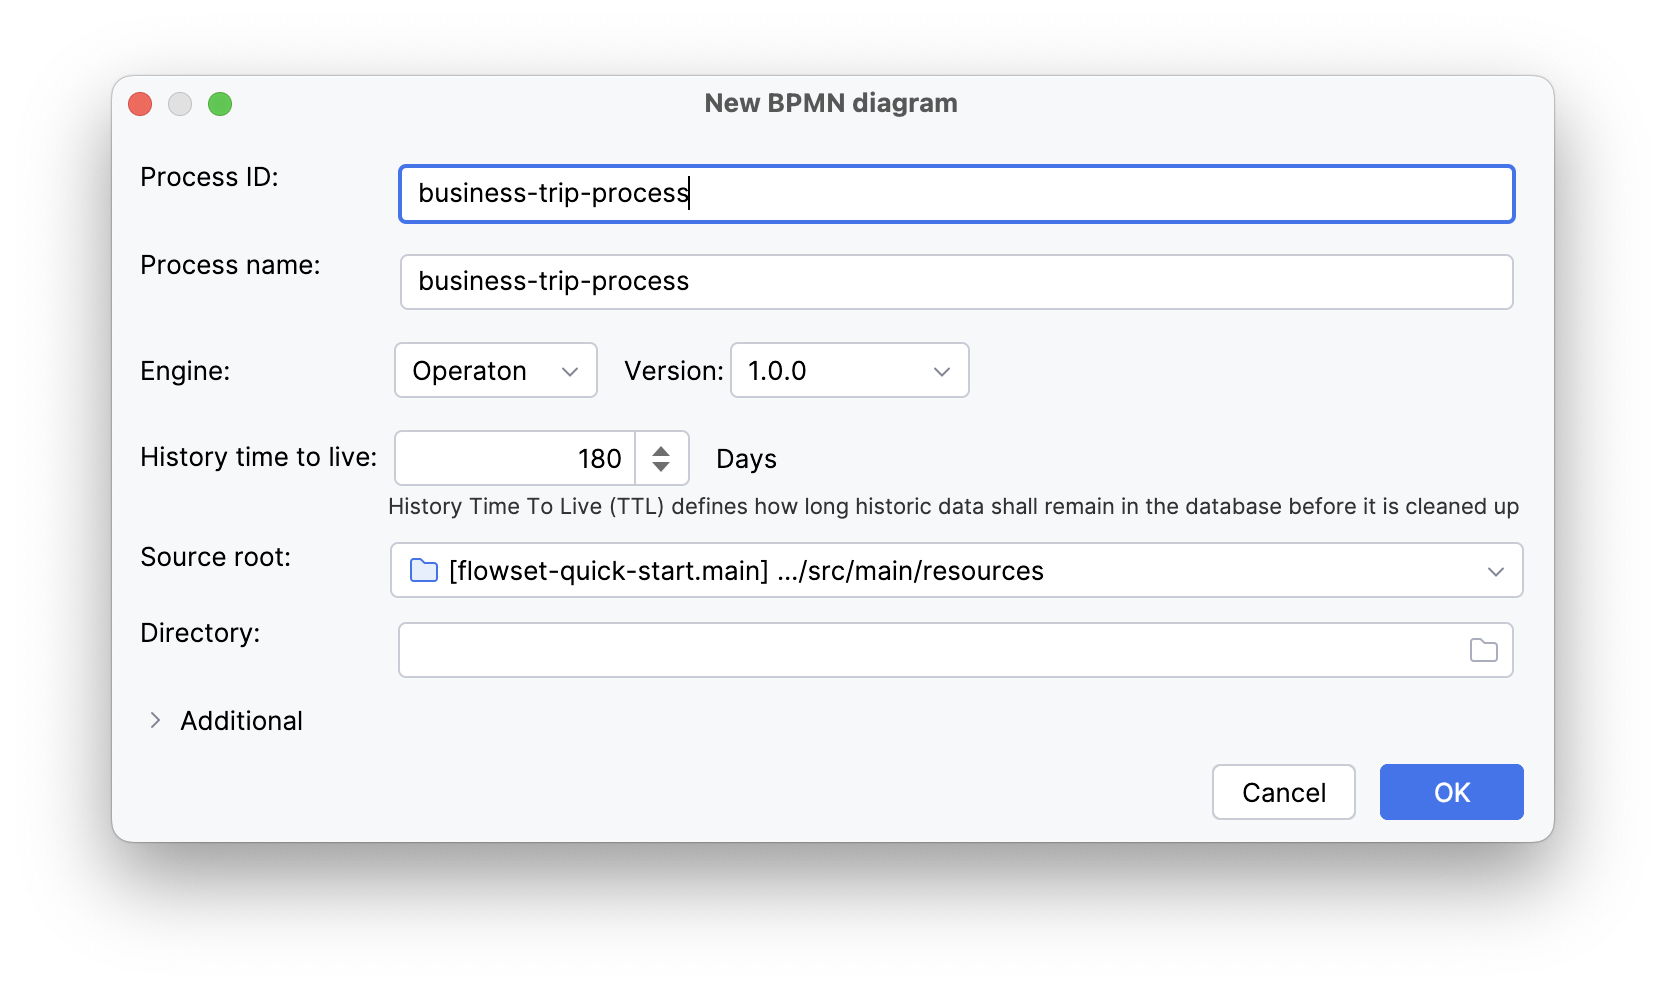
-
-
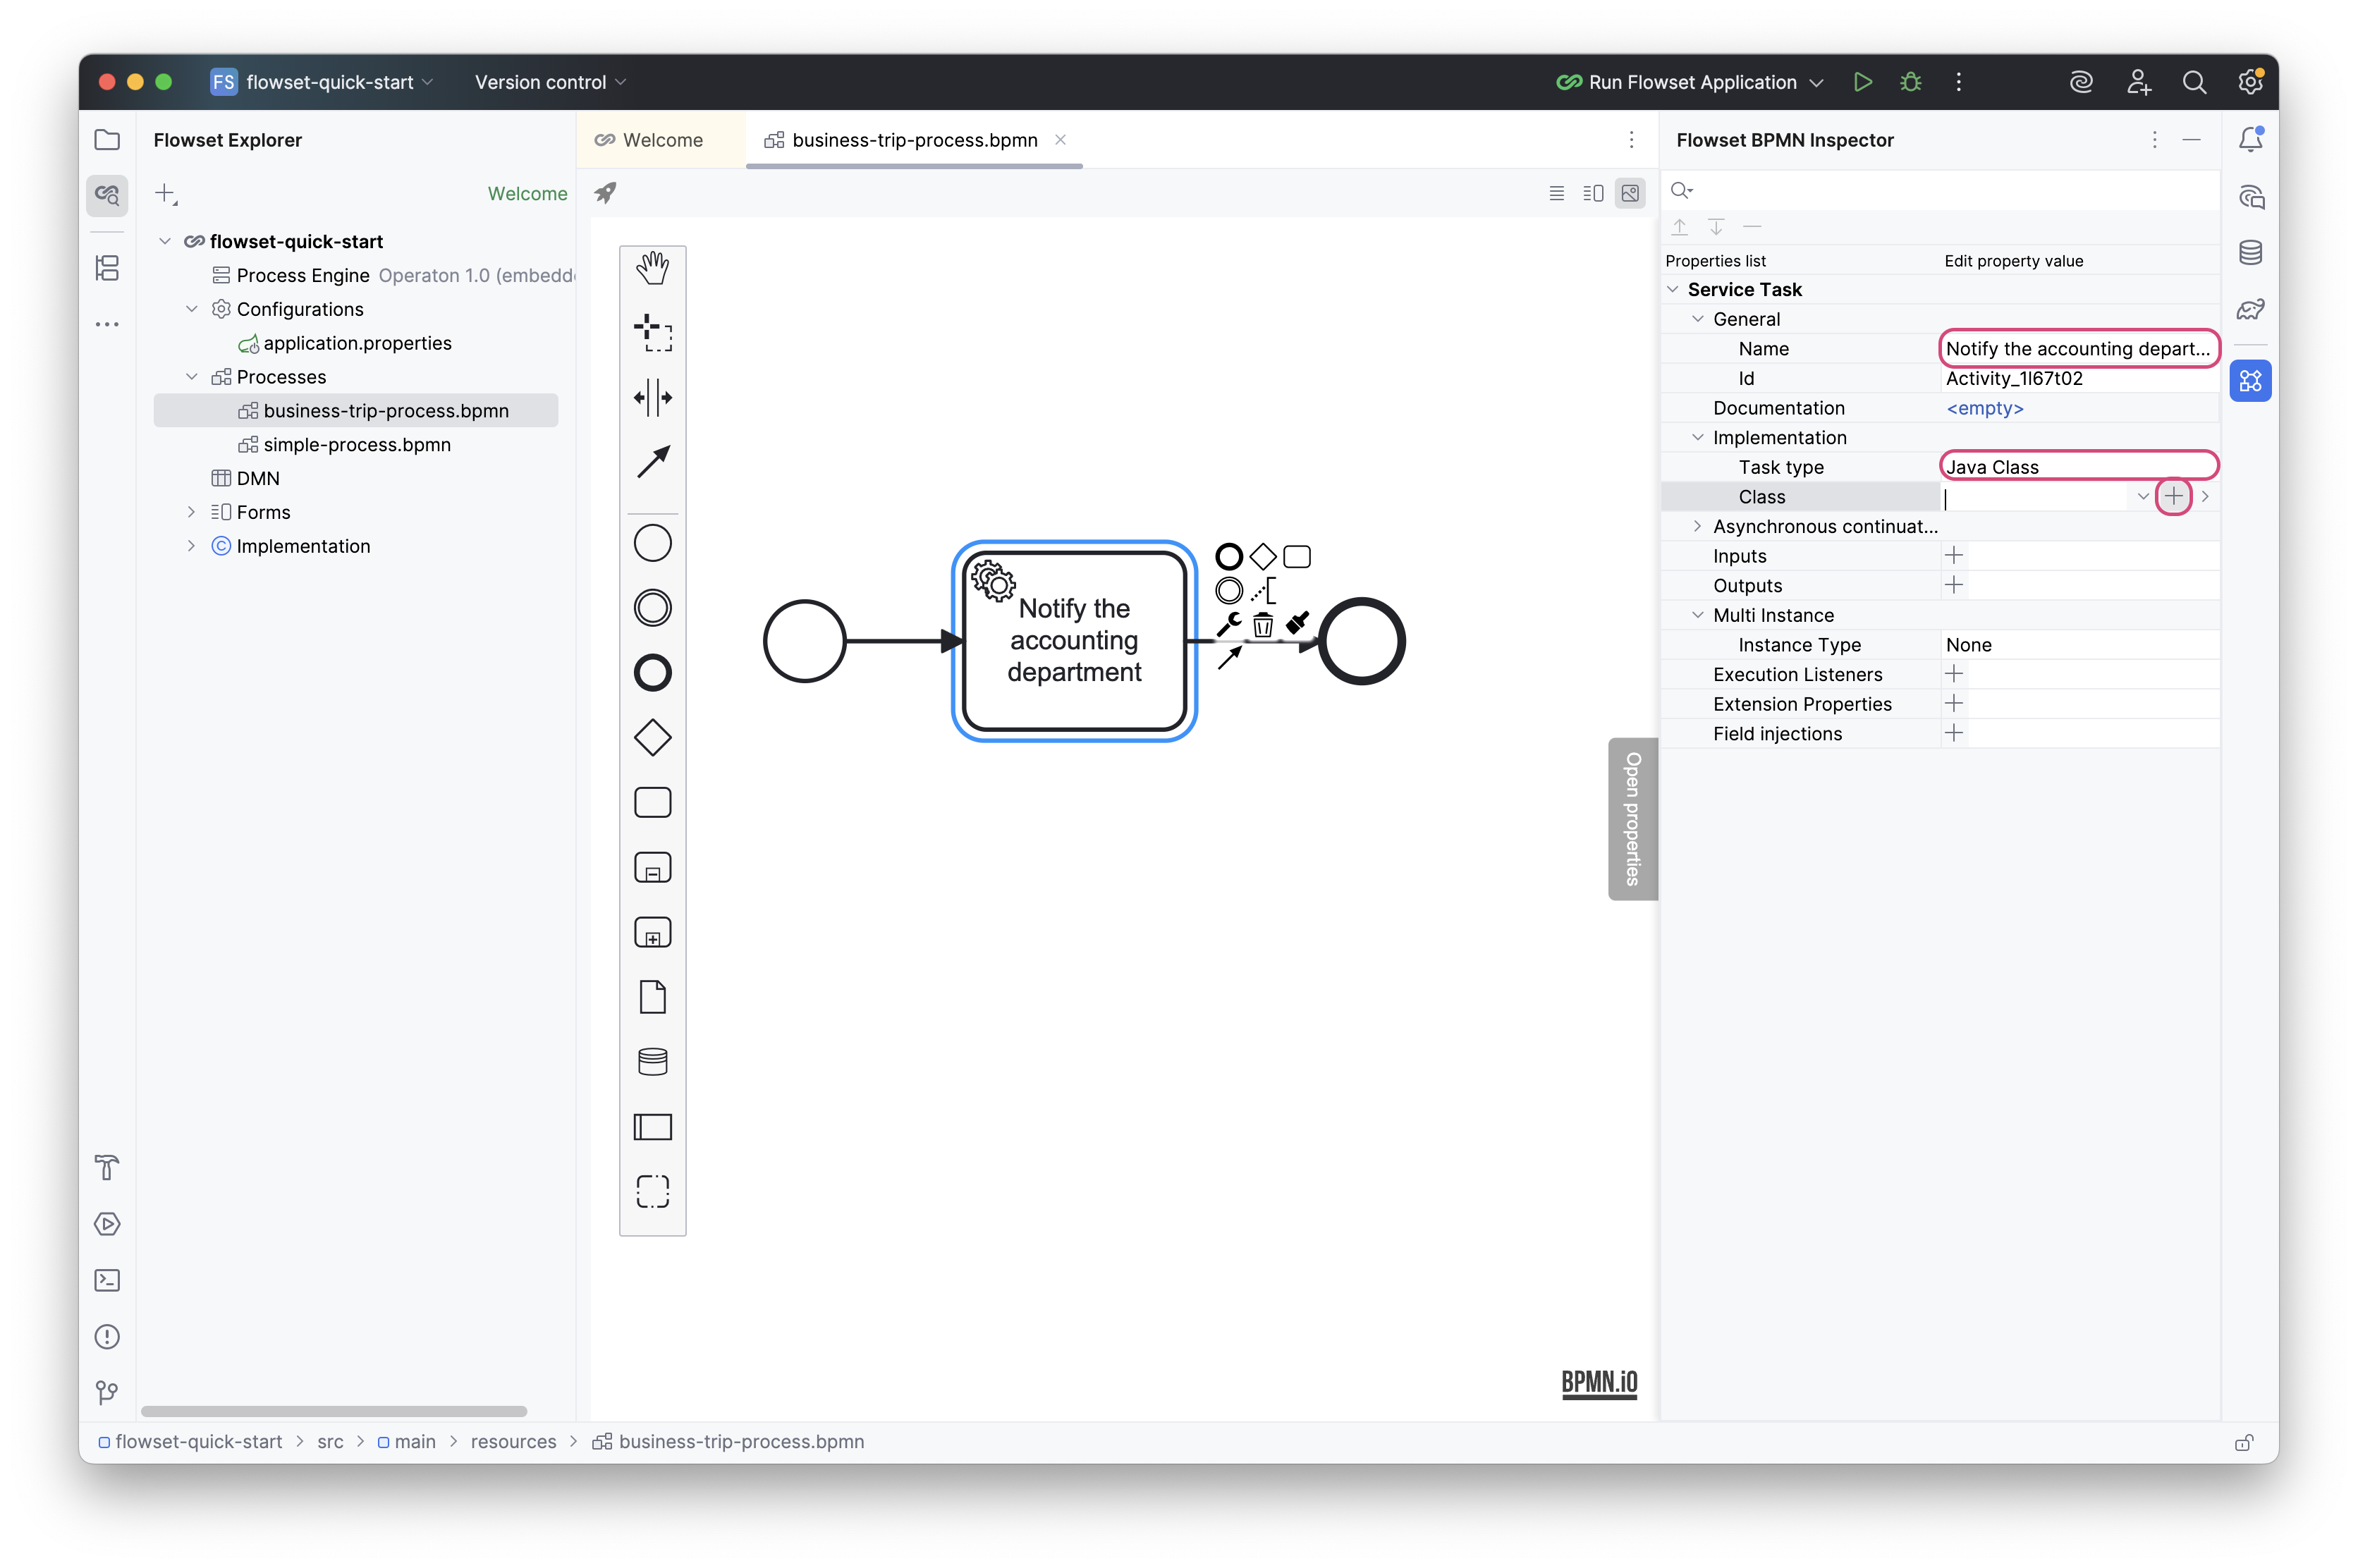
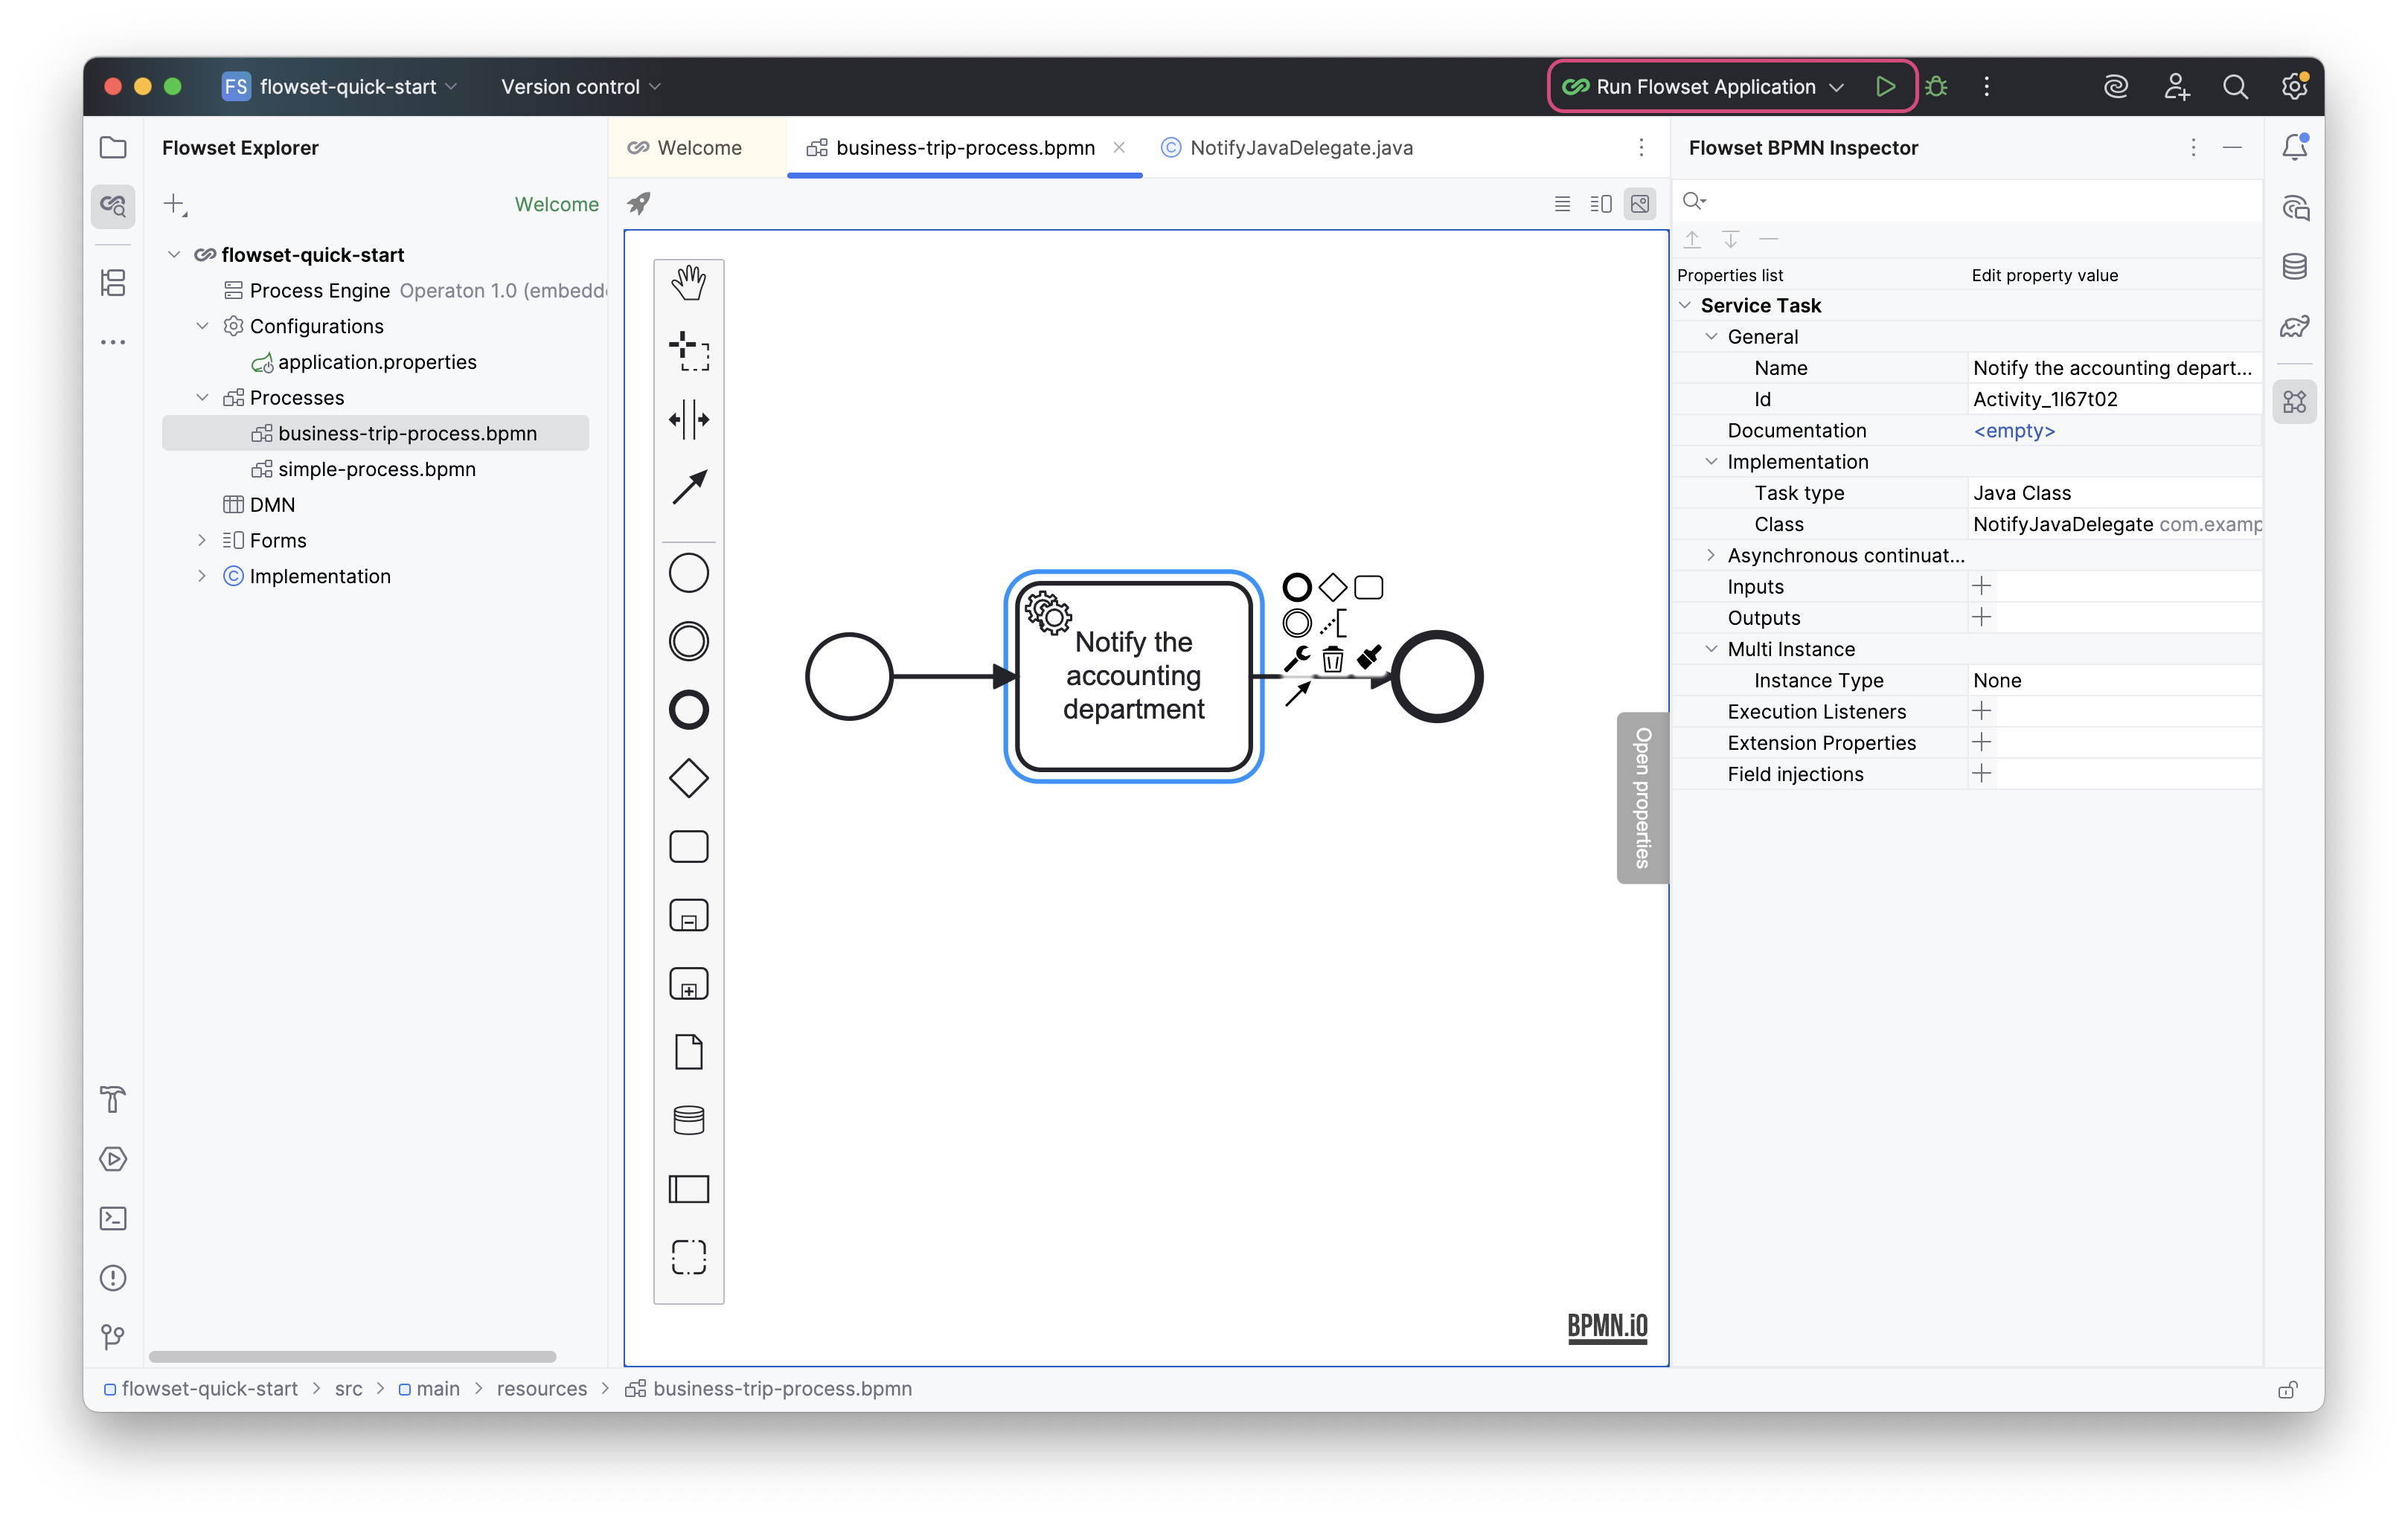
Place the elements on the diagram: Start Event → Service Task → End Event and connect them.

-
Configure the Service Task and generate a new class using the “+” icon in the Class field:
-
Name: Notify the accounting department
-
Task type: Java Class
Enter
NotifyJavaDelegateas the new class name: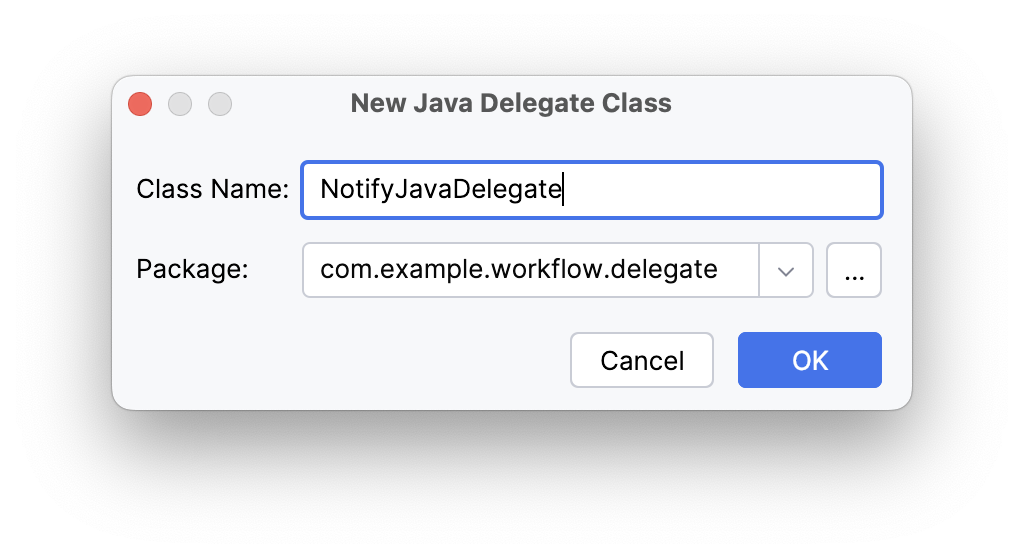
-
-
Add the following implementation to
NotifyJavaDelegate:NotifyJavaDelegate.javapackage com.example.workflow.delegate; import org.operaton.bpm.engine.delegate.DelegateExecution; import org.operaton.bpm.engine.delegate.JavaDelegate; import org.slf4j.Logger; import org.slf4j.LoggerFactory; public class NotifyJavaDelegate implements JavaDelegate { private static final Logger log = LoggerFactory.getLogger(NotifyJavaDelegate.class); @Override public void execute(DelegateExecution execution) { String employee = (String) execution.getVariable("employeeName"); String destination = (String) execution.getVariable("destination"); String startDate = (String) execution.getVariable("startDate"); String endDate = (String) execution.getVariable("endDate"); String purpose = (String) execution.getVariable("purpose"); log.info("Business trip request: {} → {} ({} — {}). Purpose: {}", employee, destination, startDate, endDate, purpose); } }NotifyJavaDelegateemulates integration with an external accounting service.
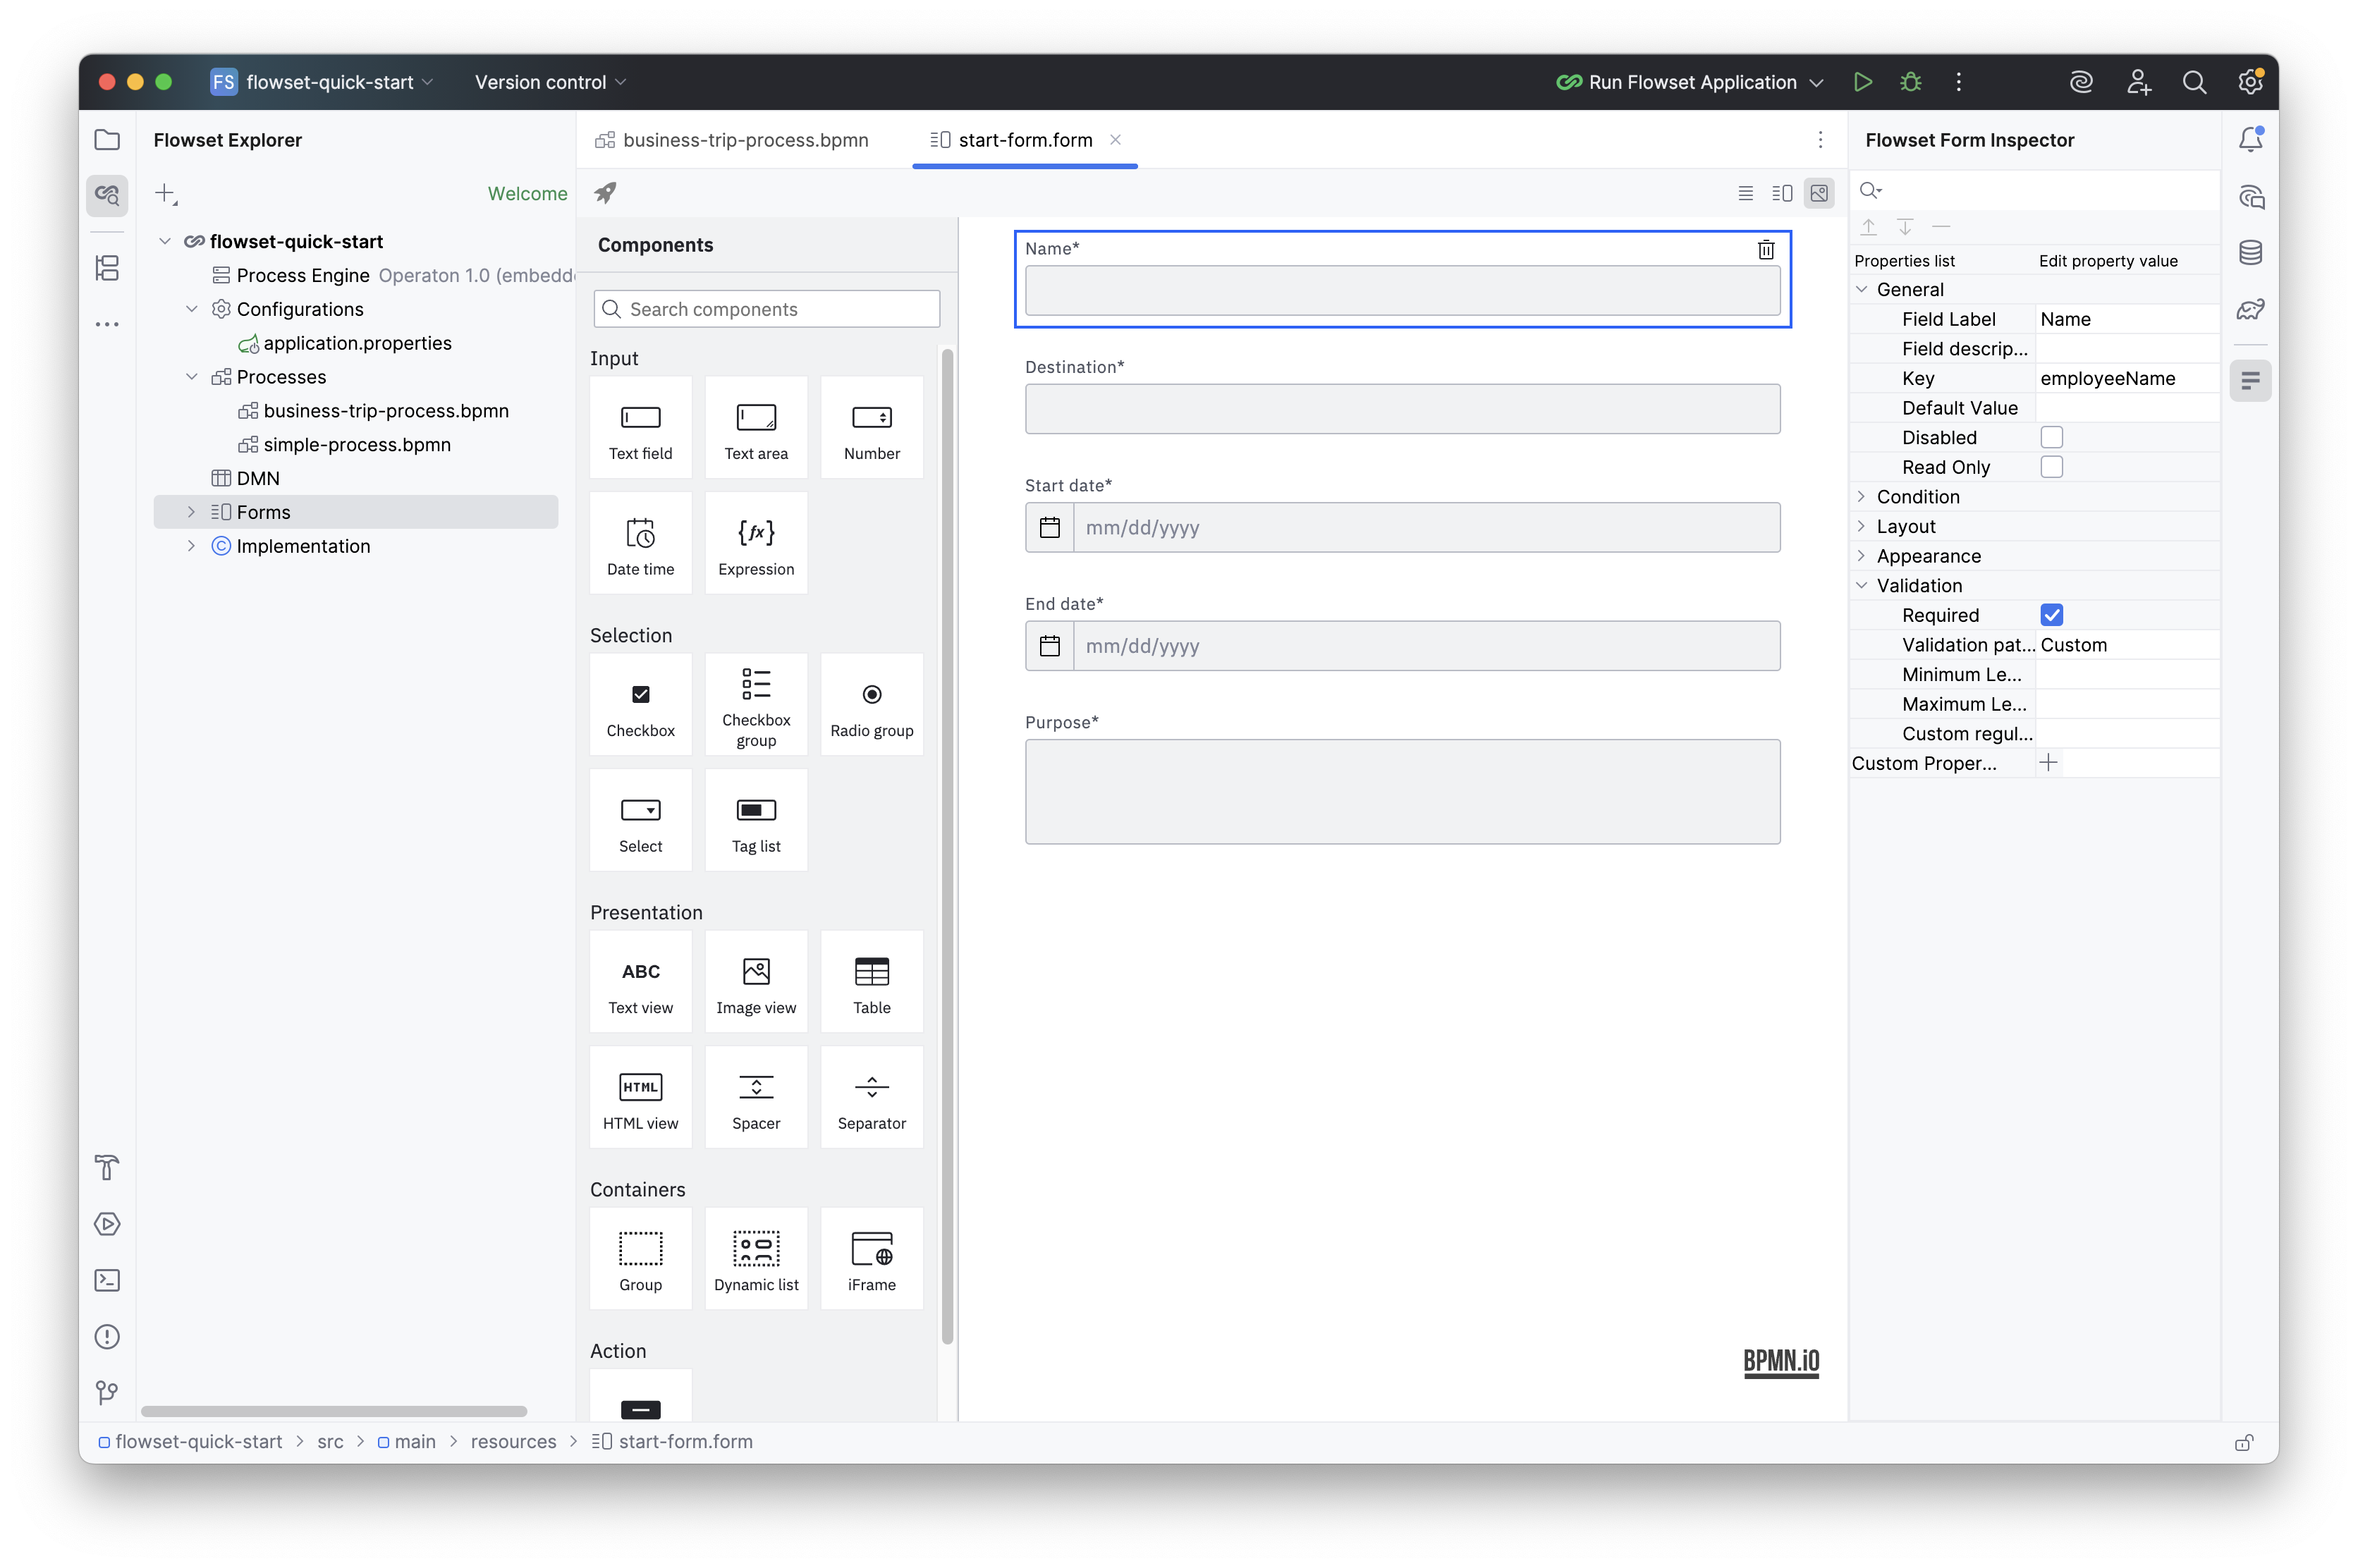
Step 2. Creating the start form
Now let’s create a user form for the business trip request.
-
In the Flowset Explorer, select: Forms → New → Blank form.
-
In the form creation dialog, fill in:
-
Form ID:
start-form.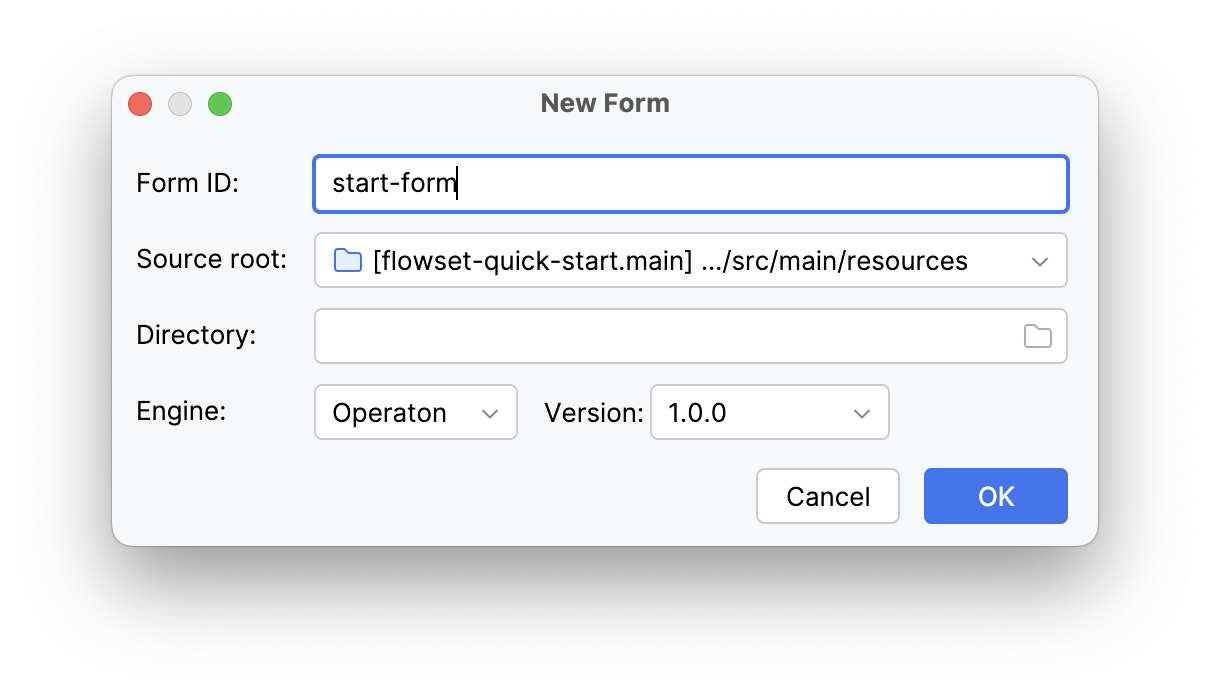
-
-
Using the visual editor, add the following fields:
Name Key Type Required? Name
employeeName
TextField
Yes
Destination
destination
TextField
Yes
Start date
startDate
Date
Yes
End date
endDate
Date
Yes
Purpose
purpose
TextArea
Yes
-
Bind the form to the Start Event:
-
Form type: Camunda form
-
Form reference: start-form.form [start-form]
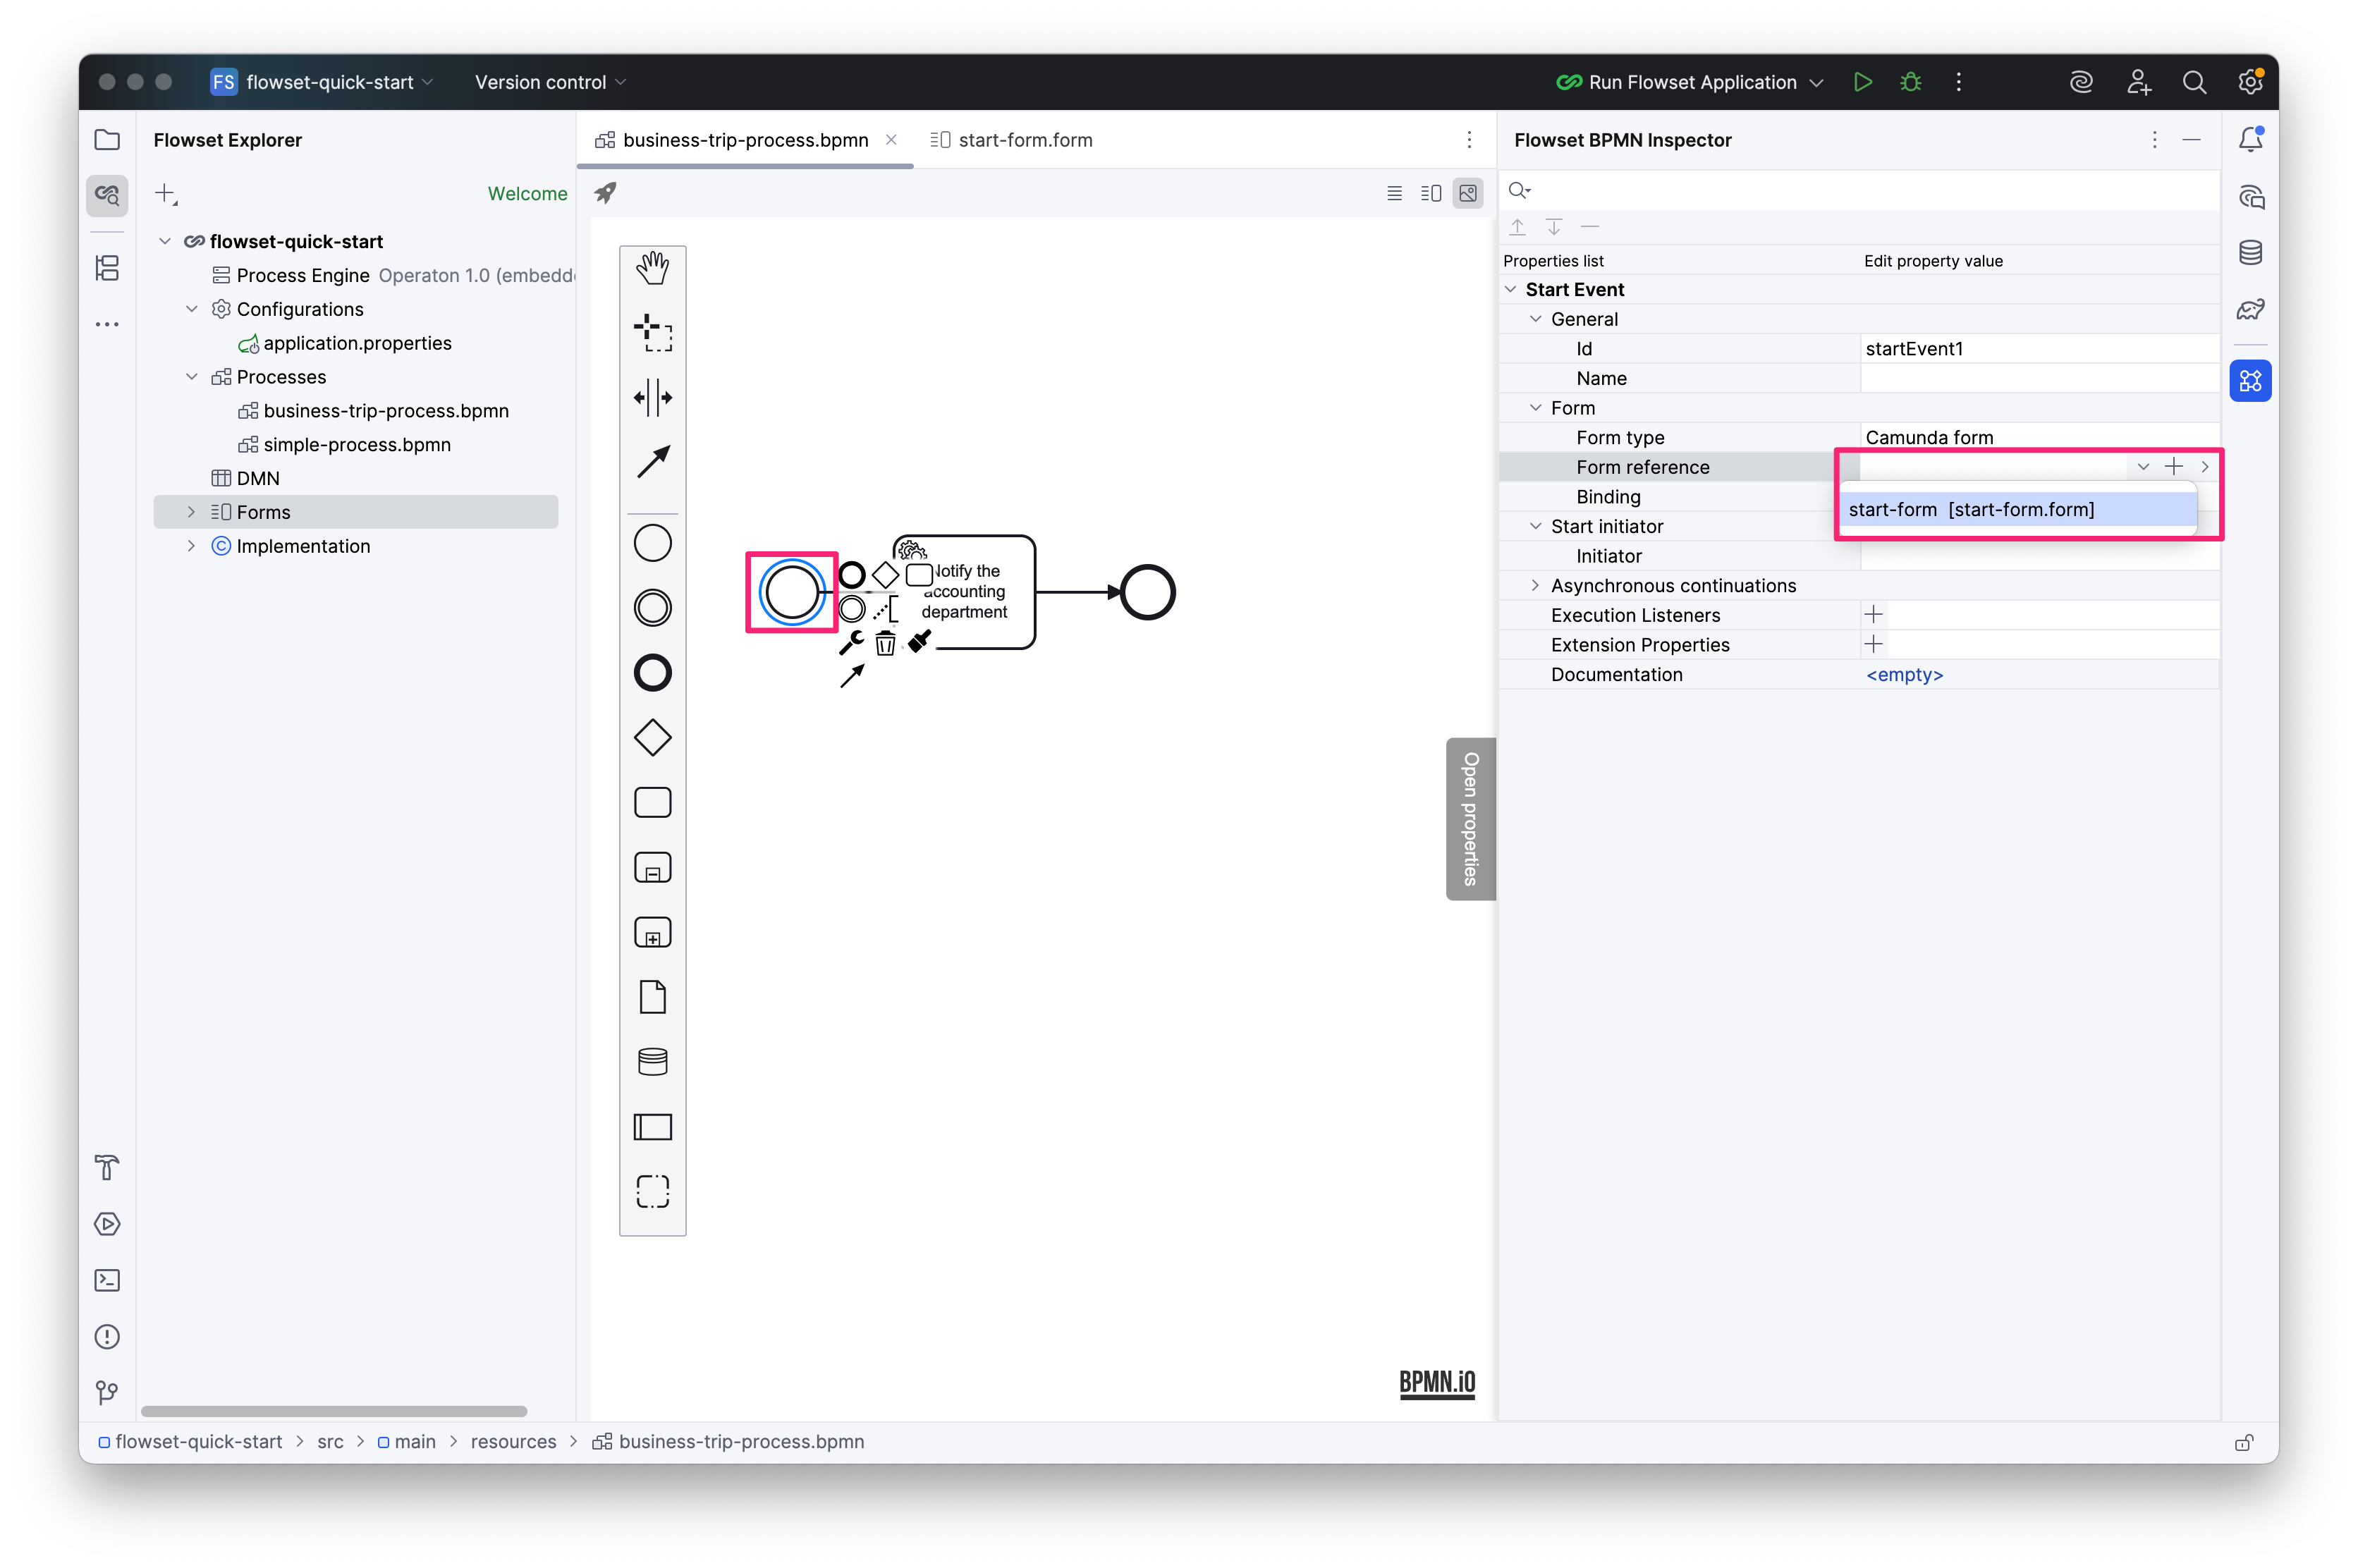
-
Your process is ready!
Step 3. Running and testing
-
Start your Spring Boot application.
-
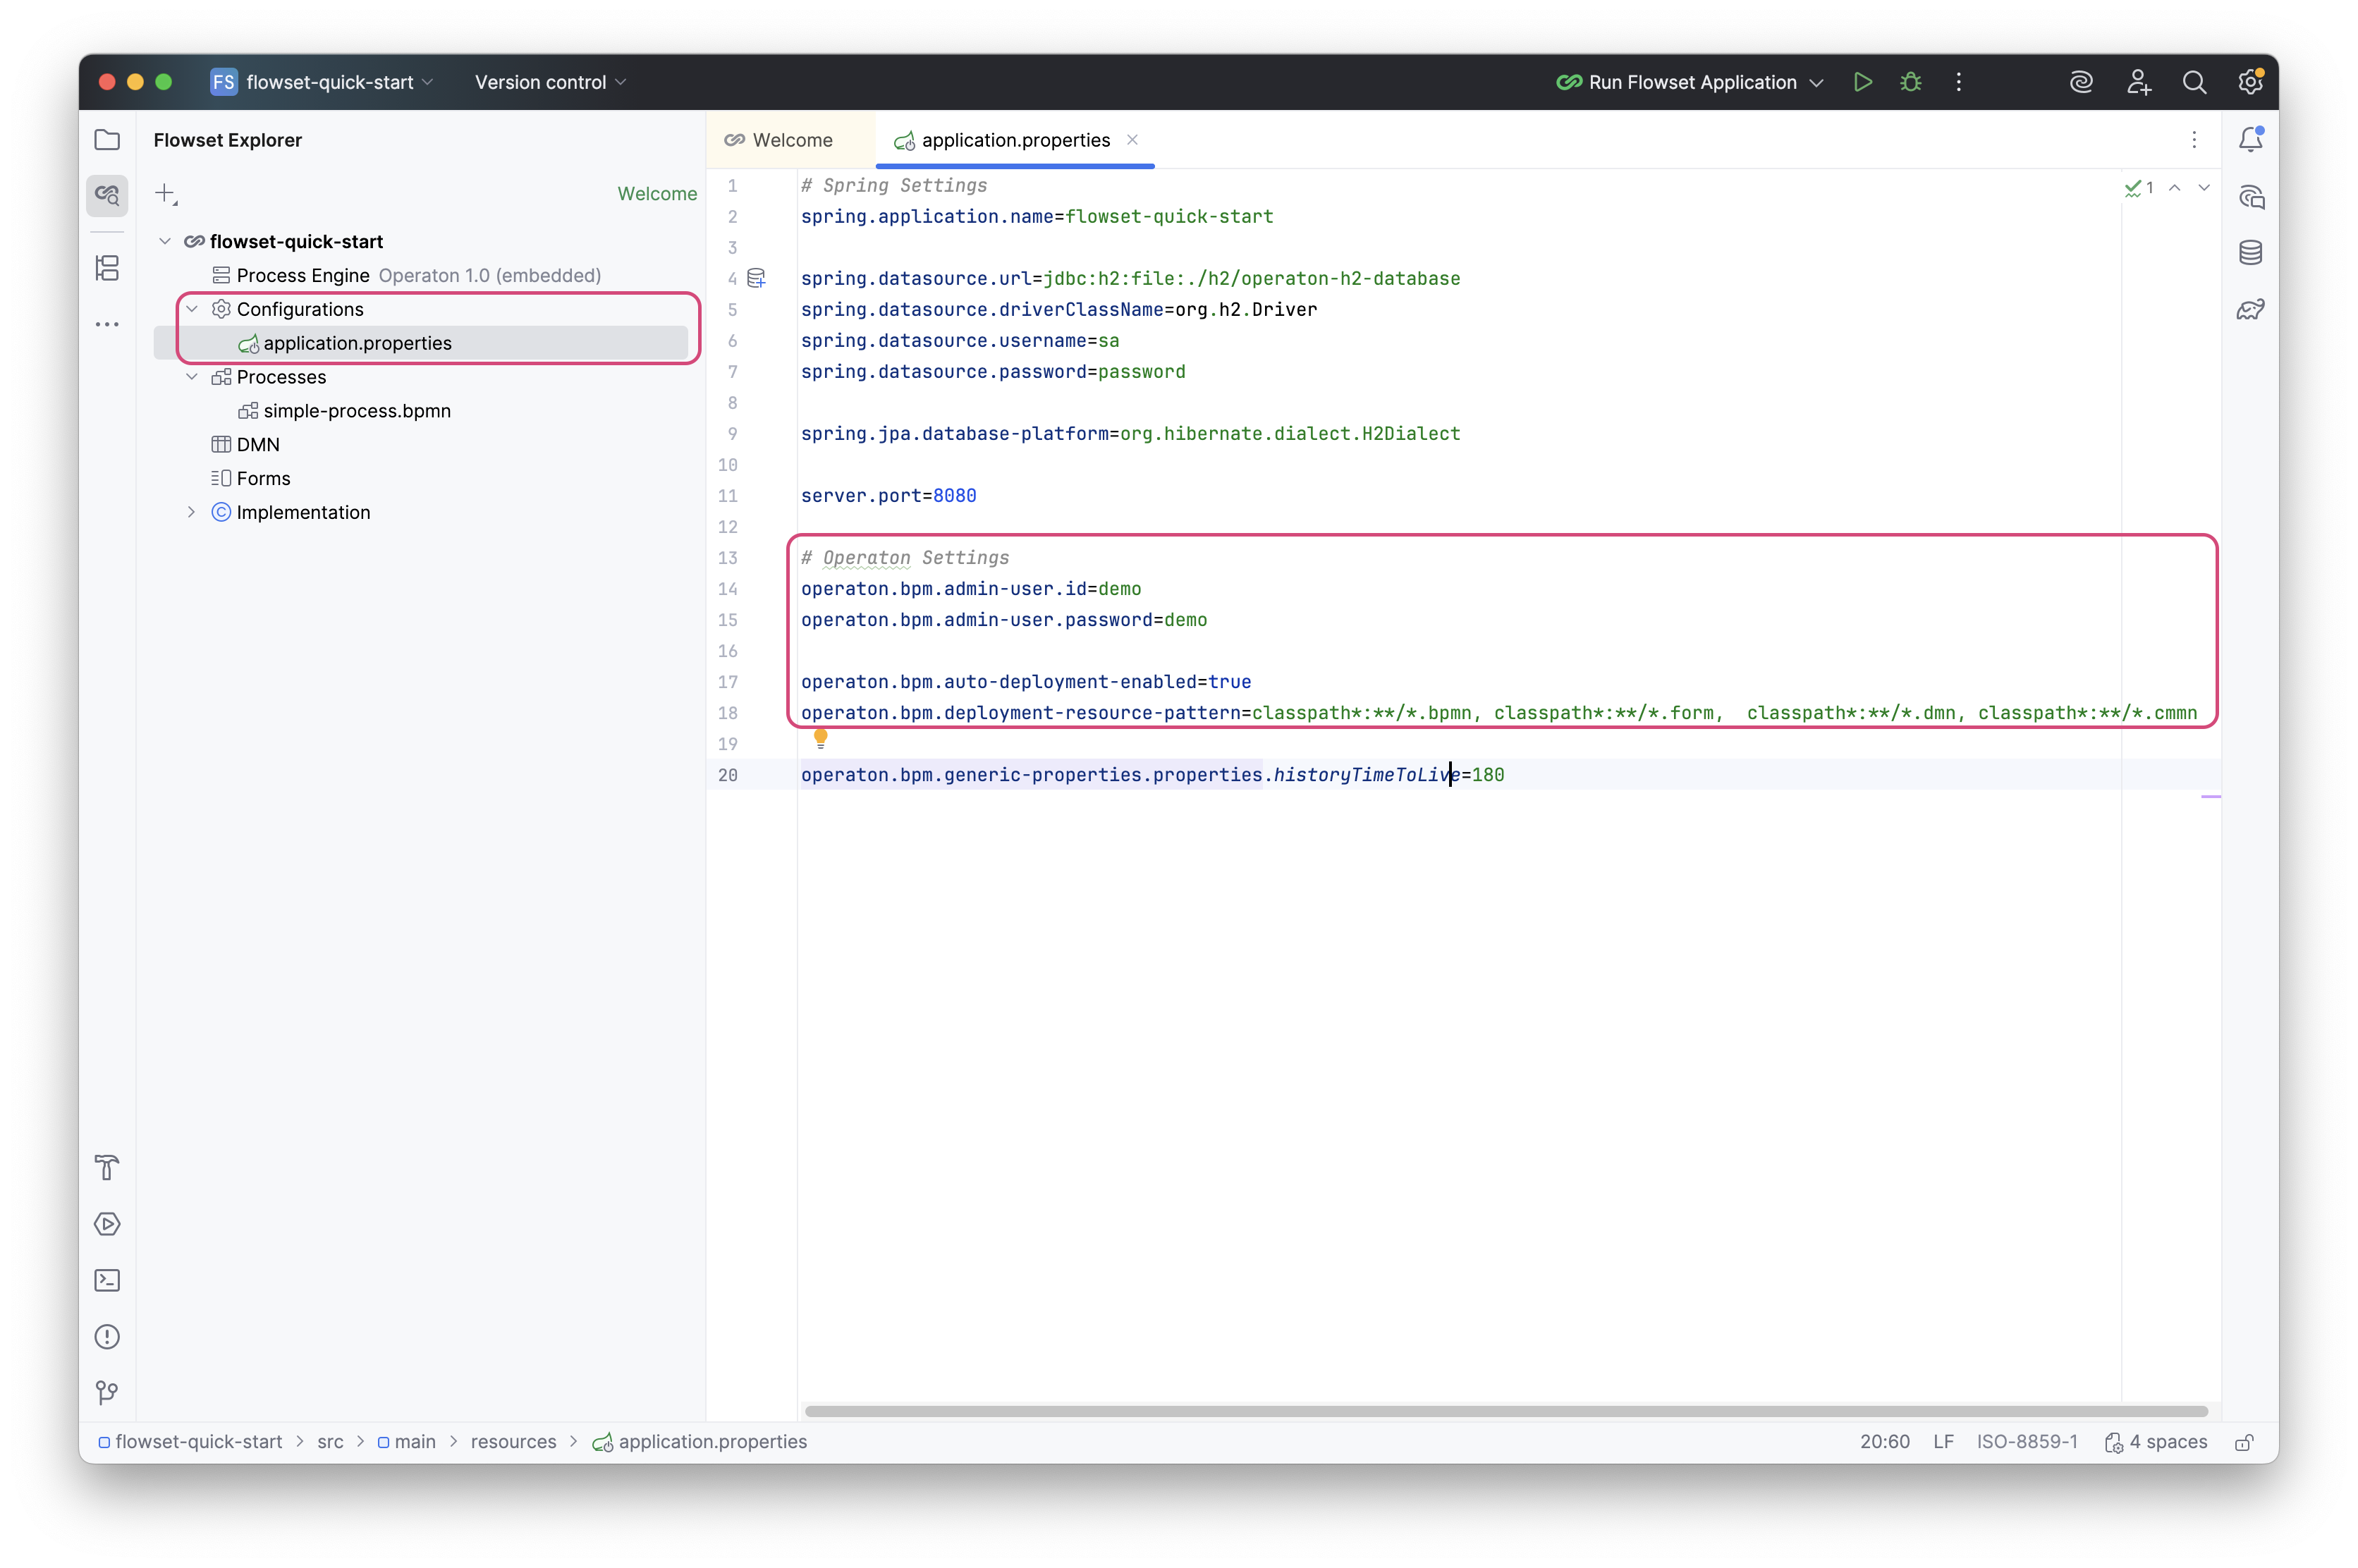
Open Operaton Tasklist at: http://localhost:8080
The login credentials are specified in application.properties. Default: admin/admin.
Enter your login and password.

-
Go to Tasklist and start your process:


Click Start.

After the process completes, a log entry will appear containing the submitted data.

Step 4. Monitoring in Flowset Control
You can view the process execution using Flowset Control. To do this, launch Control and connect it to your application.
| Installation instructions for Flowset Control: link. |
-
Log into the application:
-
Login: admin
-
Password: admin
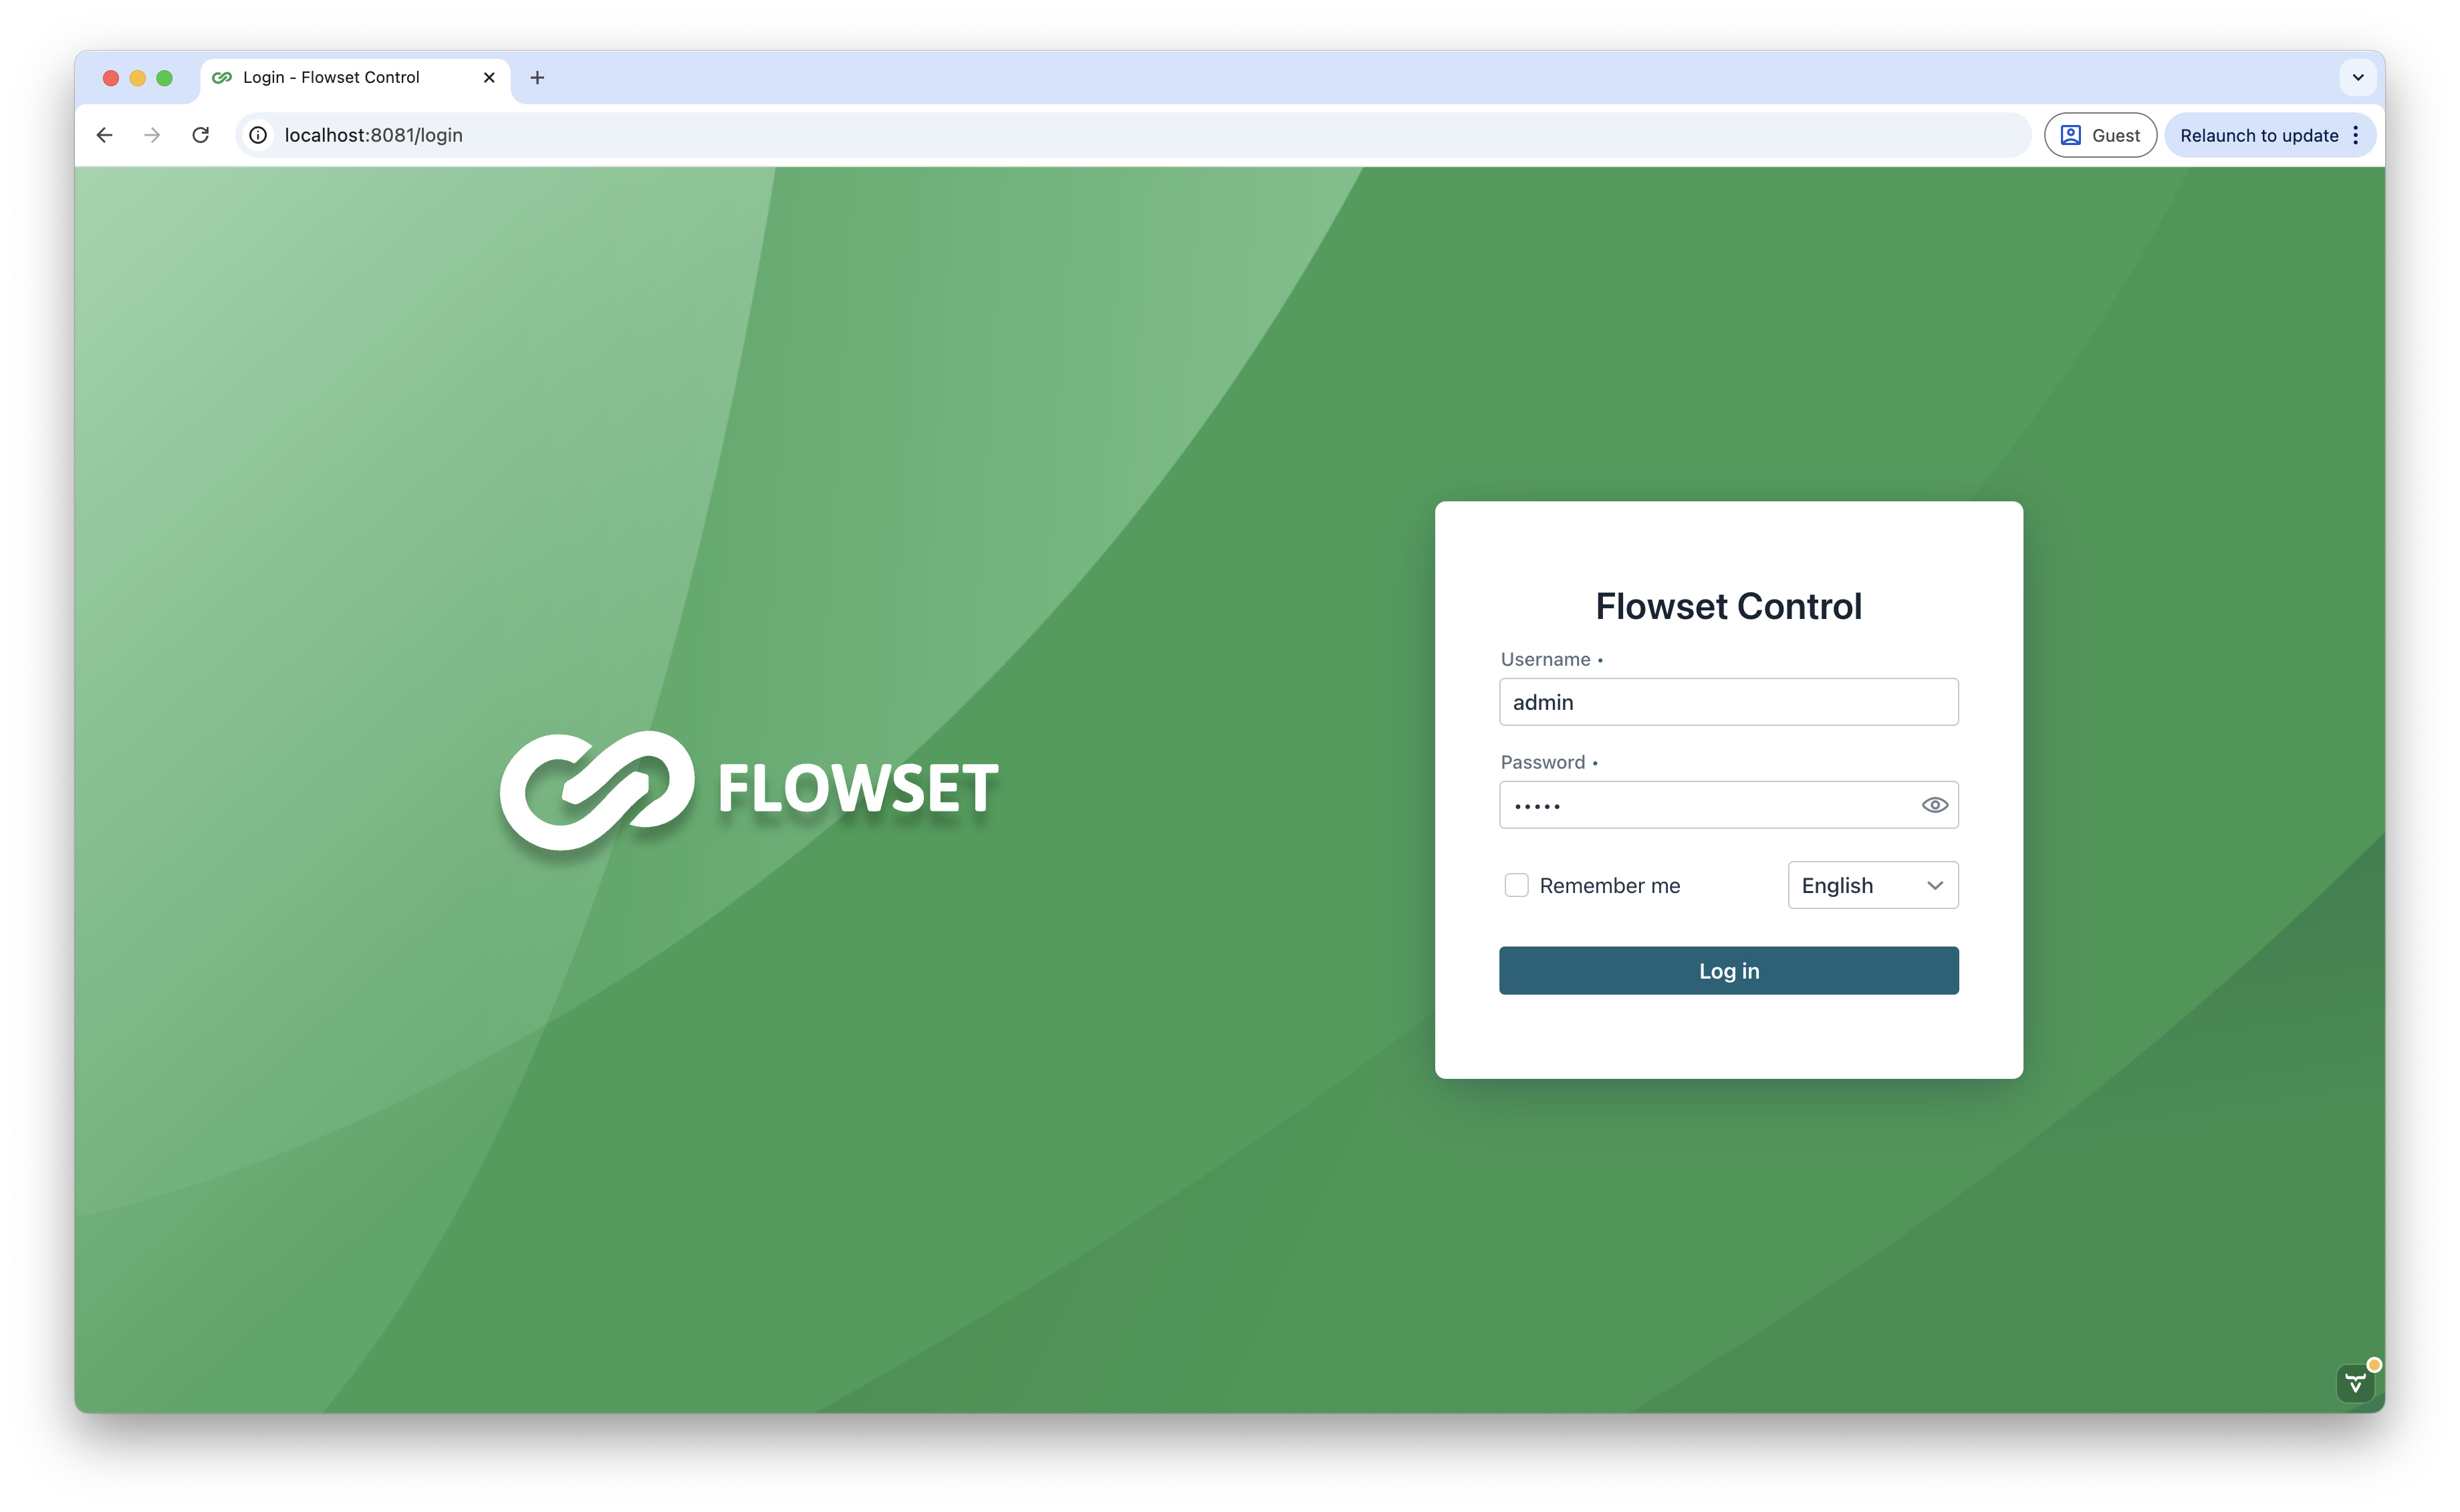
-
-
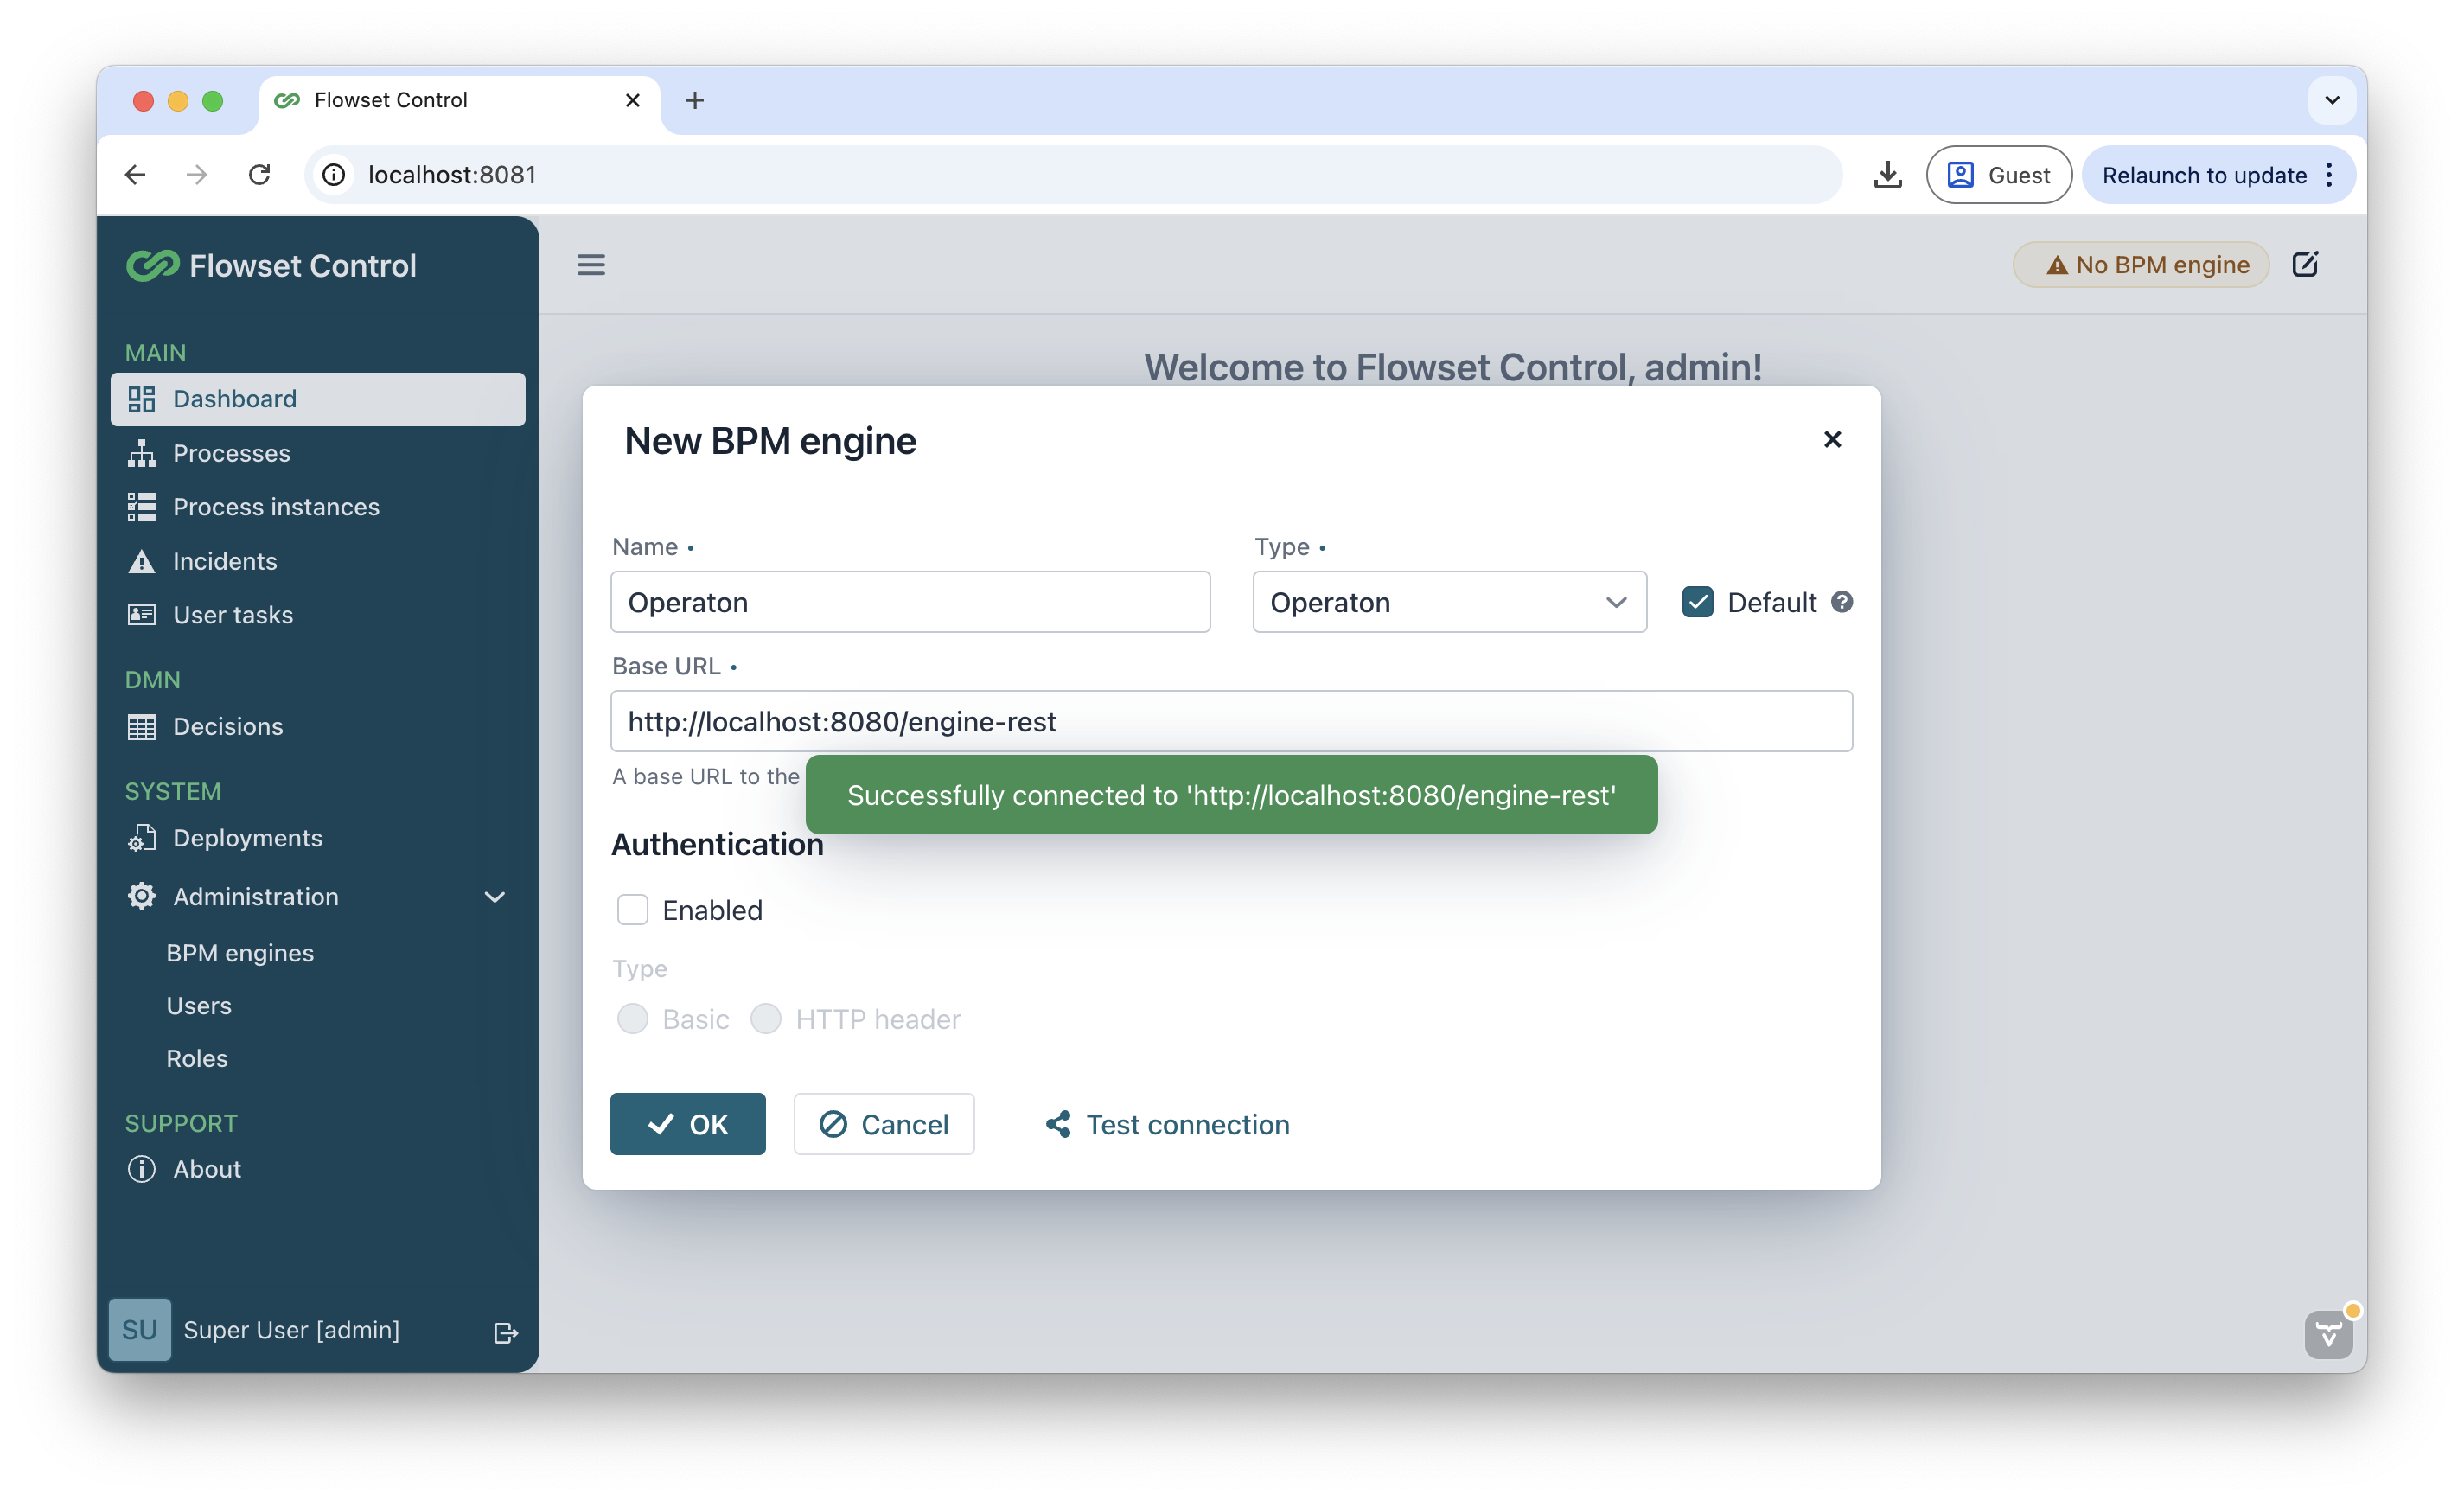
On the main screen, click Add and fill in the fields:
-
Name:
Operaton -
Base URL:
http://localhost:8080/engine-rest -
Authentication:
false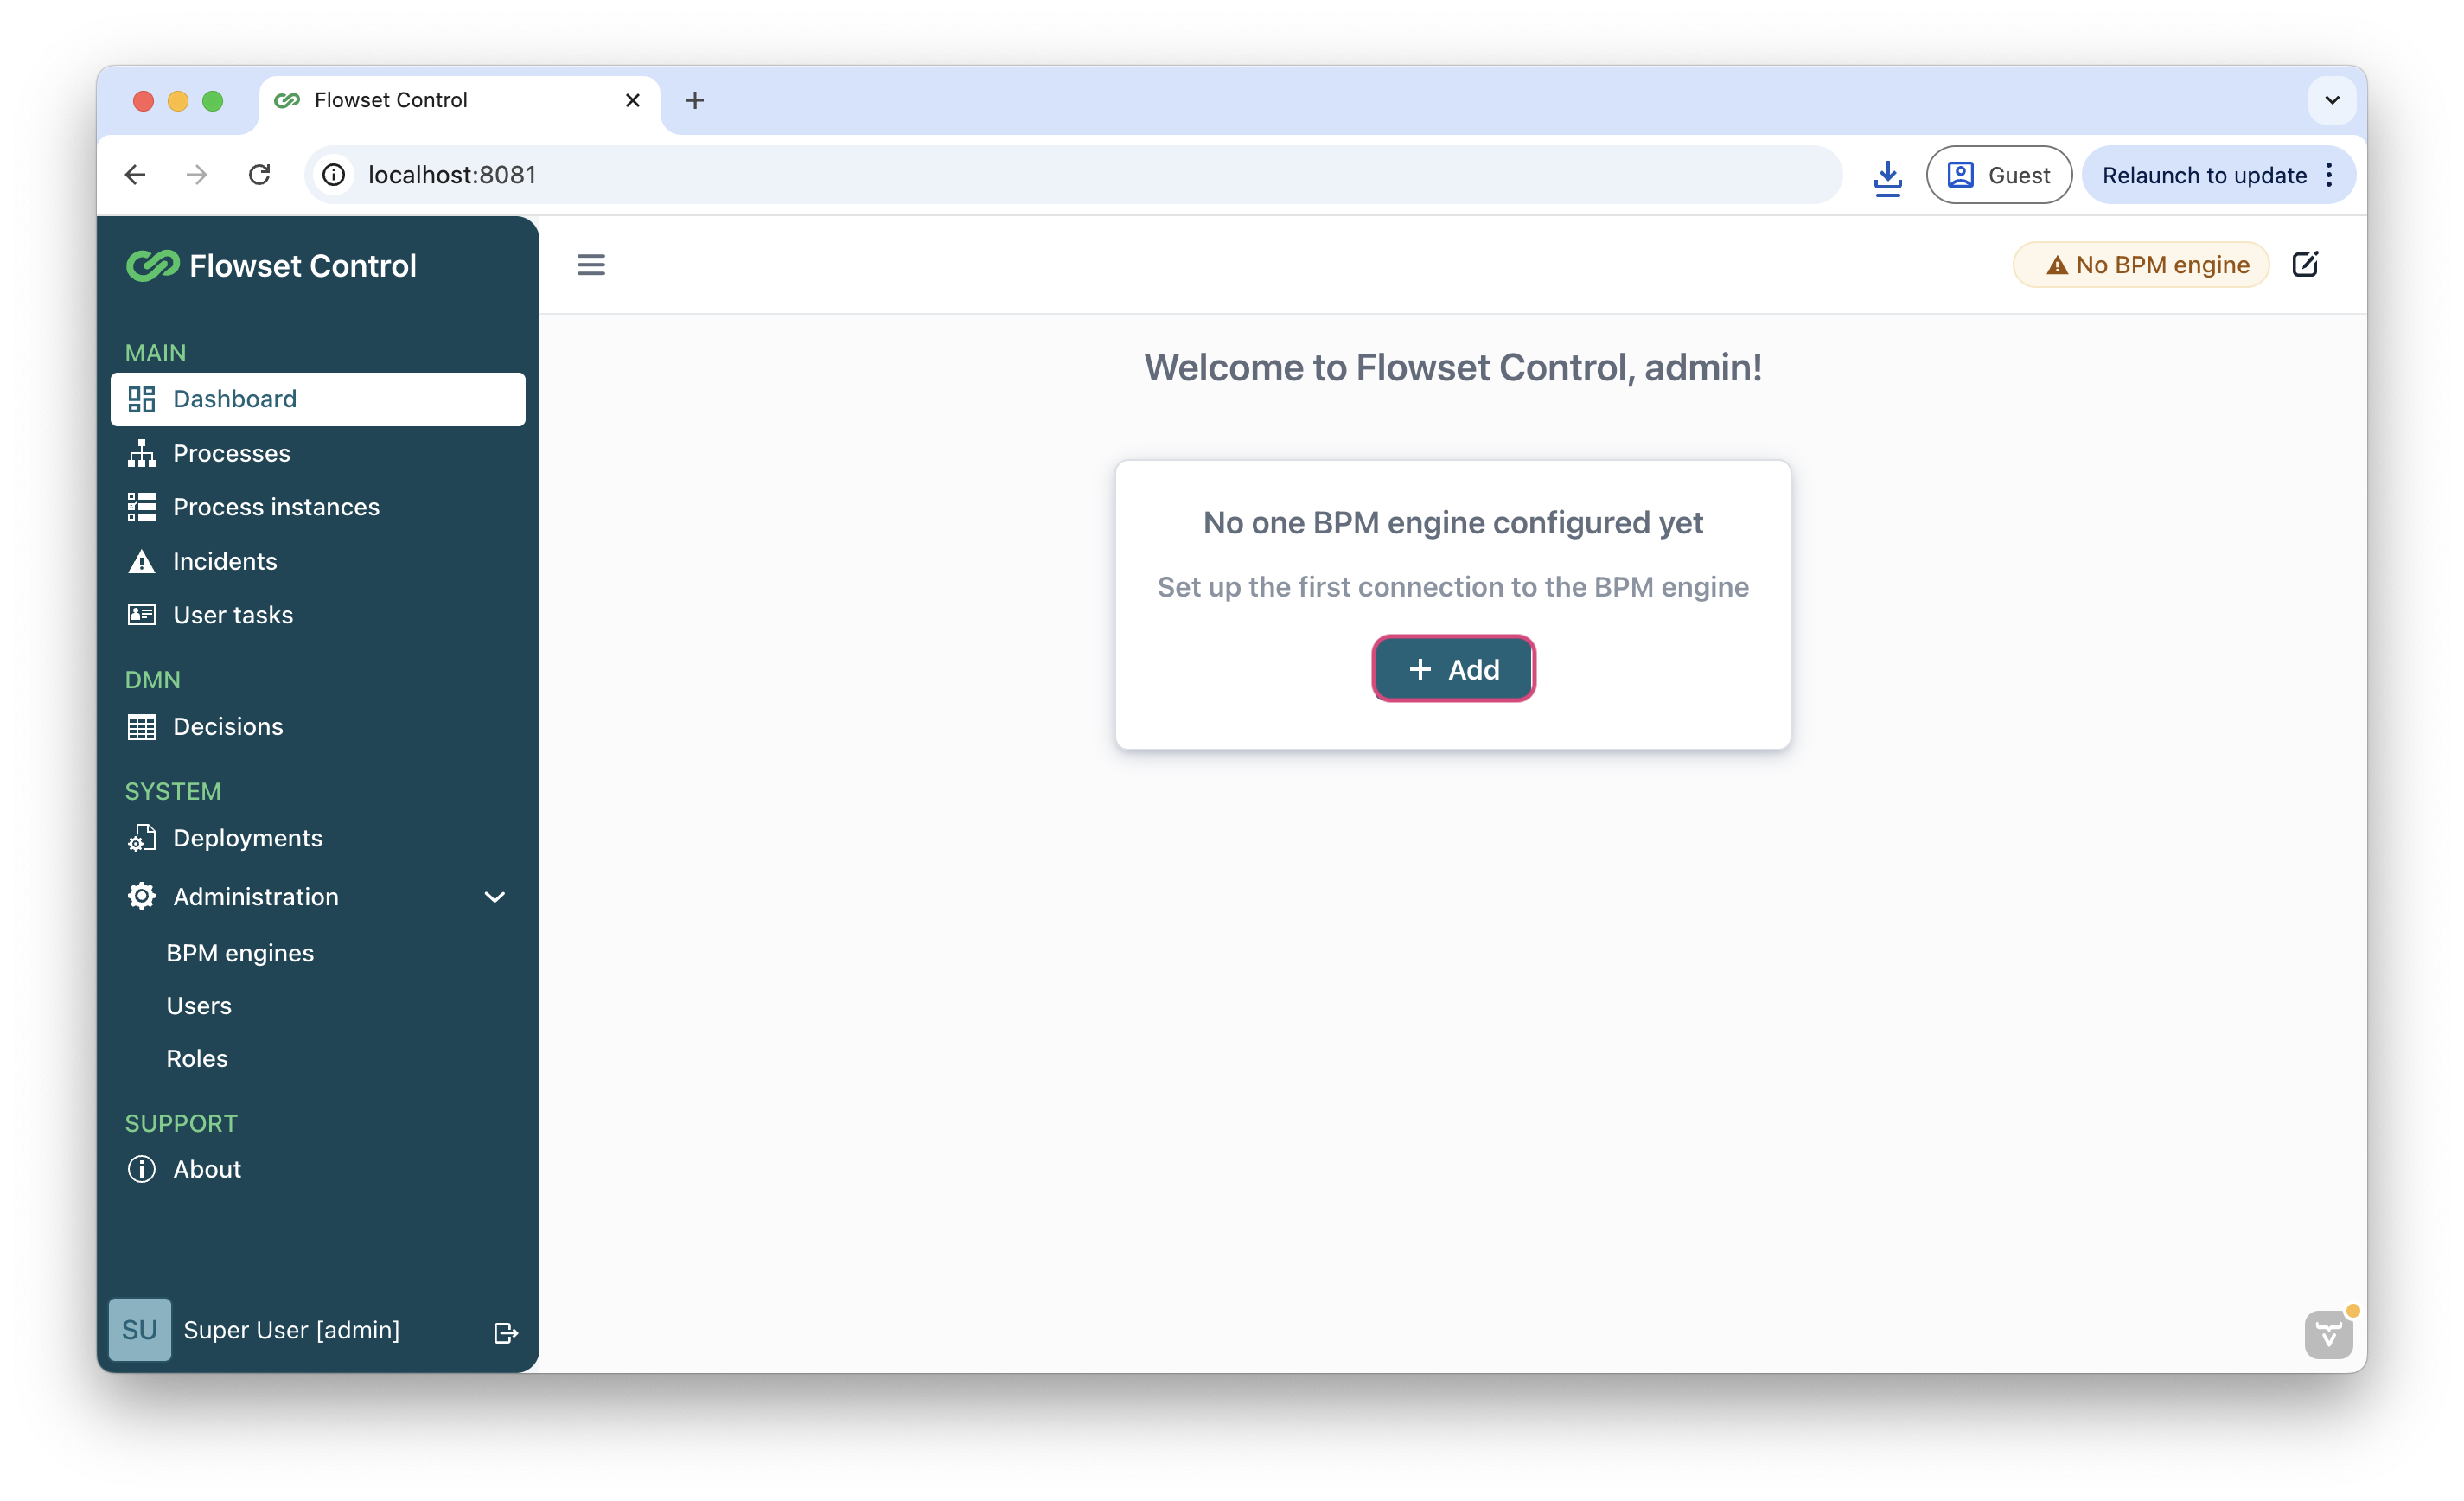
If Flowset Control is running in a Docker container, specify: http://host.docker.internal:8080/engine-restCheck the connection using the Test connection button.
-
-
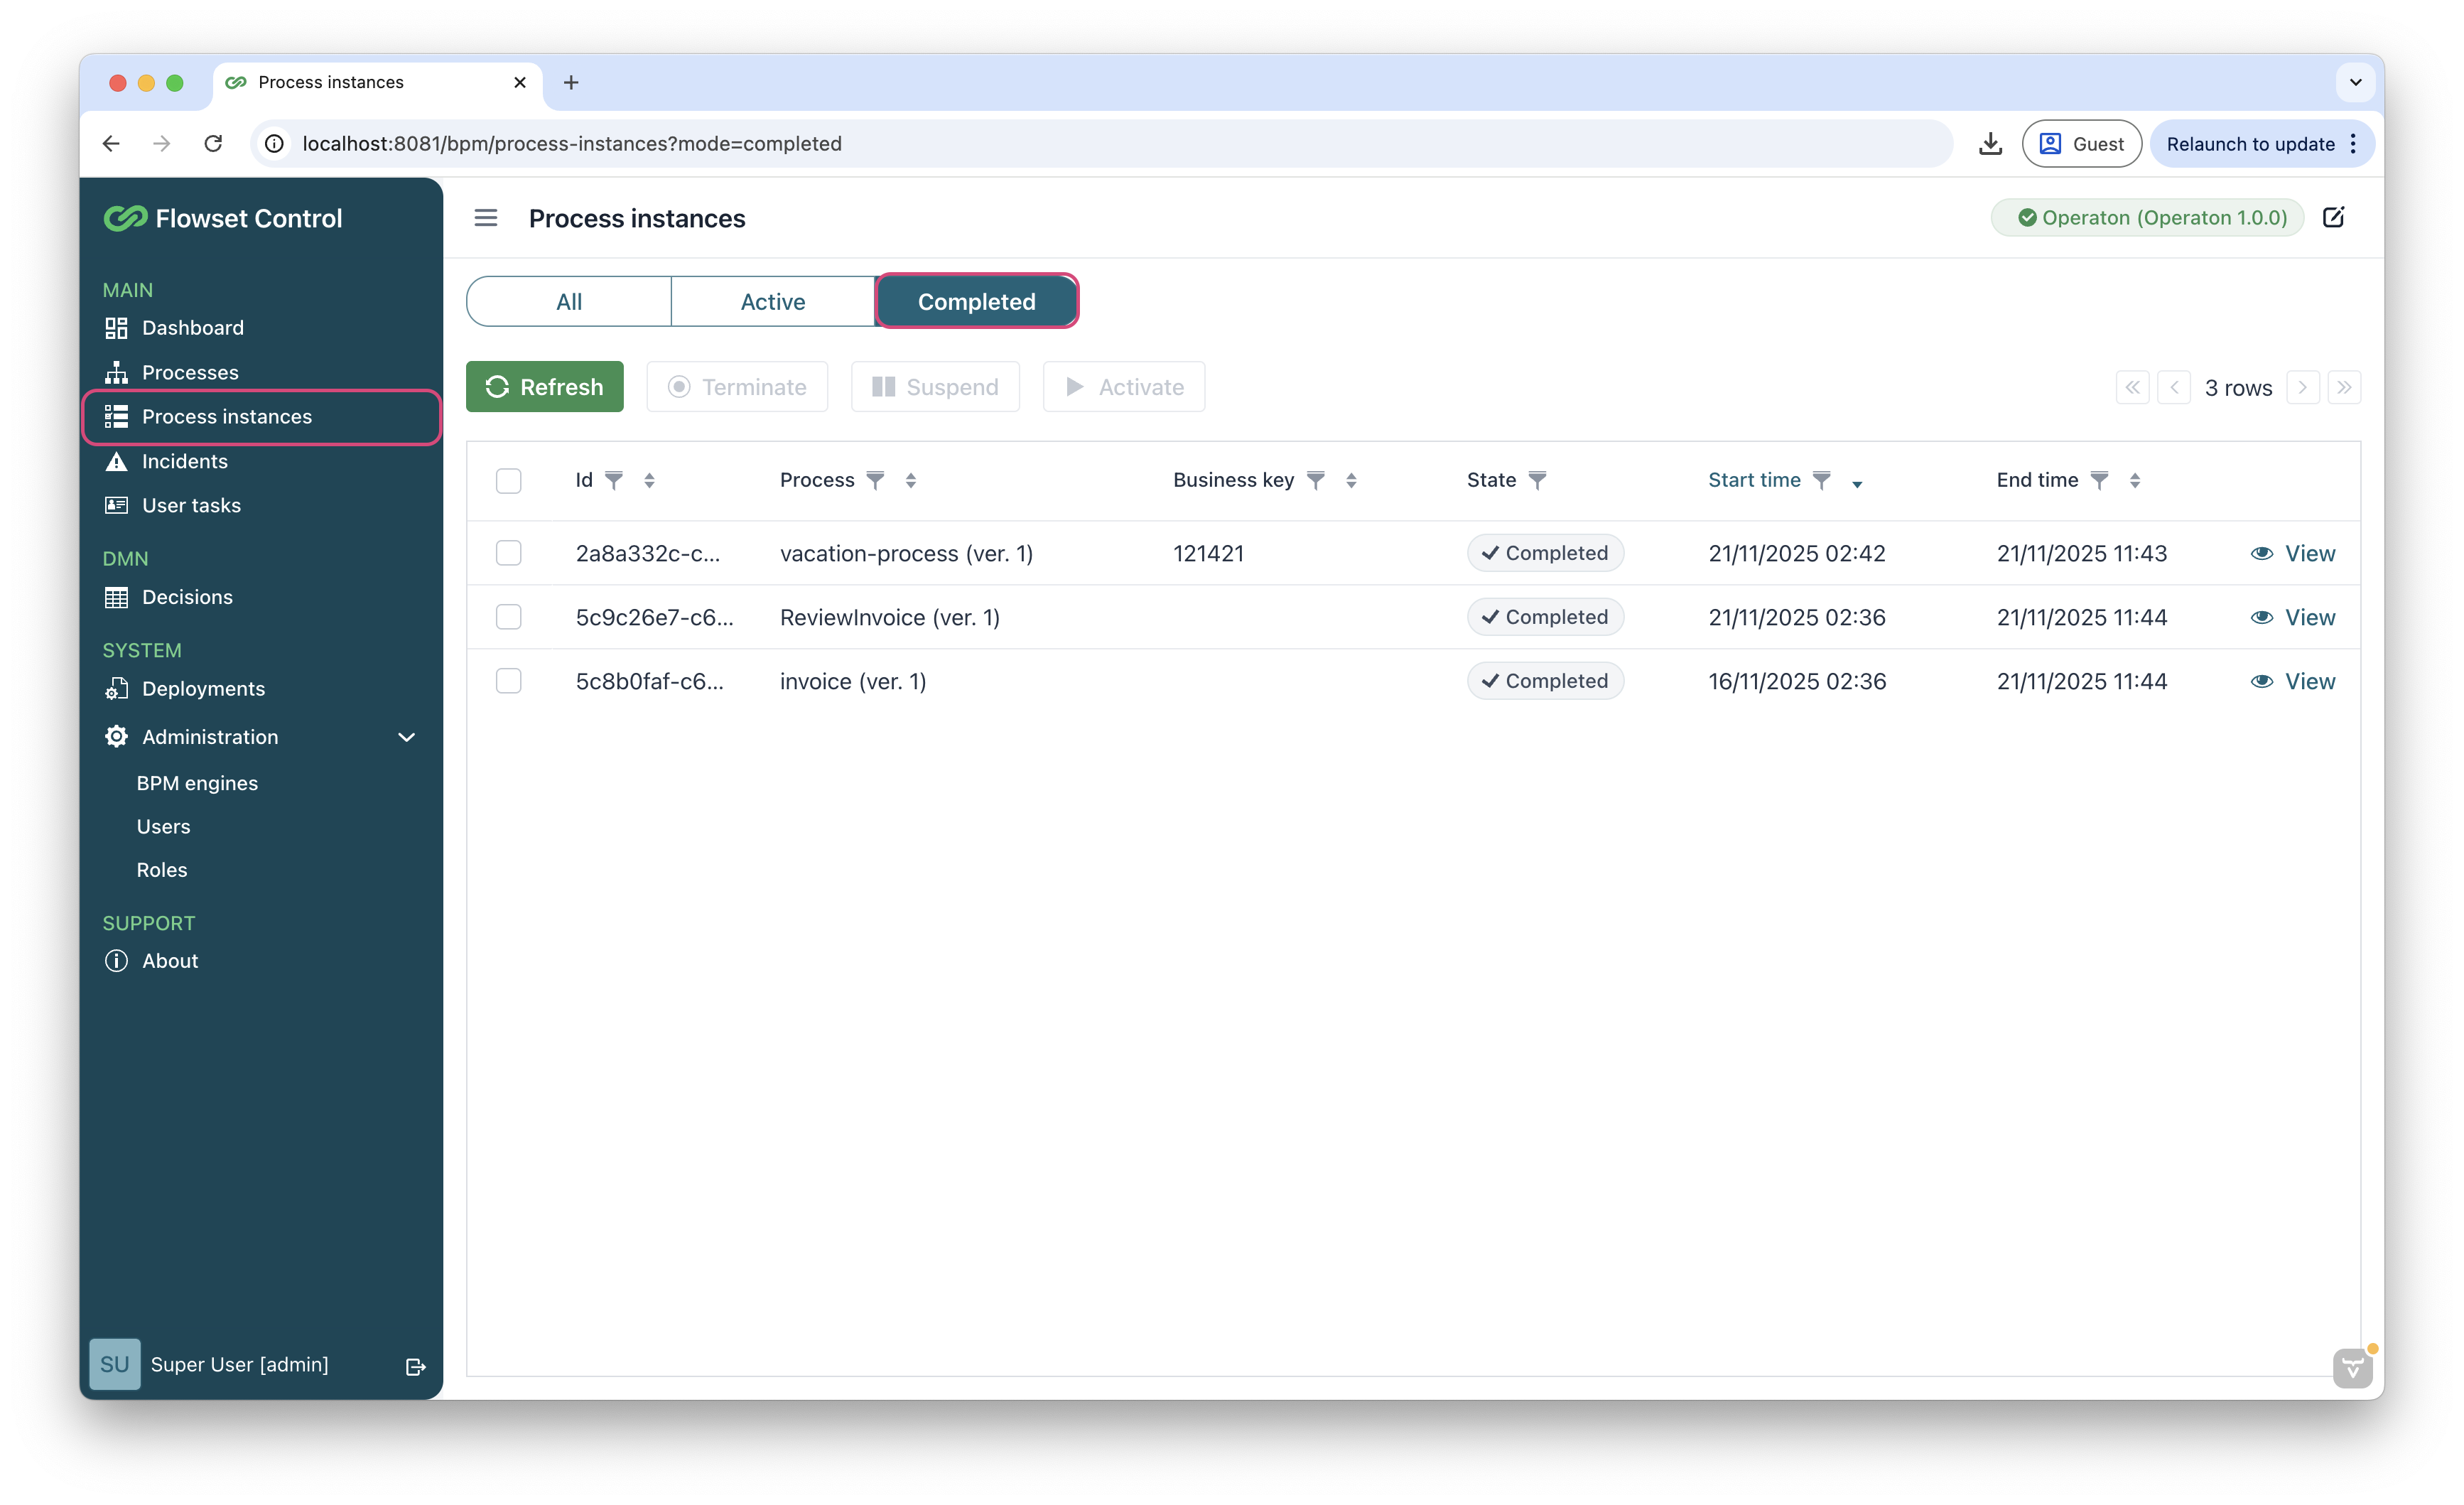
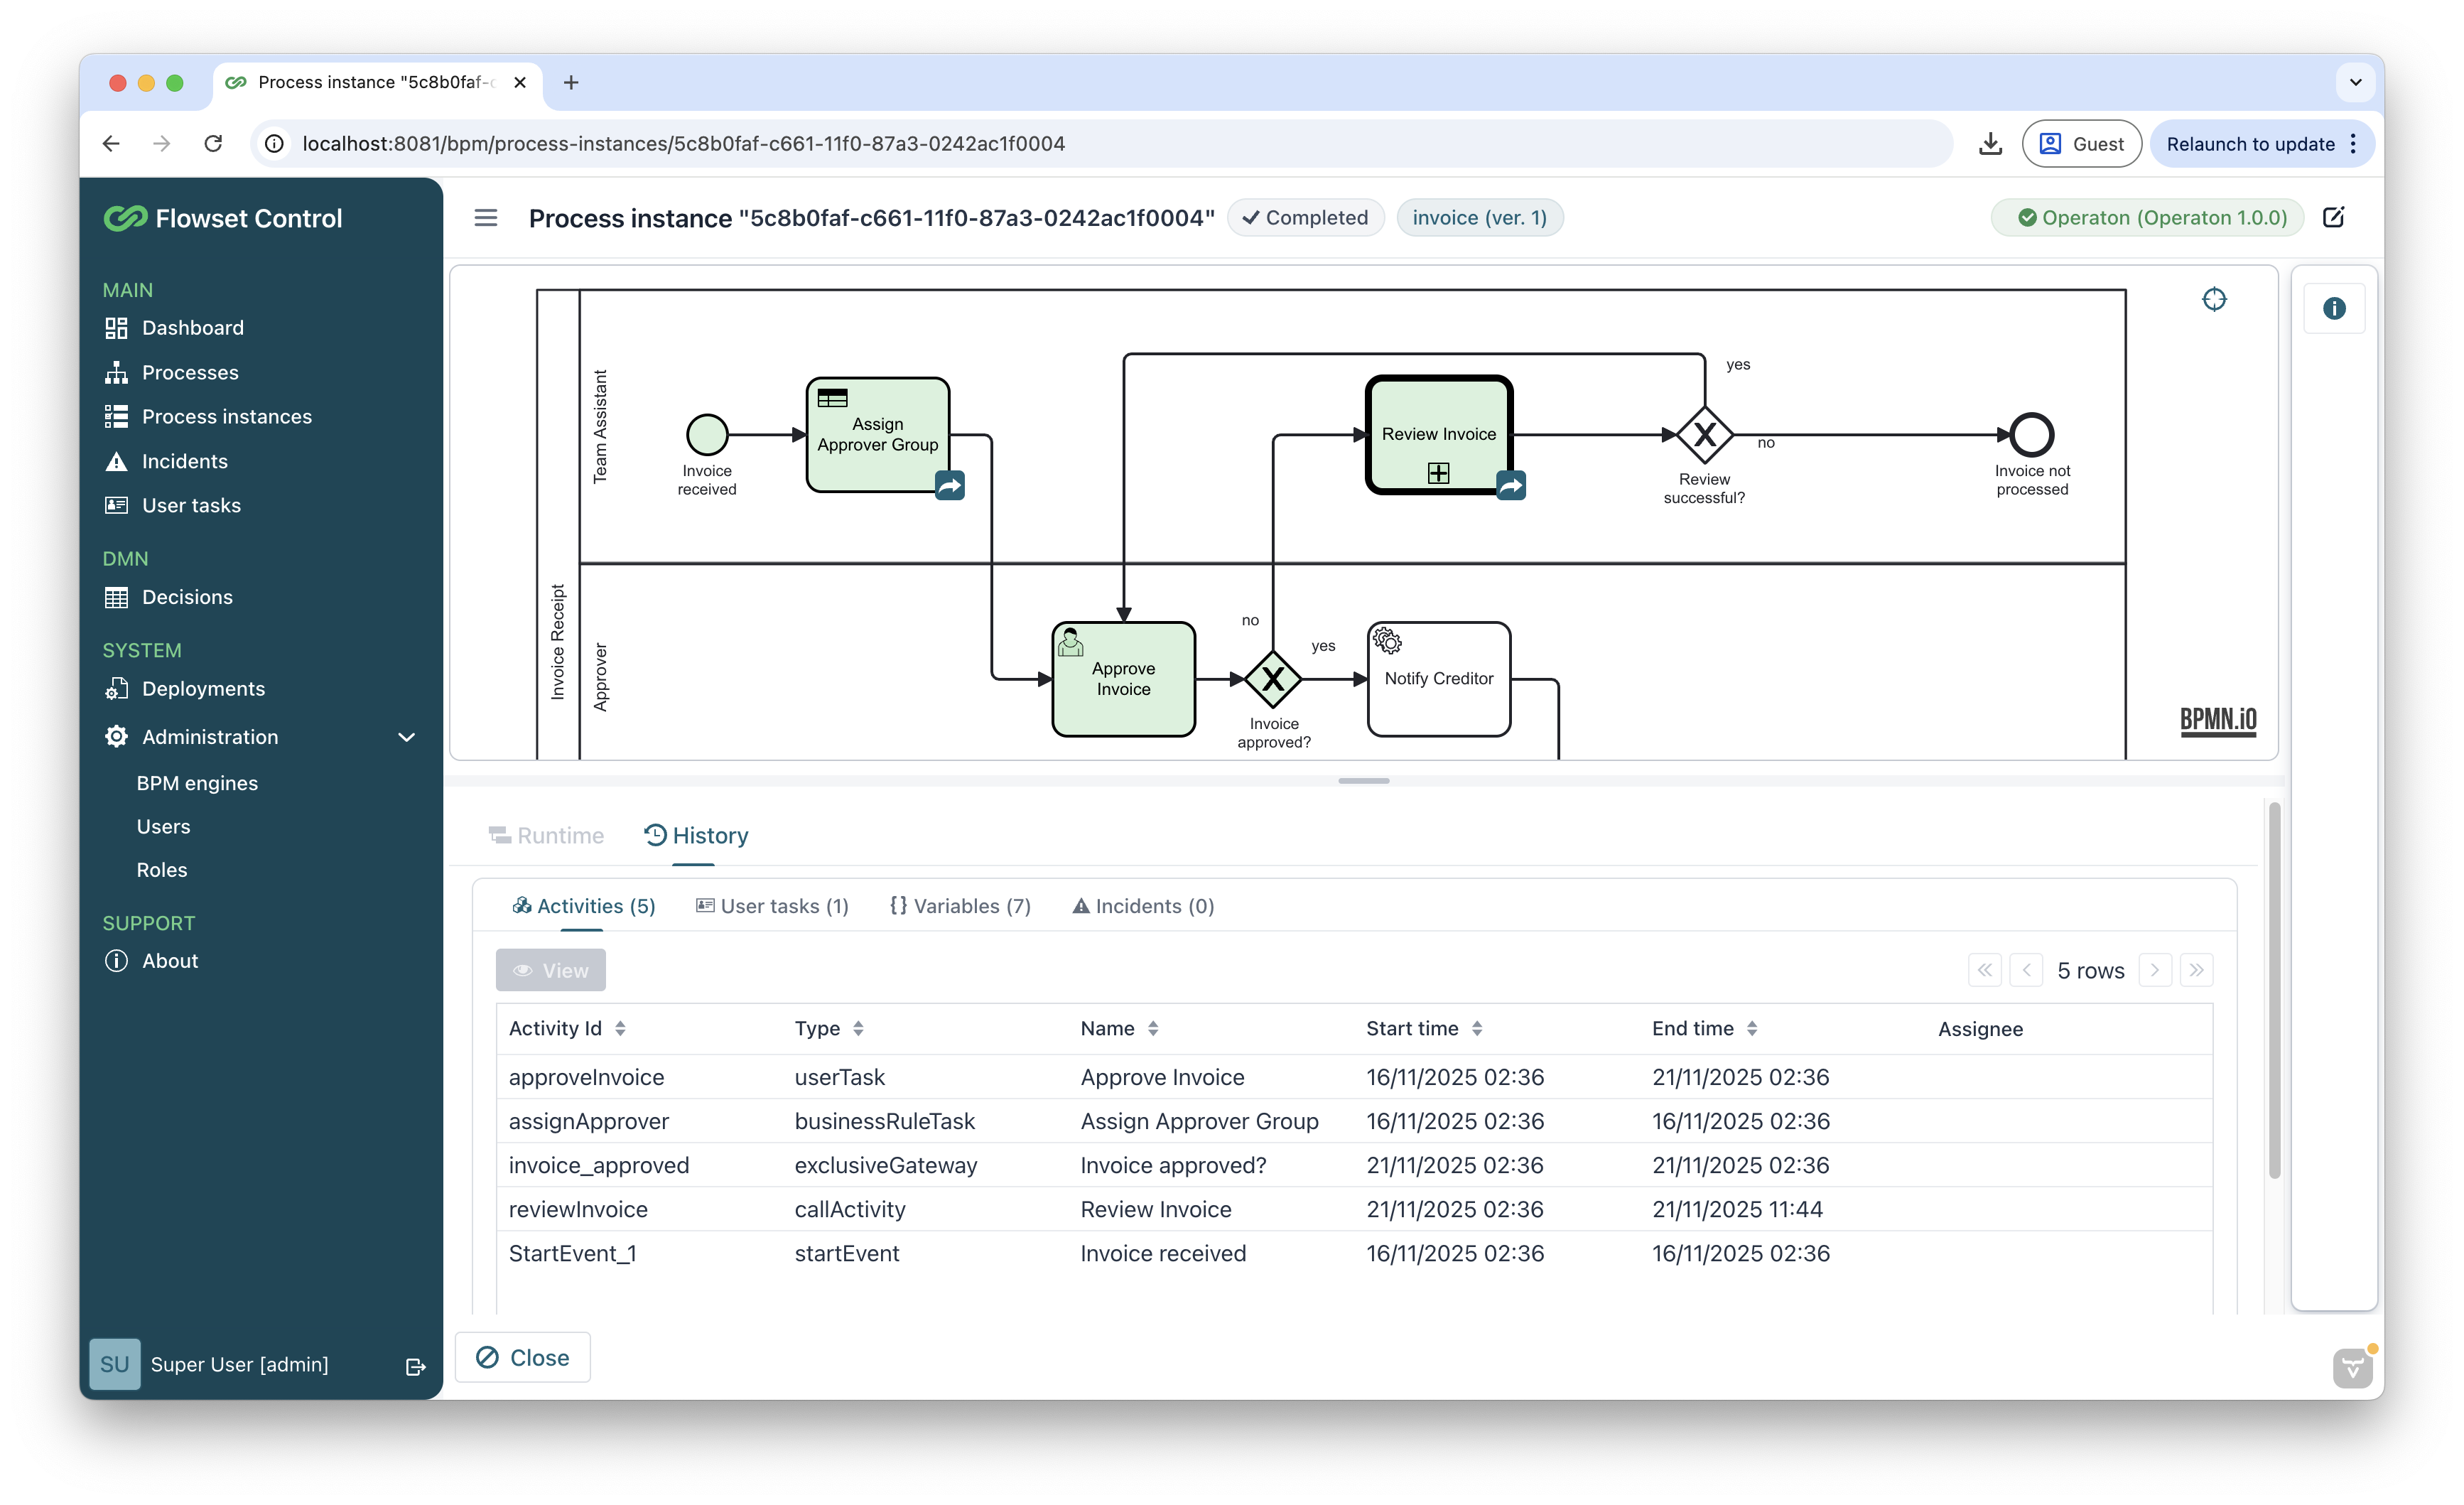
Go to Process Instances → Completed, find your process and click View.
-
Make sure the execution passed through the Service Task. If successful, the process diagram will be highlighted in green.
Now you can extend the scenario: add date validations, branching rules, integrations with external systems, and approval tasks.