Access Management
Flowset Control utilizes Jmix’s role-based access control to manage user permissions and secure access to application functionality. This section explains how to create users, assign roles, and configure permissions to ensure secure system operation.
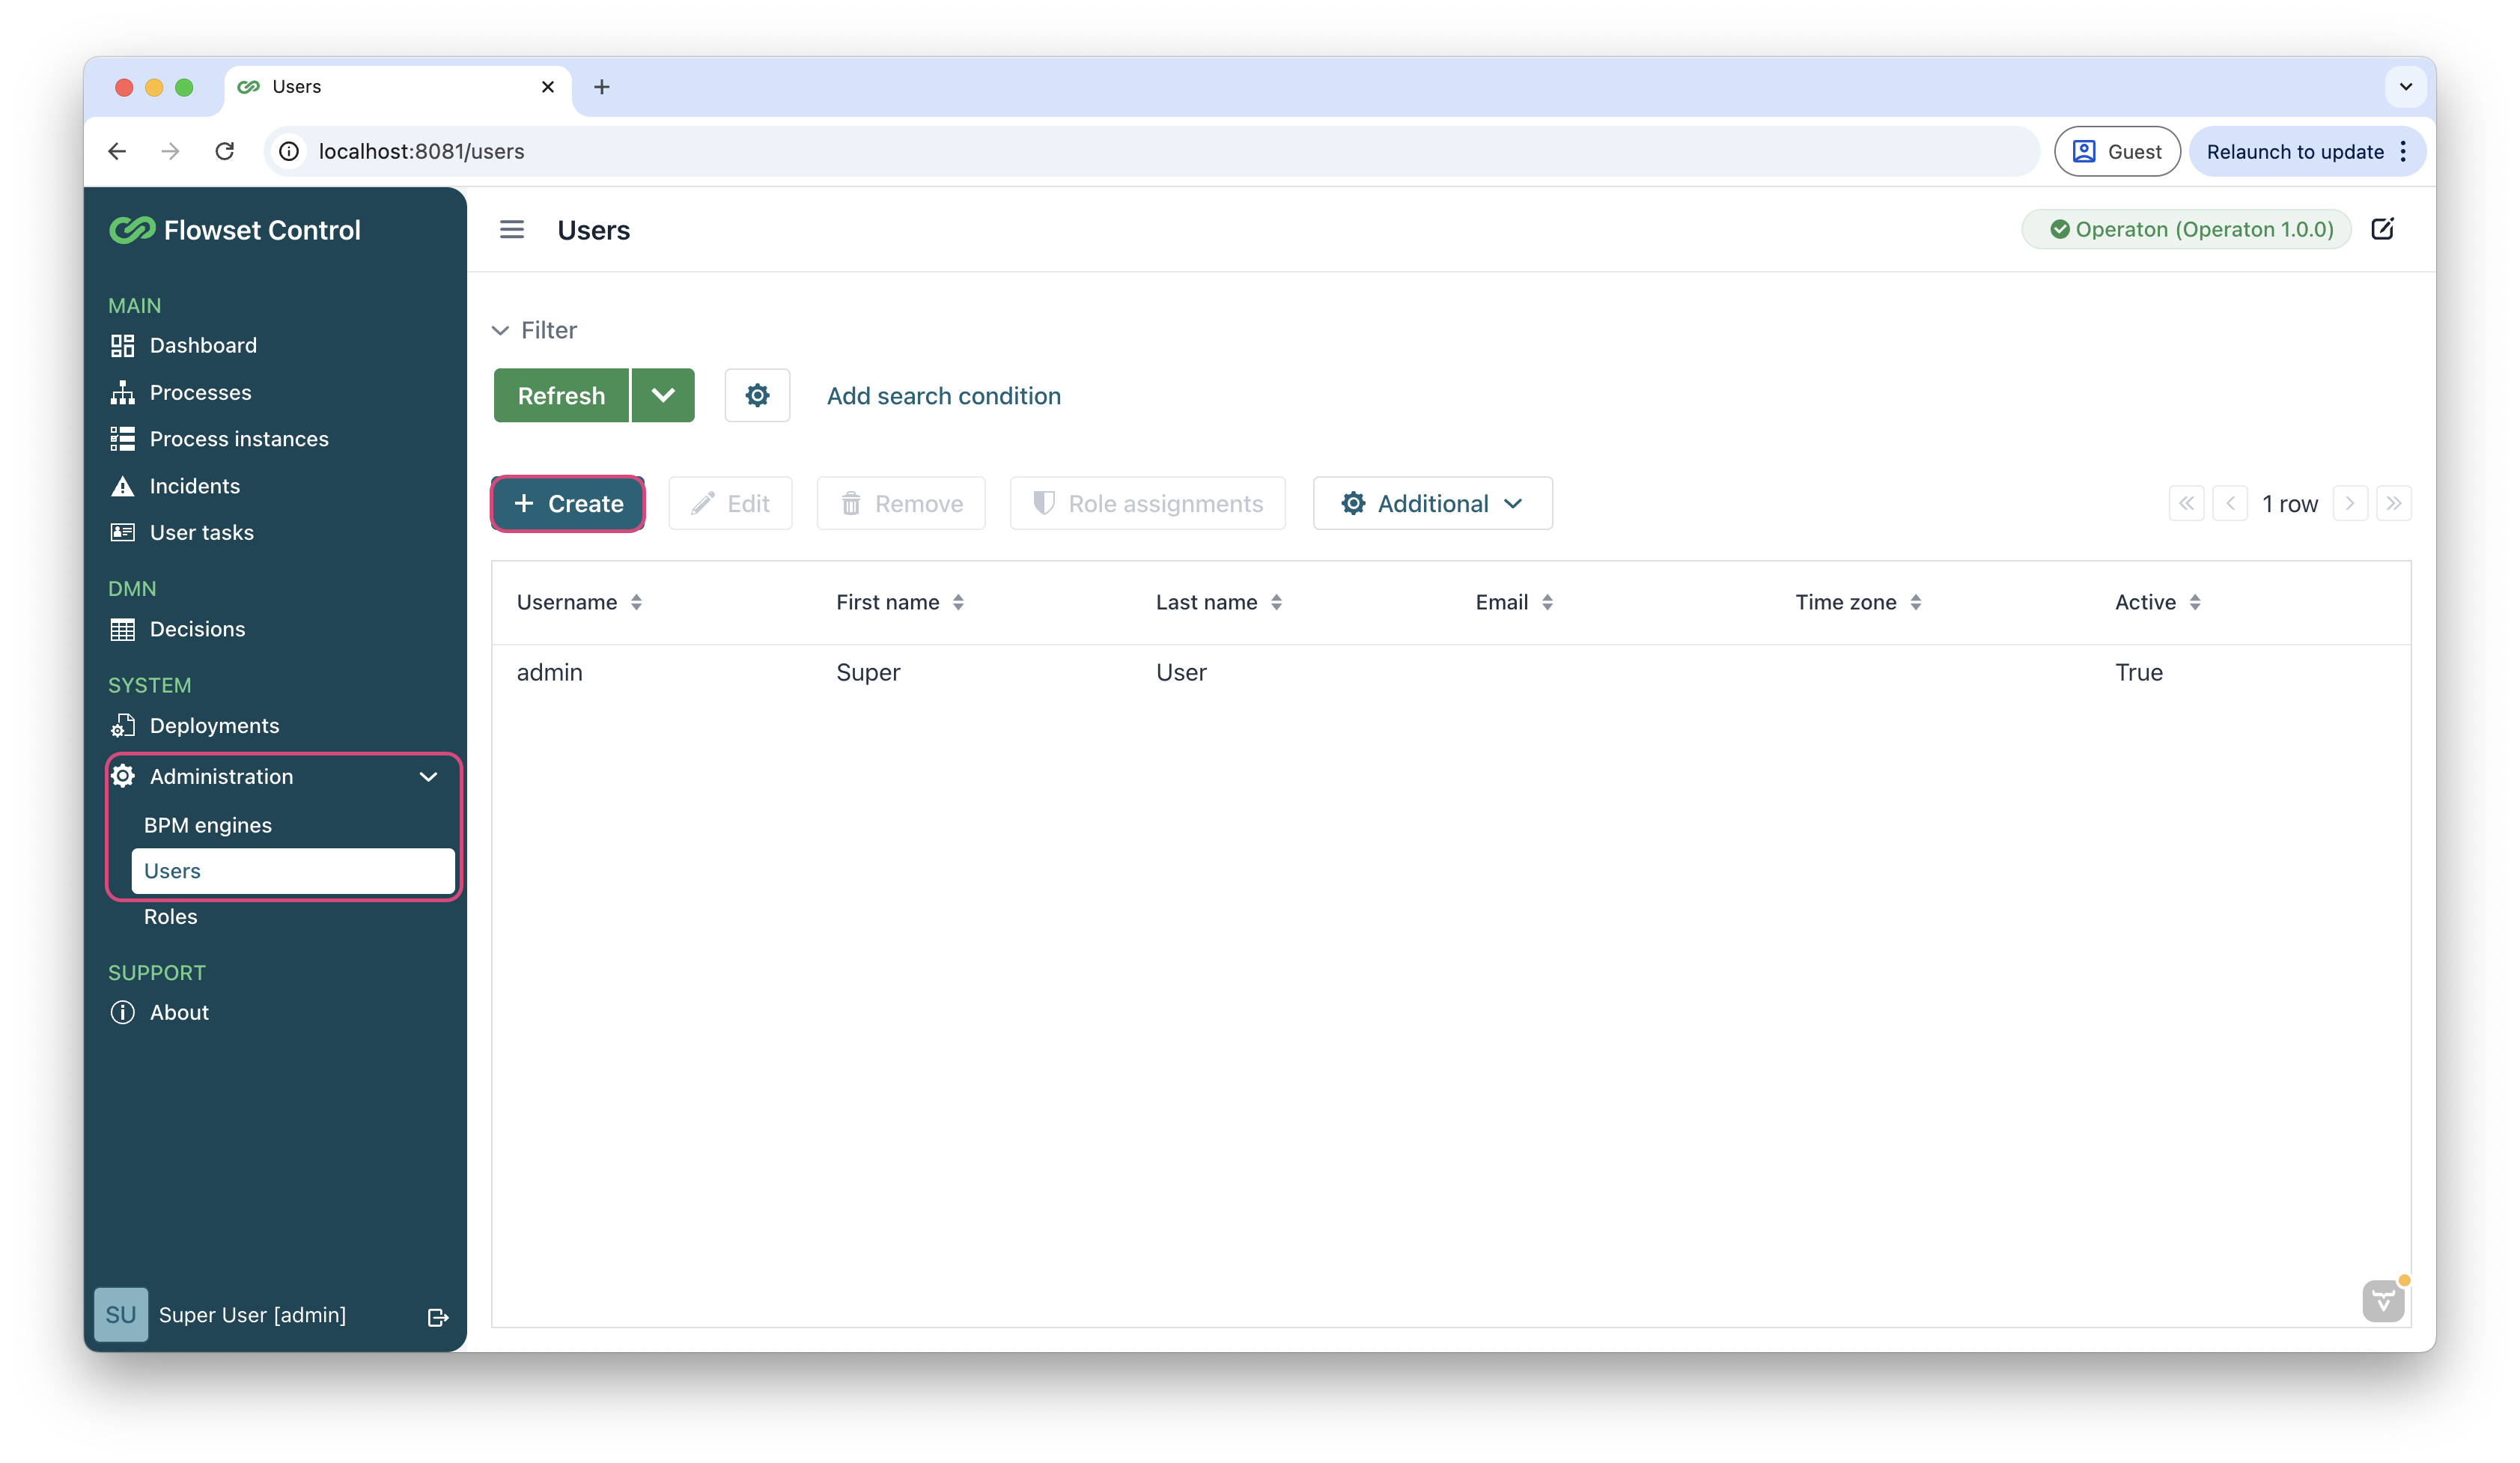
User Management
Users in the Flowset Control are defined by the User entity. Their information is stored in the USER_ table within the configured database.
The system comes with a default administrator user with the credentials admin/admin, which has full access rights.
Adding Users
To create a new user:
-
Log in to Flowset Control using administrator credentials (default:
admin/admin). -
Navigate to the Administration → Users menu item and click the Create button.
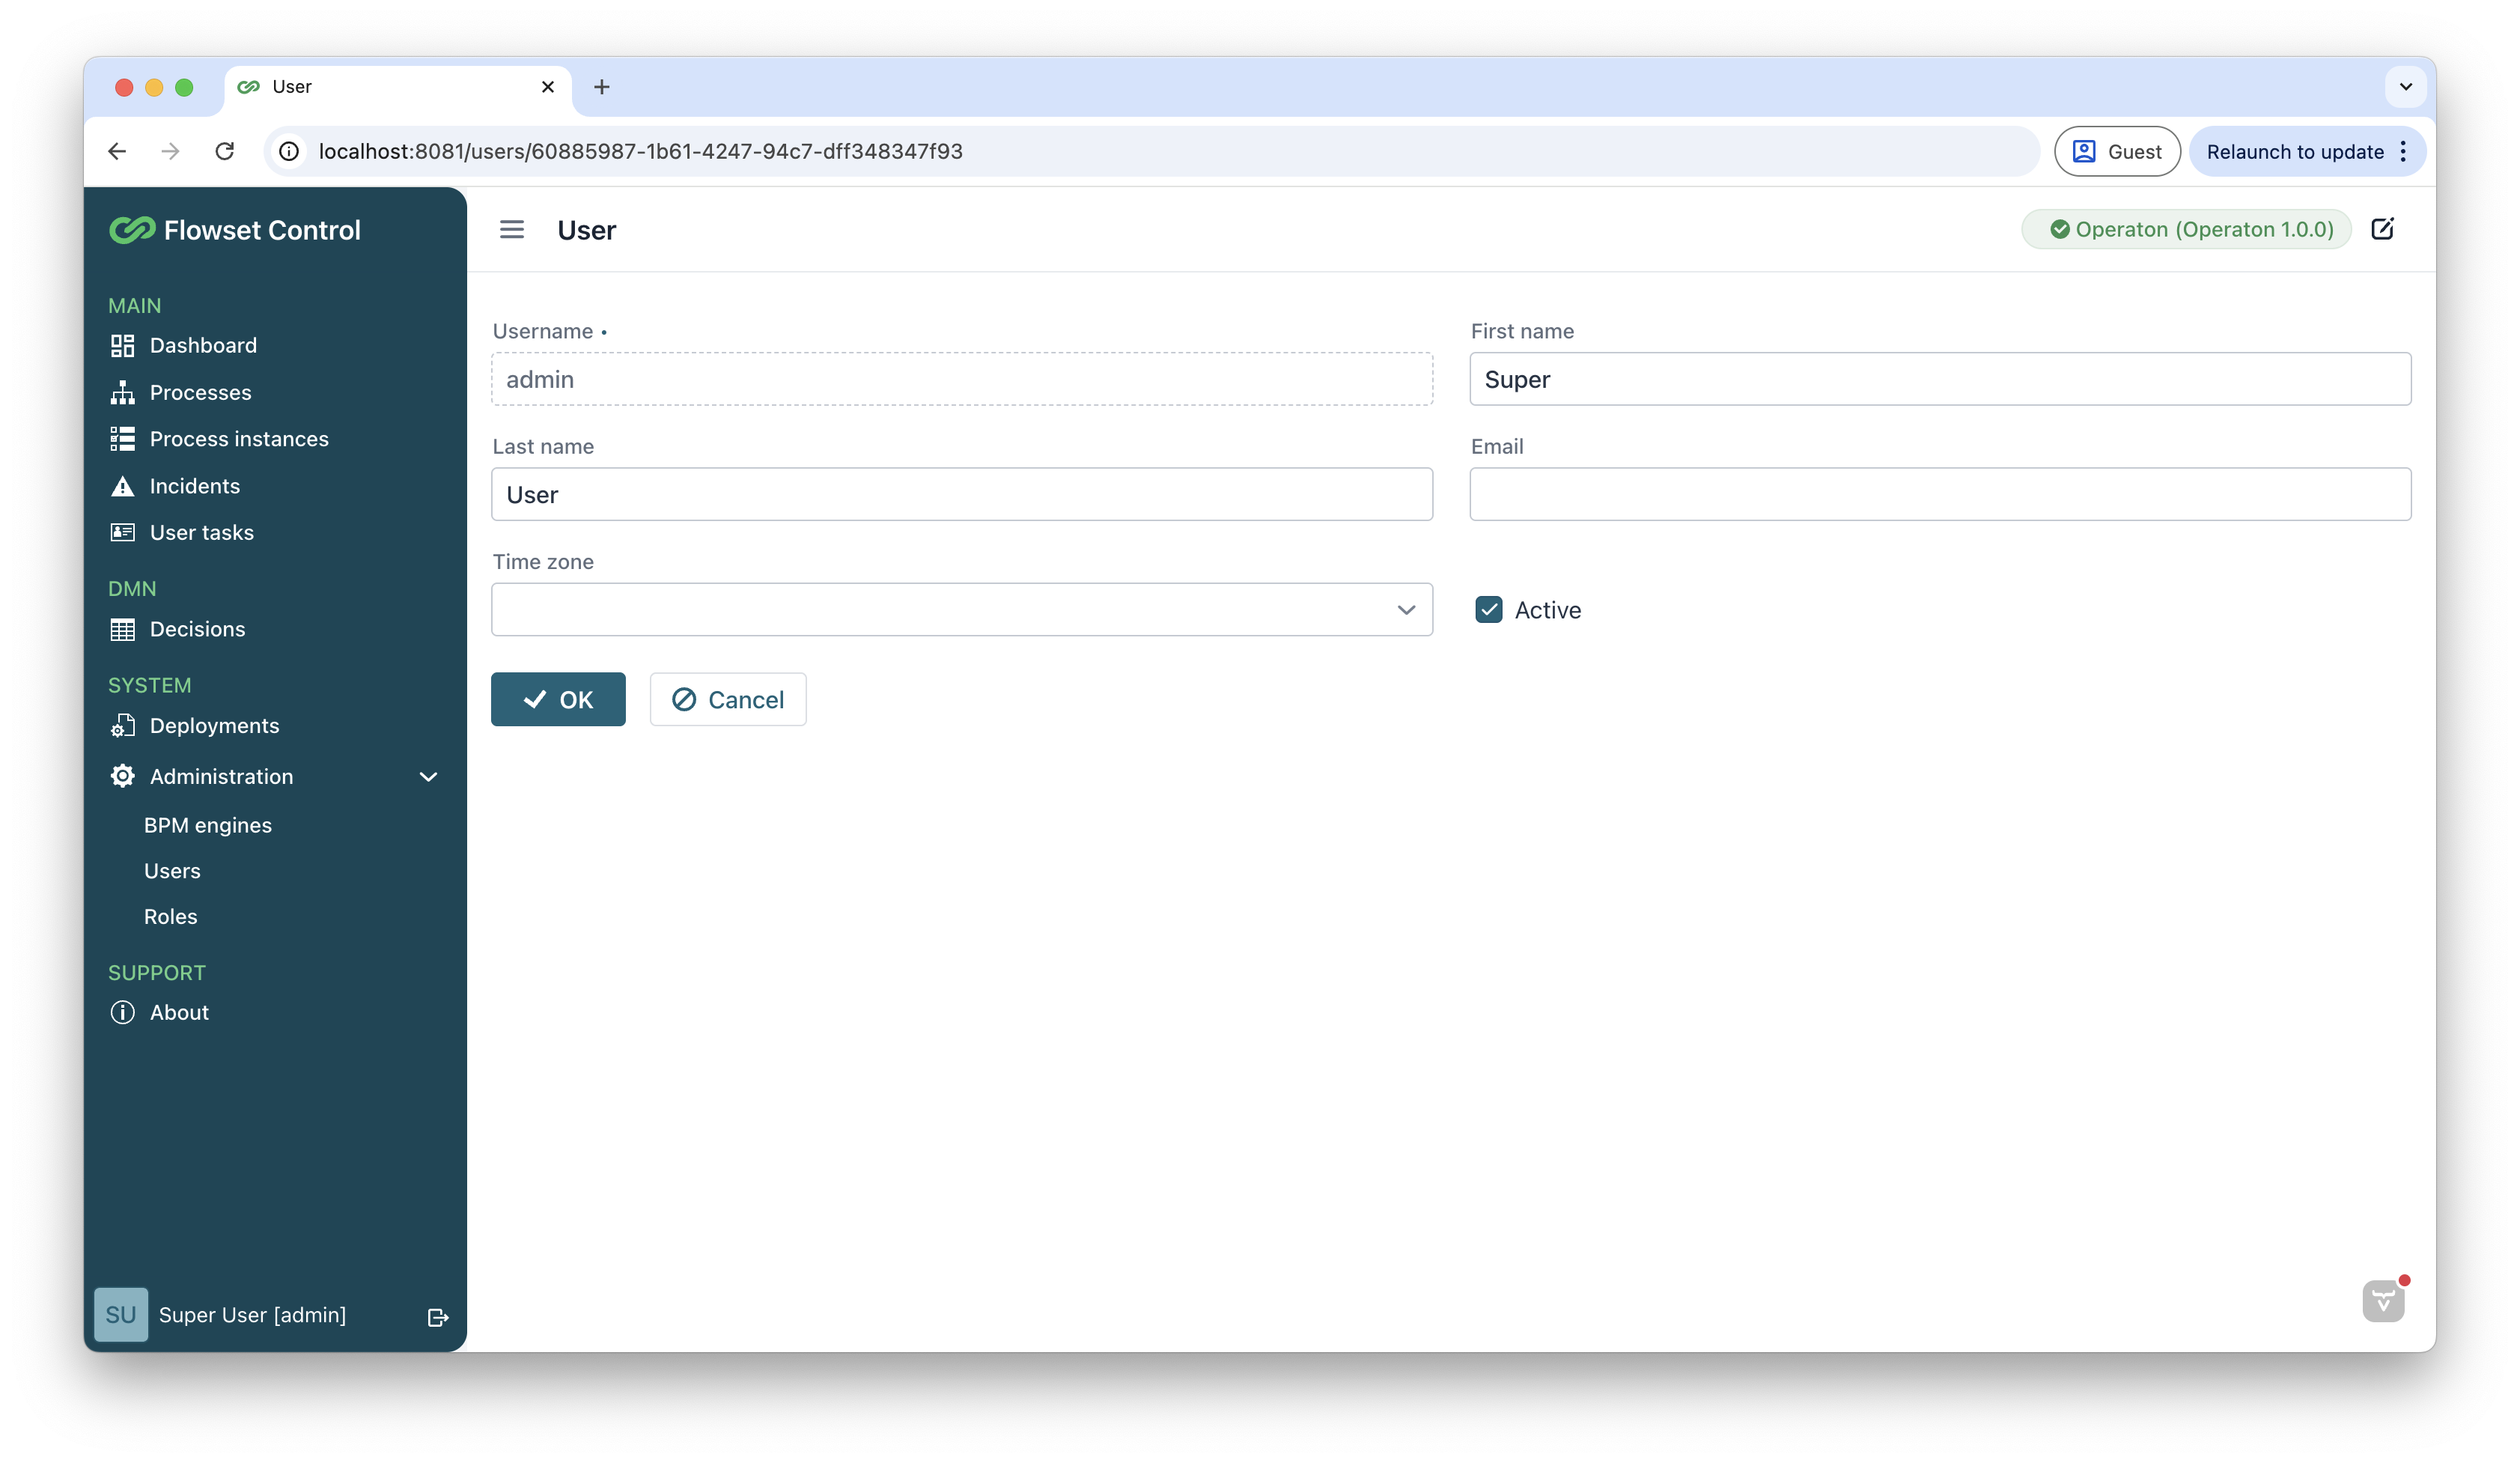
-
In the User view, fill in the required fields:
-
Username: Must be unique.
-
Password and Confirm Password.
-
-
Click OK to save the user.
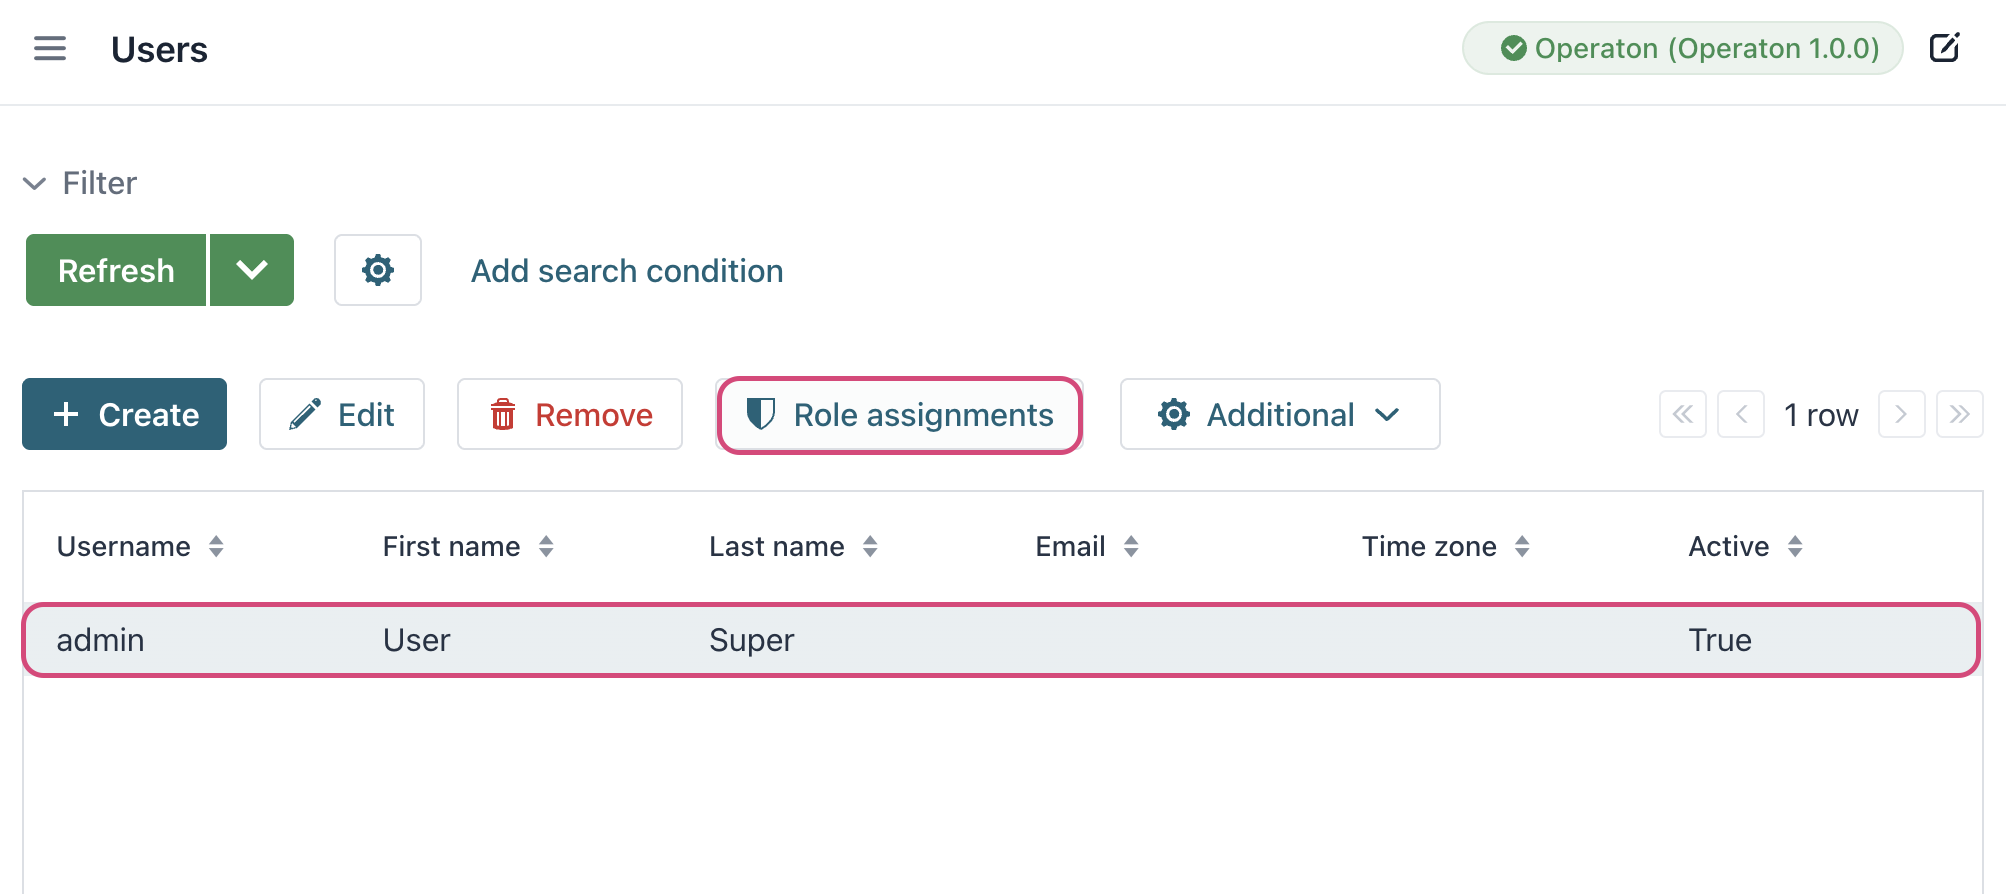
Granting Permissions
Newly created users have no permissions by default and cannot log in or use any functionality.
To assign the default full-access resource role:
-
Select the user from the list and click Role assignments.
-
In the Resource roles section, click Add.

-
Select the row labeled
Full Accessand click Select.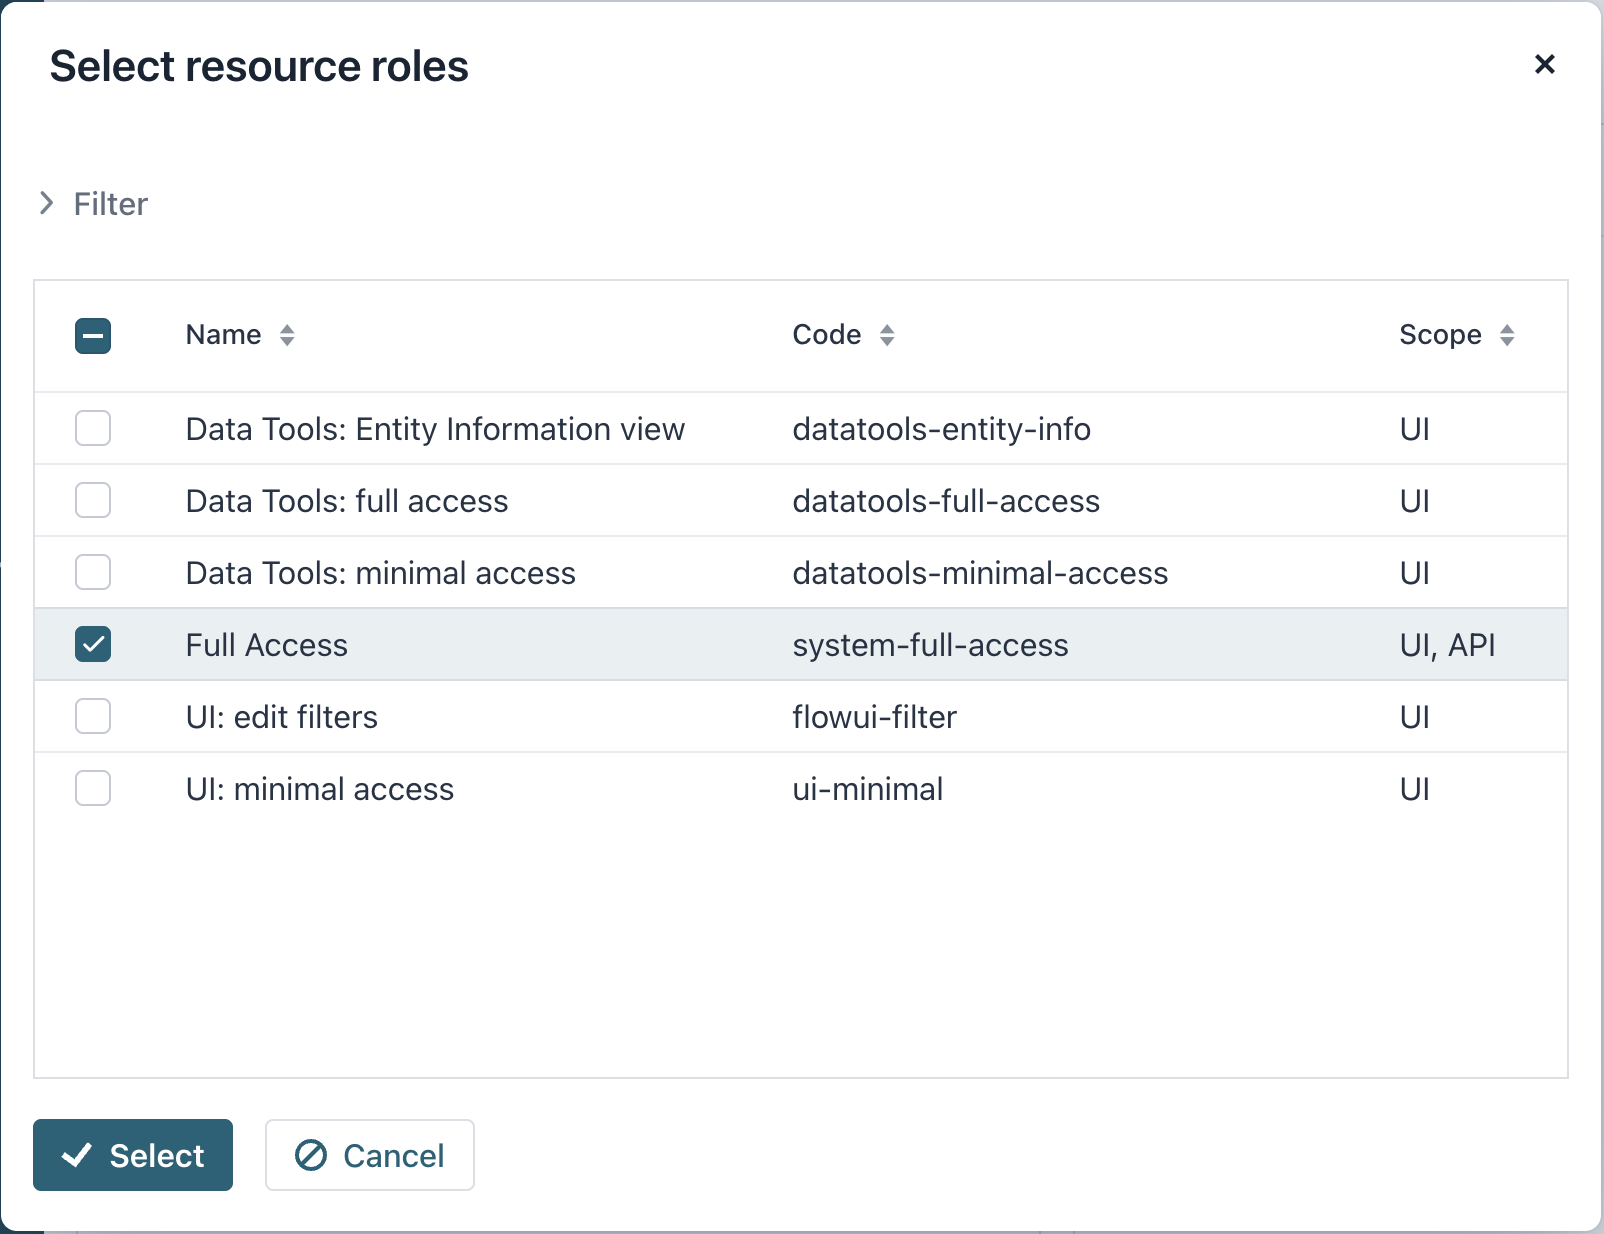
-
Click OK to save the role assignment.
The user can now log in and access all application functionality.
Role Management
Resource roles define permissions for users to access specific objects and operations within the system, including CRUD operations on entities, entity attributes, UI screens, and more.
A system administrator can create new custom roles to implement a granular security model tailored to specific organizational needs.
Creating Roles
To define a new role with a specific set of permissions:
-
Navigate to the Administration → Roles menu item.
-
Click Create to define a new role.
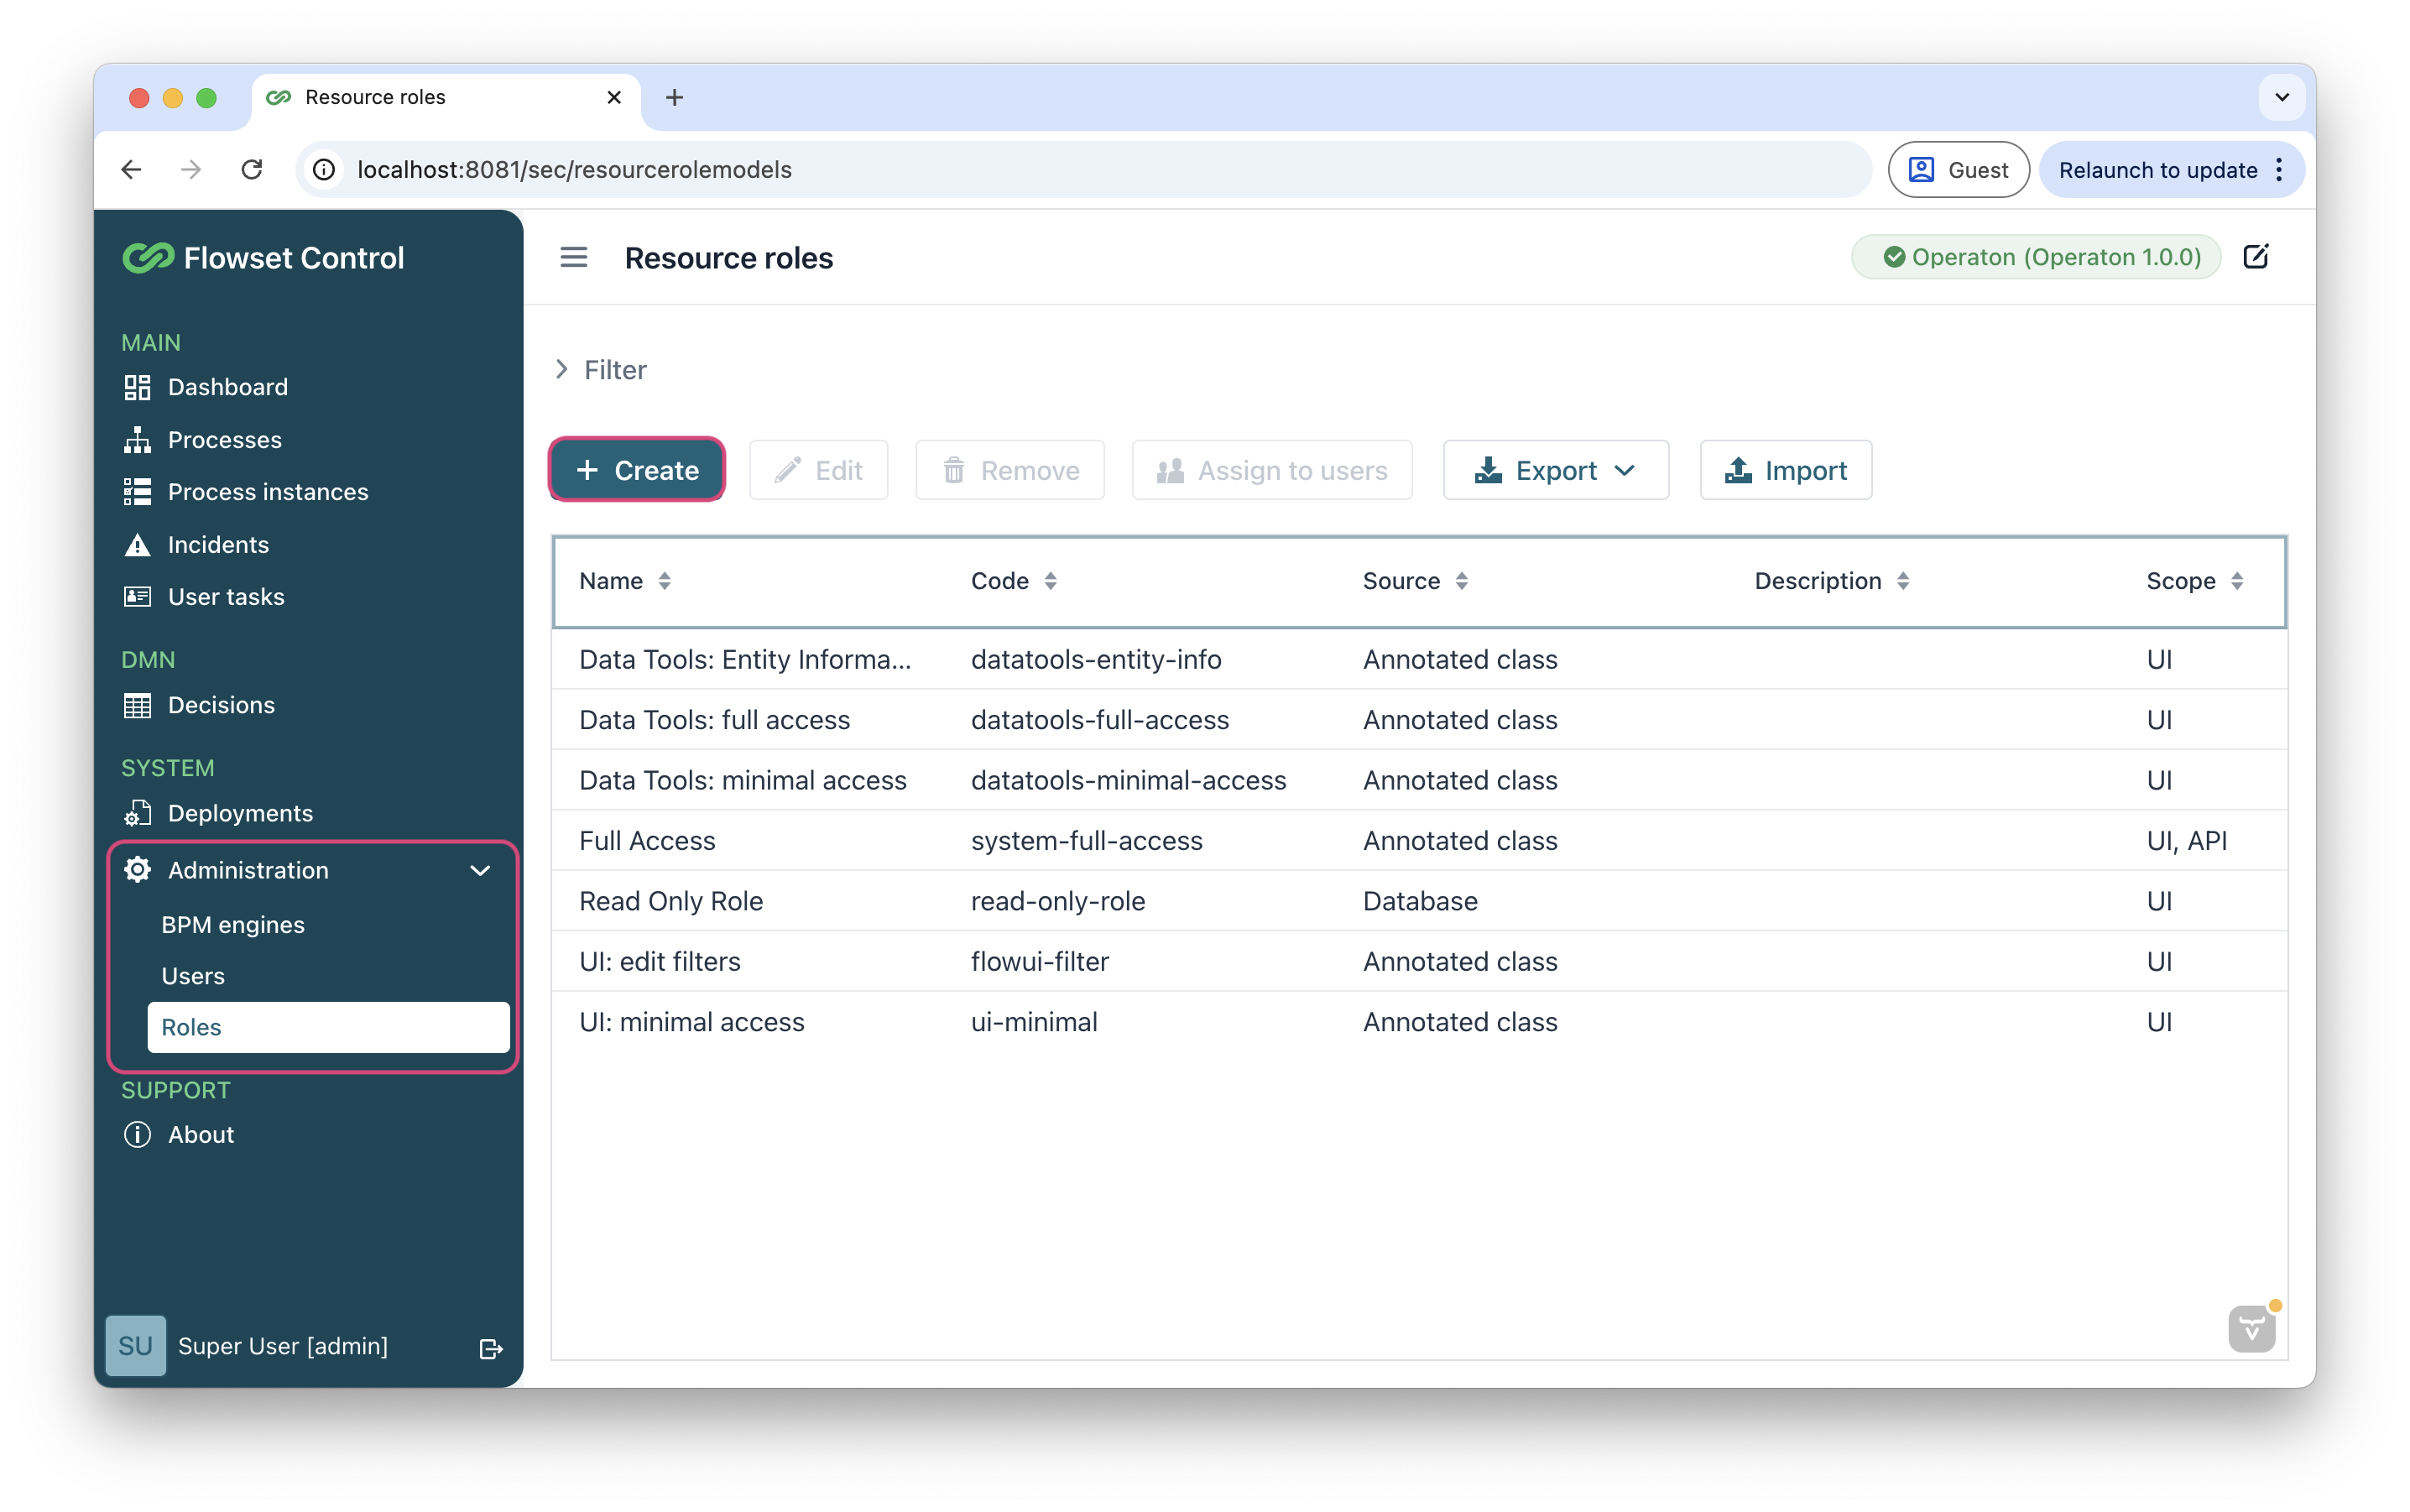
-
Specify a descriptive Name and a unique Code.
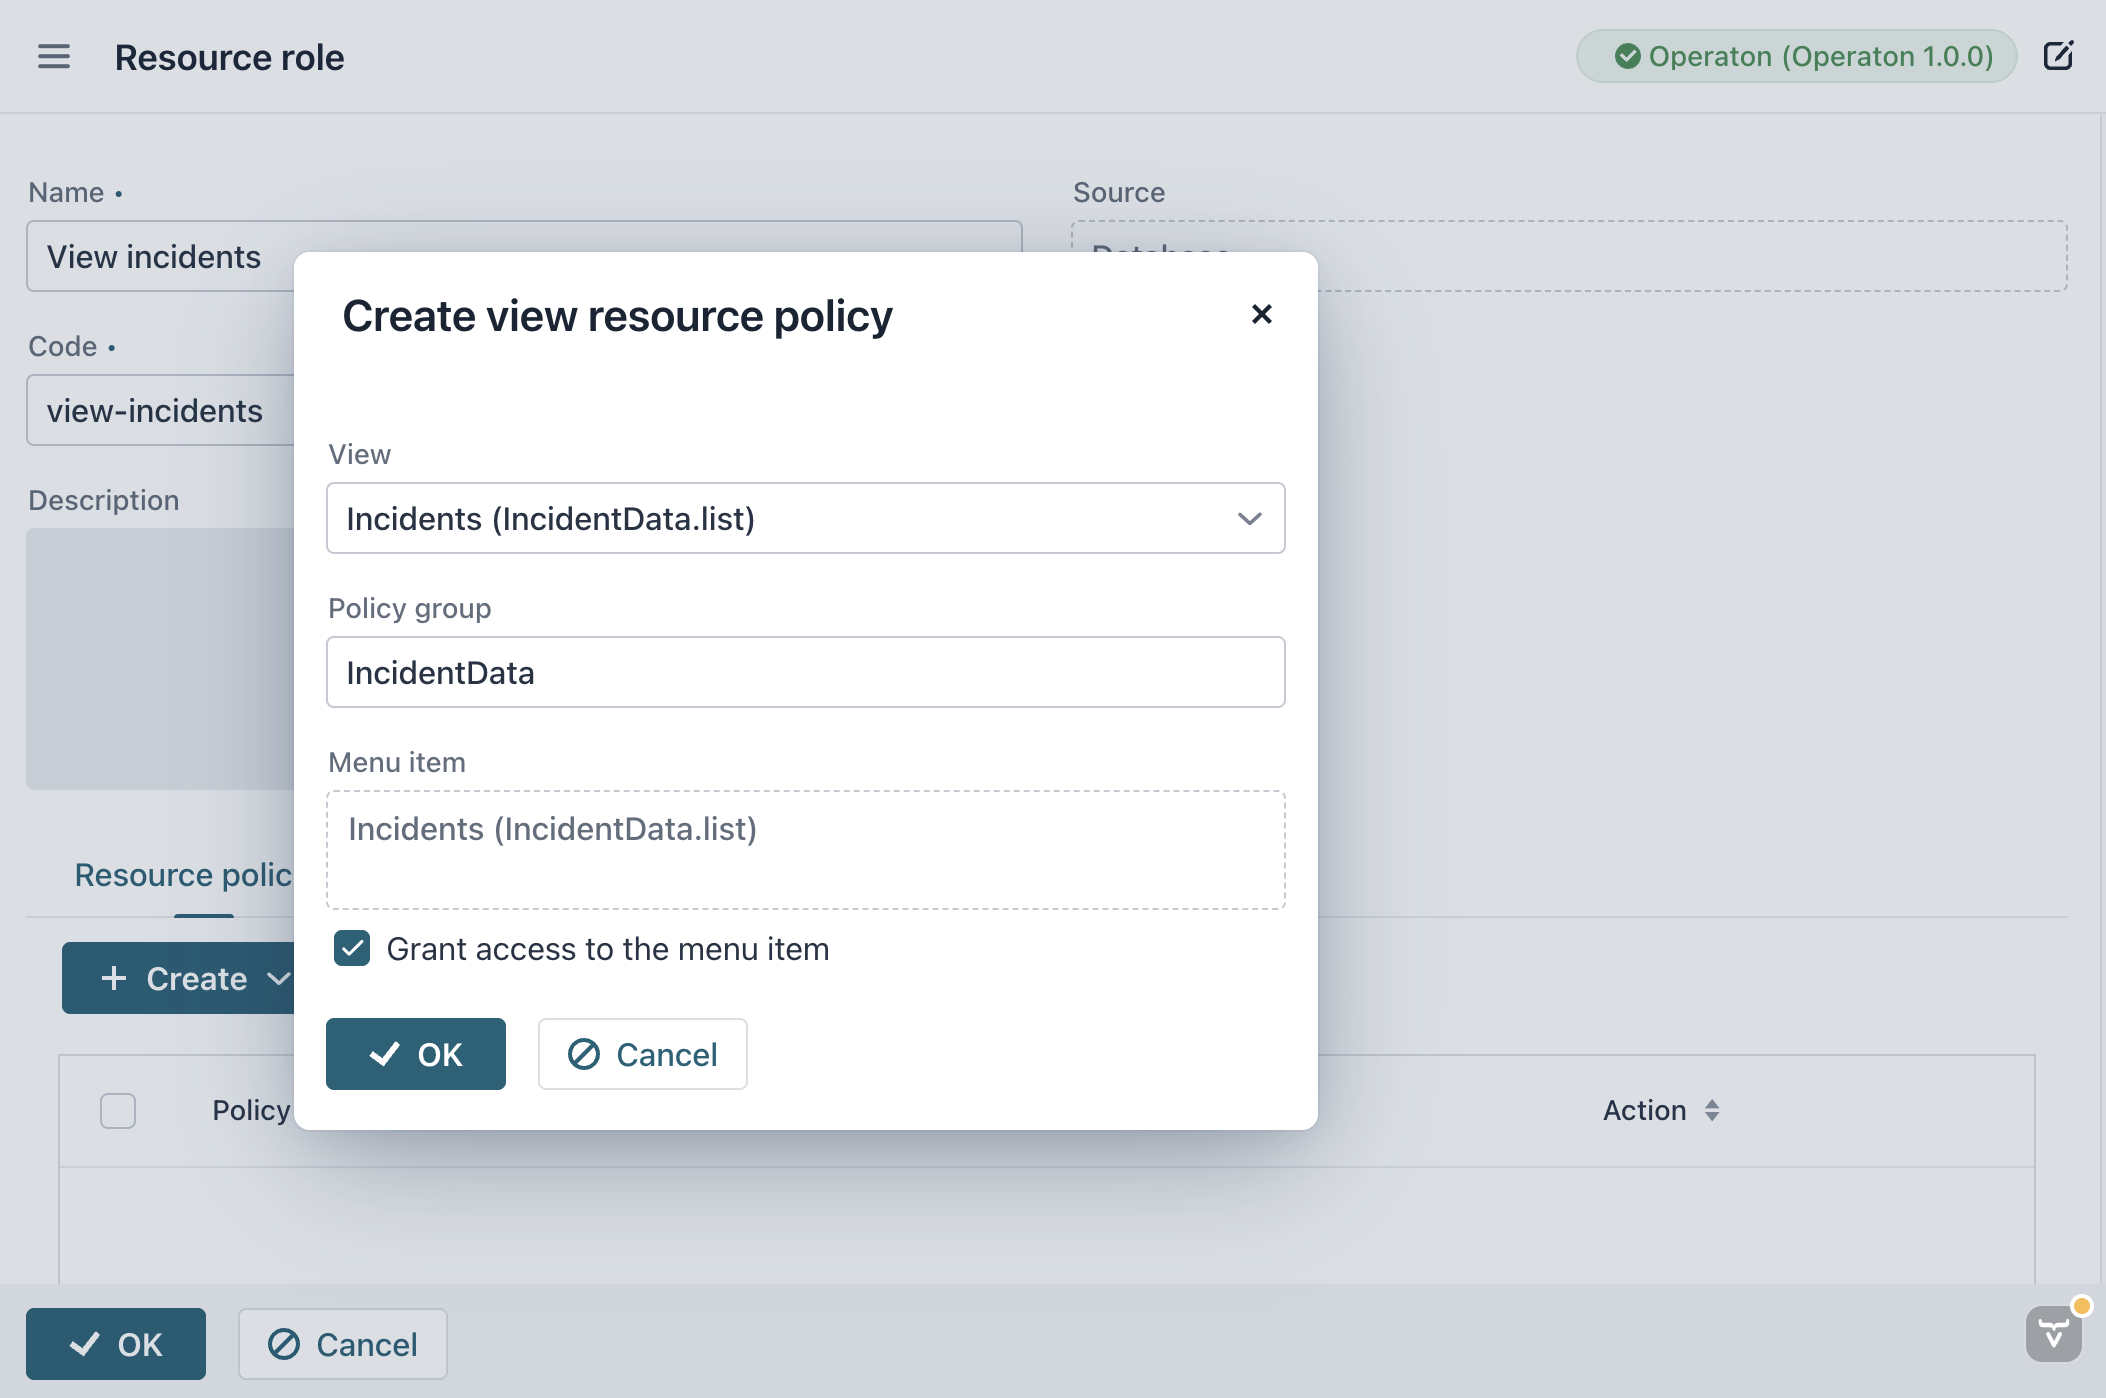
-
Configure the role’s permissions by defining the following policies:
-
Menu policy: Specifies which items in the main menu are visible to users assigned this role.
-
View policy: Grants permission to access specific application views. For example, the
Deploymentsview, theDecisionsview. -
Entity policy: Defines the Create, Read, Update, Delete (CRUD) operations allowed for a data entity. Example: Grant Create and Read permission for the
Deploymententity, but explicitly deny Delete permission. -
Entity attribute policy: Controls read or write access to specific attributes within an entity. Example: Make the
emailfield of theUserentity read-only for this role. -
Specific policy: Defines permissions for arbitrary, named functionality within the application.
-
-
Click OK to save the new role.