Single Sign-On (SSO)
Flowset Control supports the Single Sign-On (SSO) mechanism, allowing users to log into the system using an external authentication provider via the OpenID Connect (OIDC) protocol. SSO provides centralized user and role management, as well as the ability to use a unified login across all applications in the organization’s infrastructure.
As an example of SSO configuration, below is an integration with the Keycloak identity management system.
Configuring Flowset Control
Enabling SSO Mode
To replace the standard login form with SSO-based authentication, you need to enable OIDC usage and set the Login Mode parameter to oidc:
# Enable OIDC support
jmix.oidc.use-default-configuration=true

# Switch login mode
flowset.control.security.login-mode=oidc
Configuring the OIDC Client
Next, you need to configure a client to connect to your SSO provider.
The configuration is performed using standard Spring Security mechanisms via the application.properties file:
# Keycloak OIDC configuration
spring.security.oauth2.client.registration.keycloak.client-id=<client-id>
spring.security.oauth2.client.registration.keycloak.client-secret=<client_secret>
spring.security.oauth2.client.registration.keycloak.scope=openid, profile, roles

spring.security.oauth2.client.provider.keycloak.issuer-uri=http://localhost:8180/realms/<realm>
spring.security.oauth2.client.provider.keycloak.user-name-attribute=preferred_username

spring.security.oauth2.resourceserver.jwt.issuer-uri=http://localhost:8180/realms/<realm>

jmix.oidc.jwt-authentication-converter.username-claim=preferred_username

jmix.oidc.default-claims-roles-mapper.roles-claim-name=roles
Notes:
-
keycloakis the provider identifier (can be changed, for example, to okta). -
The
client-idandclient-secretparameters are issued by your OpenID provider. -
issuer-uripoints to the OpenID Configuration Endpoint, for example:http://localhost:8180/realms/flowset/.well-known/openid-configuration. -
By default, the
subclaim is used as the username. To change it, use:spring.security.oauth2.client.provider.keycloak.user-name-attribute=preferred_username
Flowset Control implements OIDC support using the Jmix OIDC Add-on. You can read more about configuration here: official documentation.
Container Configuration (Docker)
If Flowset Control is deployed in a container, OIDC parameters can be passed via environment variables in the docker-compose.yml file:
services:
  flowset-control-app:
    image: flowset/flowset-control-community:latest
    container_name: flowset-control-app
    restart: "no"
    environment:
      MAIN_DATASOURCE_URL: "jdbc:postgresql://flowset-control-database/flowset-control"
      MAIN_DATASOURCE_USERNAME: "root"
      MAIN_DATASOURCE_PASSWORD: "root"
      SERVER_PORT: "8081"
      SPRING_SECURITY_OAUTH2_CLIENT_REGISTRATION_KEYCLOAK_CLIENTID: "<client-id>"
      SPRING_SECURITY_OAUTH2_CLIENT_REGISTRATION_KEYCLOAK_CLIENTSECRET: "<client-secret>"
      SPRING_SECURITY_OAUTH2_CLIENT_PROVIDER_KEYCLOAK_ISSUERURI: "http://localhost:8180/realms/<realm>"
      SPRING_SECURITY_OAUTH2_RESOURCESERVER_JWT_ISSUERURI: "http://localhost:8180/realms/<realm>"
      SPRING_SECURITY_OAUTH2_CLIENT_PROVIDER_KEYCLOAK_USERNAMEATTRIBUTE: "preferred_username"
      SPRING_SECURITY_OAUTH2_CLIENT_REGISTRATION_KEYCLOAK_SCOPE: "openid, profile, roles"
      JMIX_OIDC_JWTAUTHENTICATIONCONVERTER_USERNAMECLAIM: "preferred_username"
      JMIX_OIDC_DEFAULTCLAIMSROLESMAPPER_ROLESCLAIMNAME: "roles"
      JMIX_OIDC_USEDEFAULTCONFIGURATION: "true"
      FLOWSET_CONTROL_SECURITY_LOGINMODE: "oidc"
    ports:
      - "8081:8081"
    depends_on:
      flowset-control-database:
        condition: service_started
    networks:
      - flowset-control-net

  flowset-control-database:
    image: postgres:16.3
    container_name: flowset-control-database
    restart: "no"
    environment:
      POSTGRES_DB: "flowset-control"
      POSTGRES_USER: "root"
      POSTGRES_PASSWORD: "root"
    volumes:
      - flowset-control-database_data:/var/lib/postgresql/data
    networks:
      - flowset-control-net

volumes:
  flowset-control-database_data:

networks:
  flowset-control-net:
    driver: bridge
Setting Up a Local Keycloak Instance
One of the most popular OpenID providers is Keycloak. To explore the Jmix OIDC add-on, you can run Keycloak locally using Docker.
Running Keycloak with Docker
Use the following command to run a Keycloak instance via Docker on port 8180:
docker run -p 8180:8080 \
    -e KEYCLOAK_ADMIN=admin \
    -e KEYCLOAK_ADMIN_PASSWORD=admin \
    --name keycloak \
    quay.io/keycloak/keycloak:22.0 start-dev
See the Keycloak documentation for more details.
Keycloak URL: http://localhost:8180
Admin credentials:
Username: admin
Password: admin
You can read about configuring a Keycloak instance in the Server Administration Guide.
Configuring Keycloak for Flowset Control
Creating a Realm
Log in to the Keycloak Admin Console and complete the following steps:
-
In the left panel, click Add Realm.

-
Enter a realm name, for example
flowset. -
Click Create.

Creating a Client
A client represents the Flowset Control application that will use Keycloak for authentication.
-
Open Clients and click Create.
-
Specify parameters:
Parameter Value Client ID
flowset-controlClient Protocol
openid-connect
-
In the Capability config section:
Parameter Value Client authentication
ON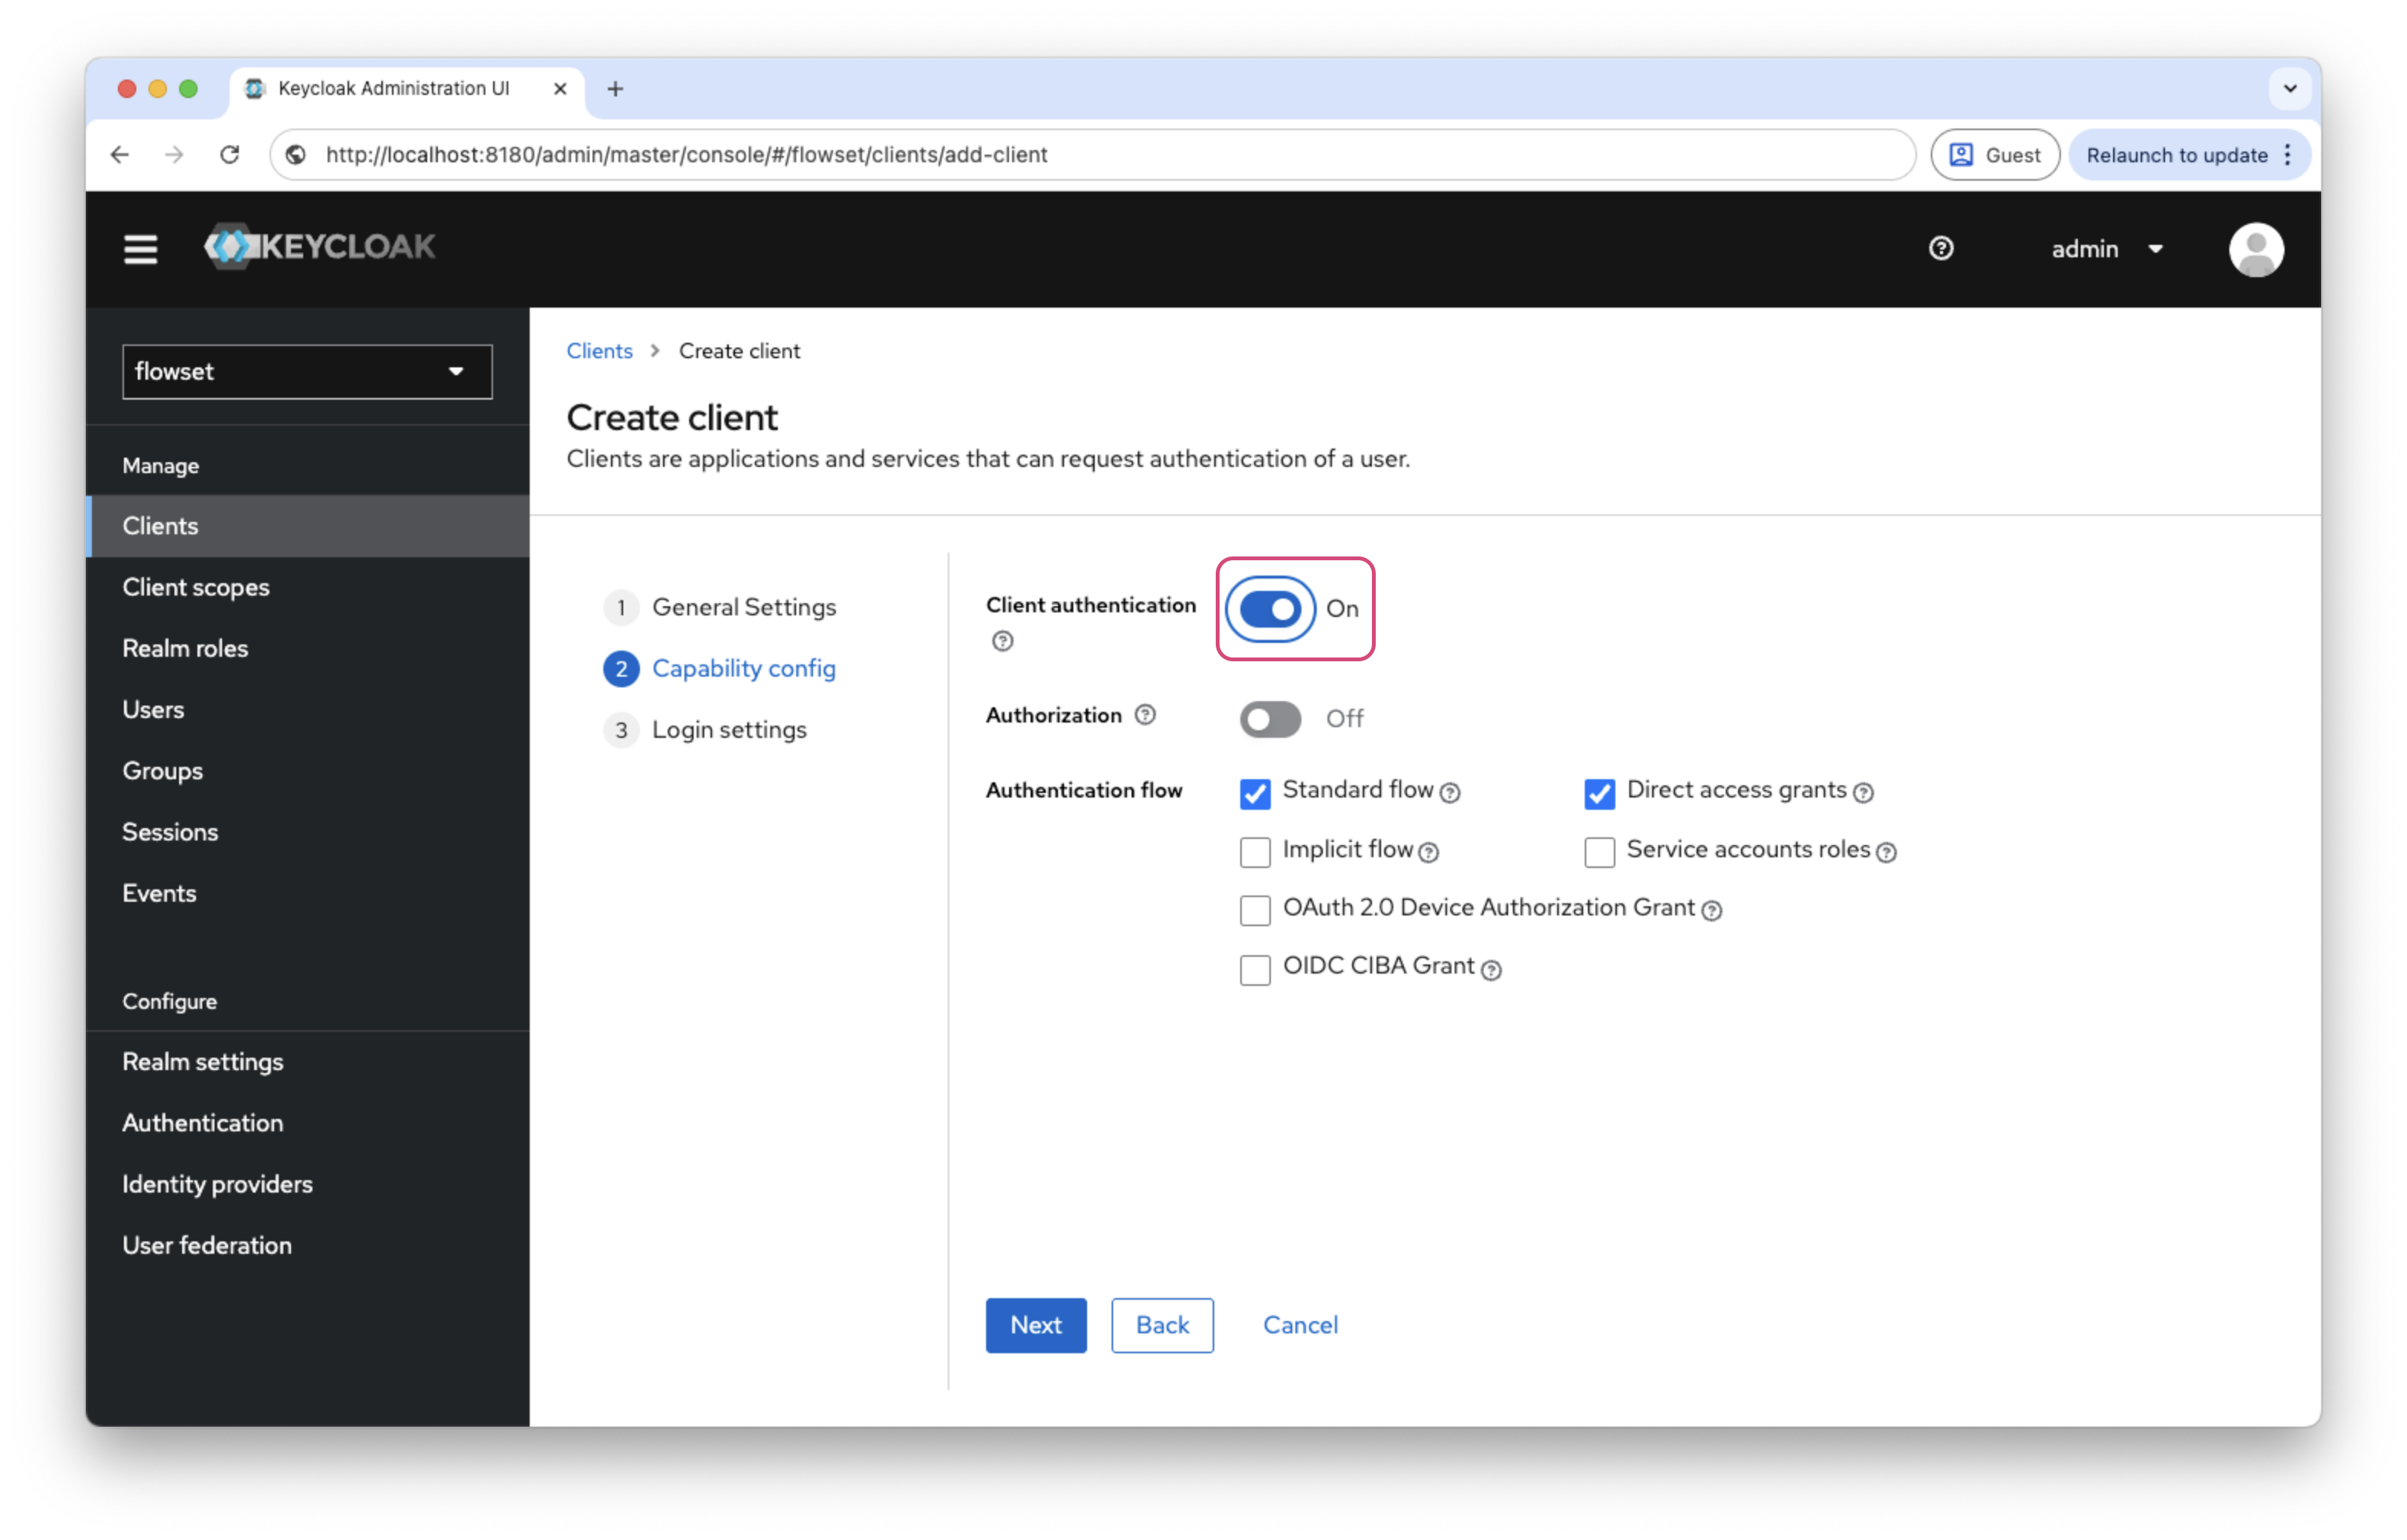
-
In the Login Settings section, set:
Parameter Value Valid Redirect URIs
*(development only)Valid post logout redirect URIs
*(development only)Web Origins
*(development only)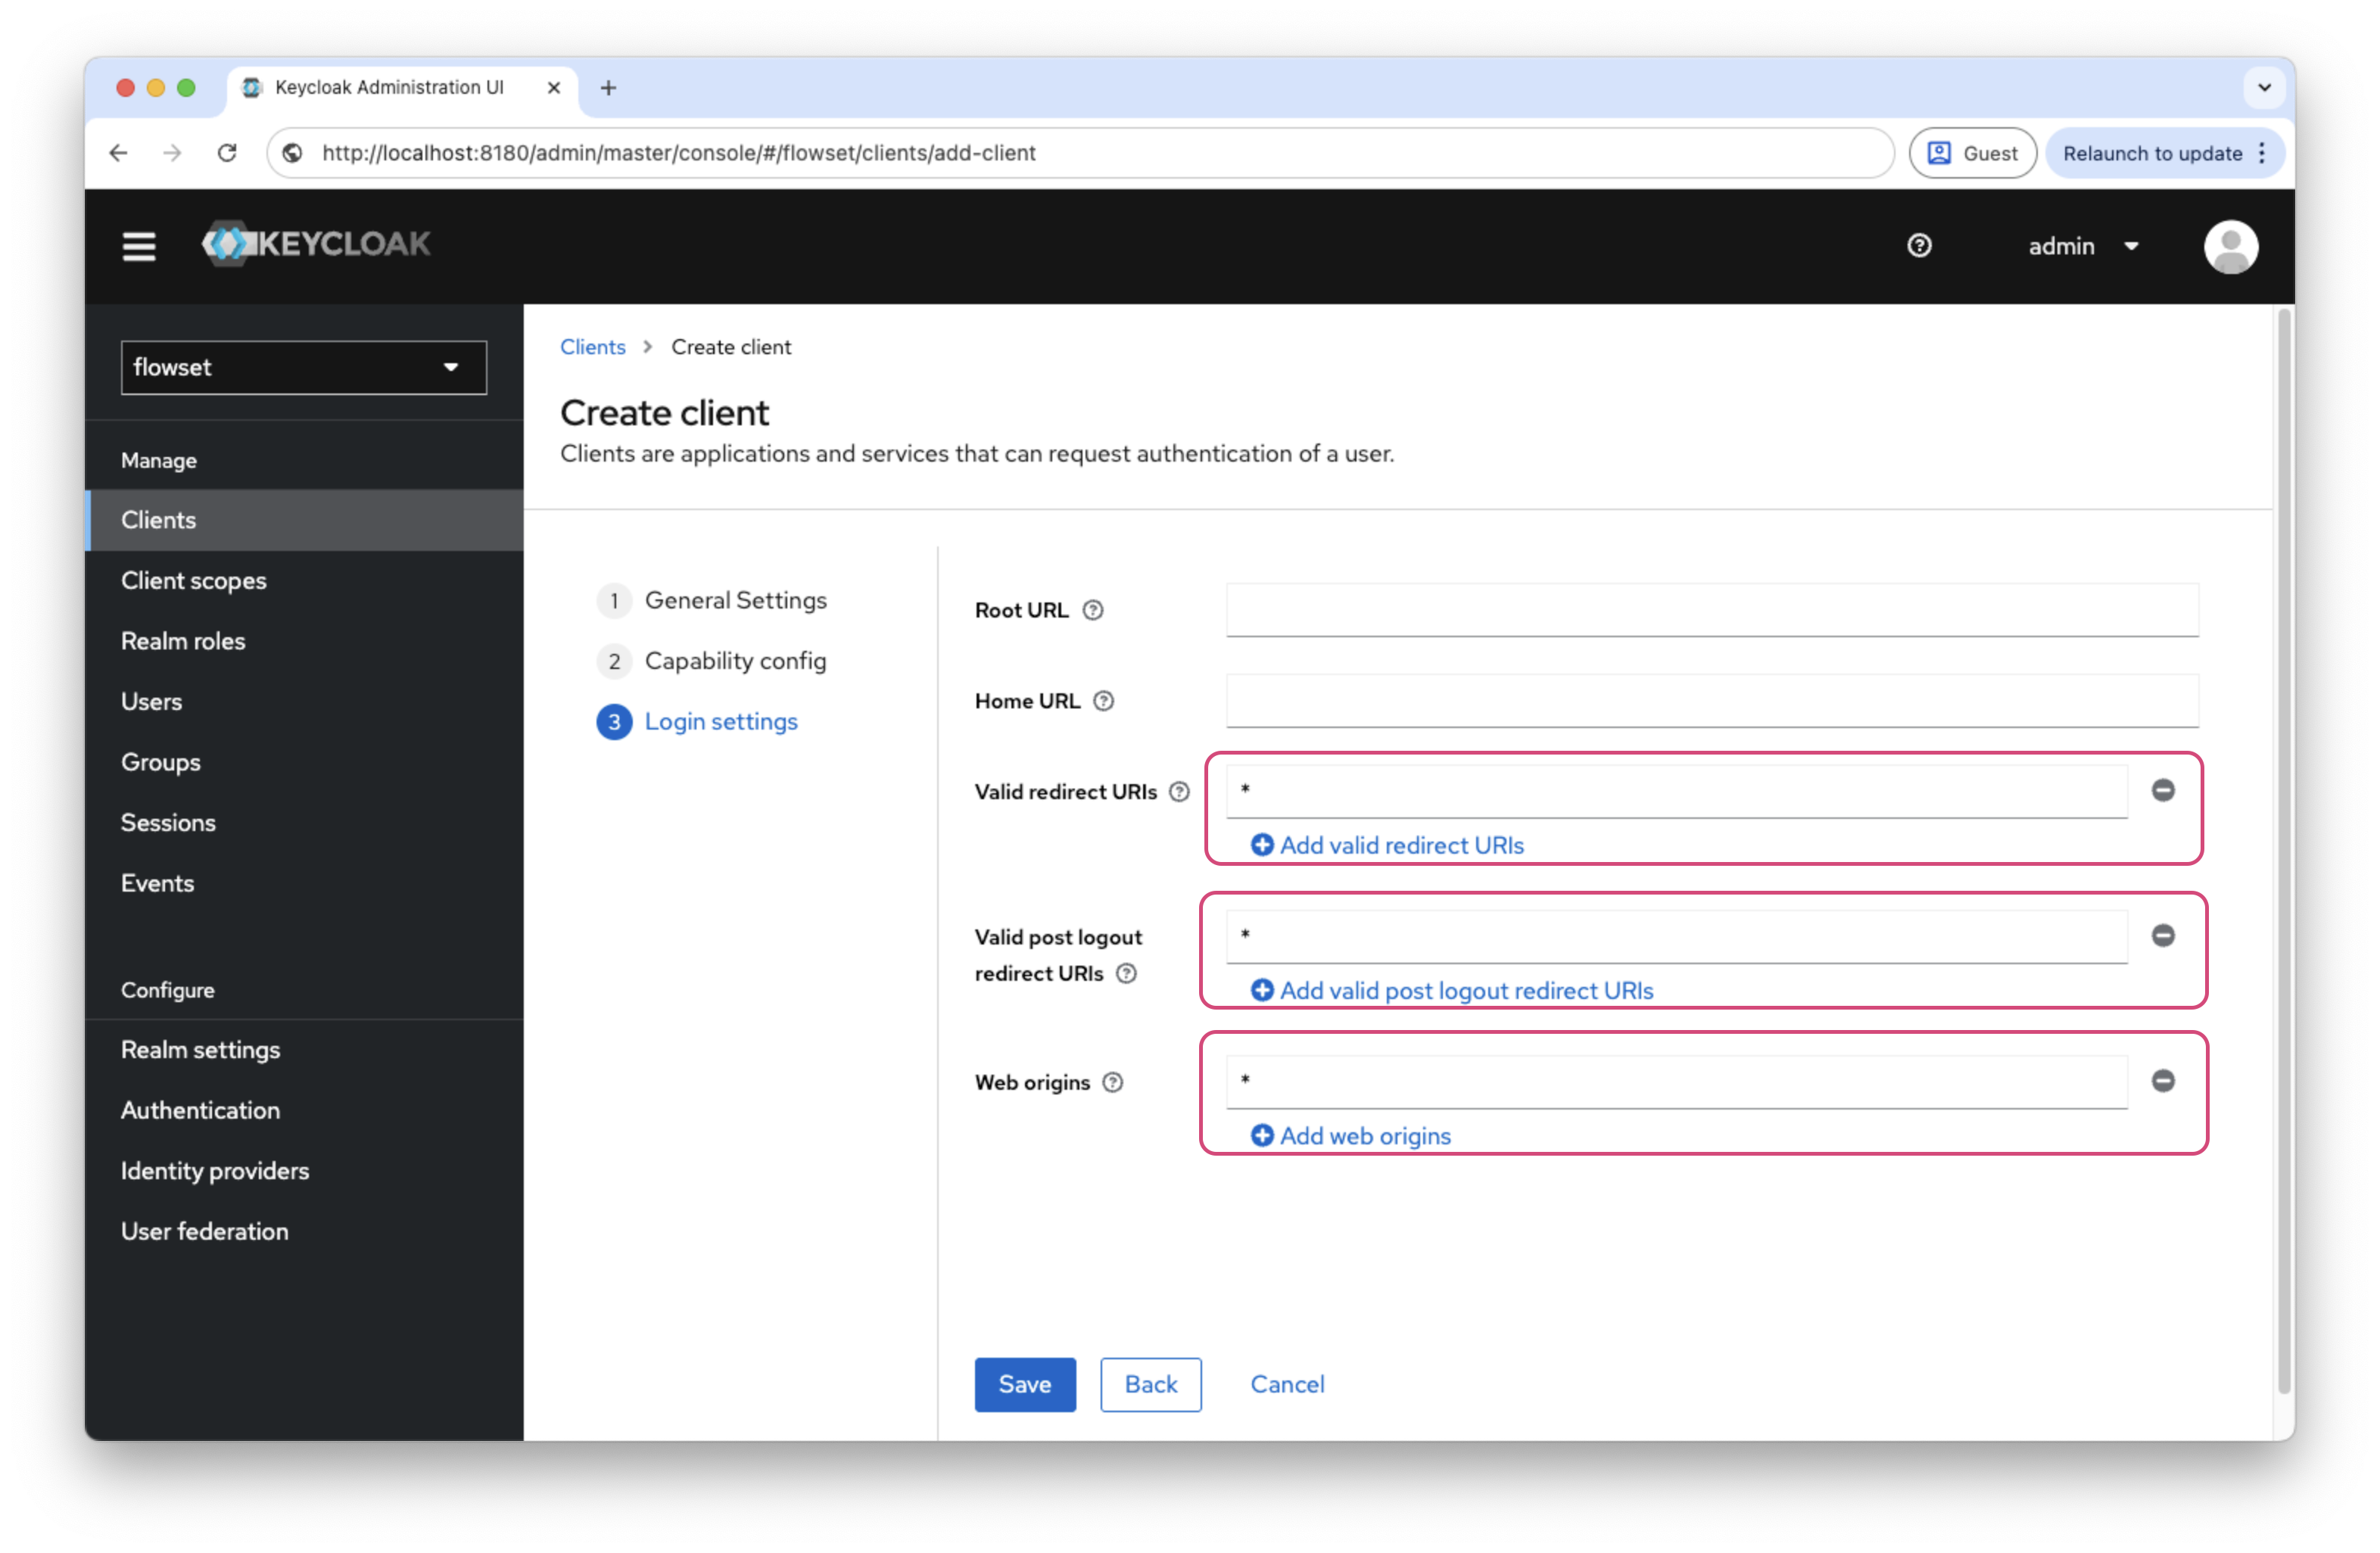
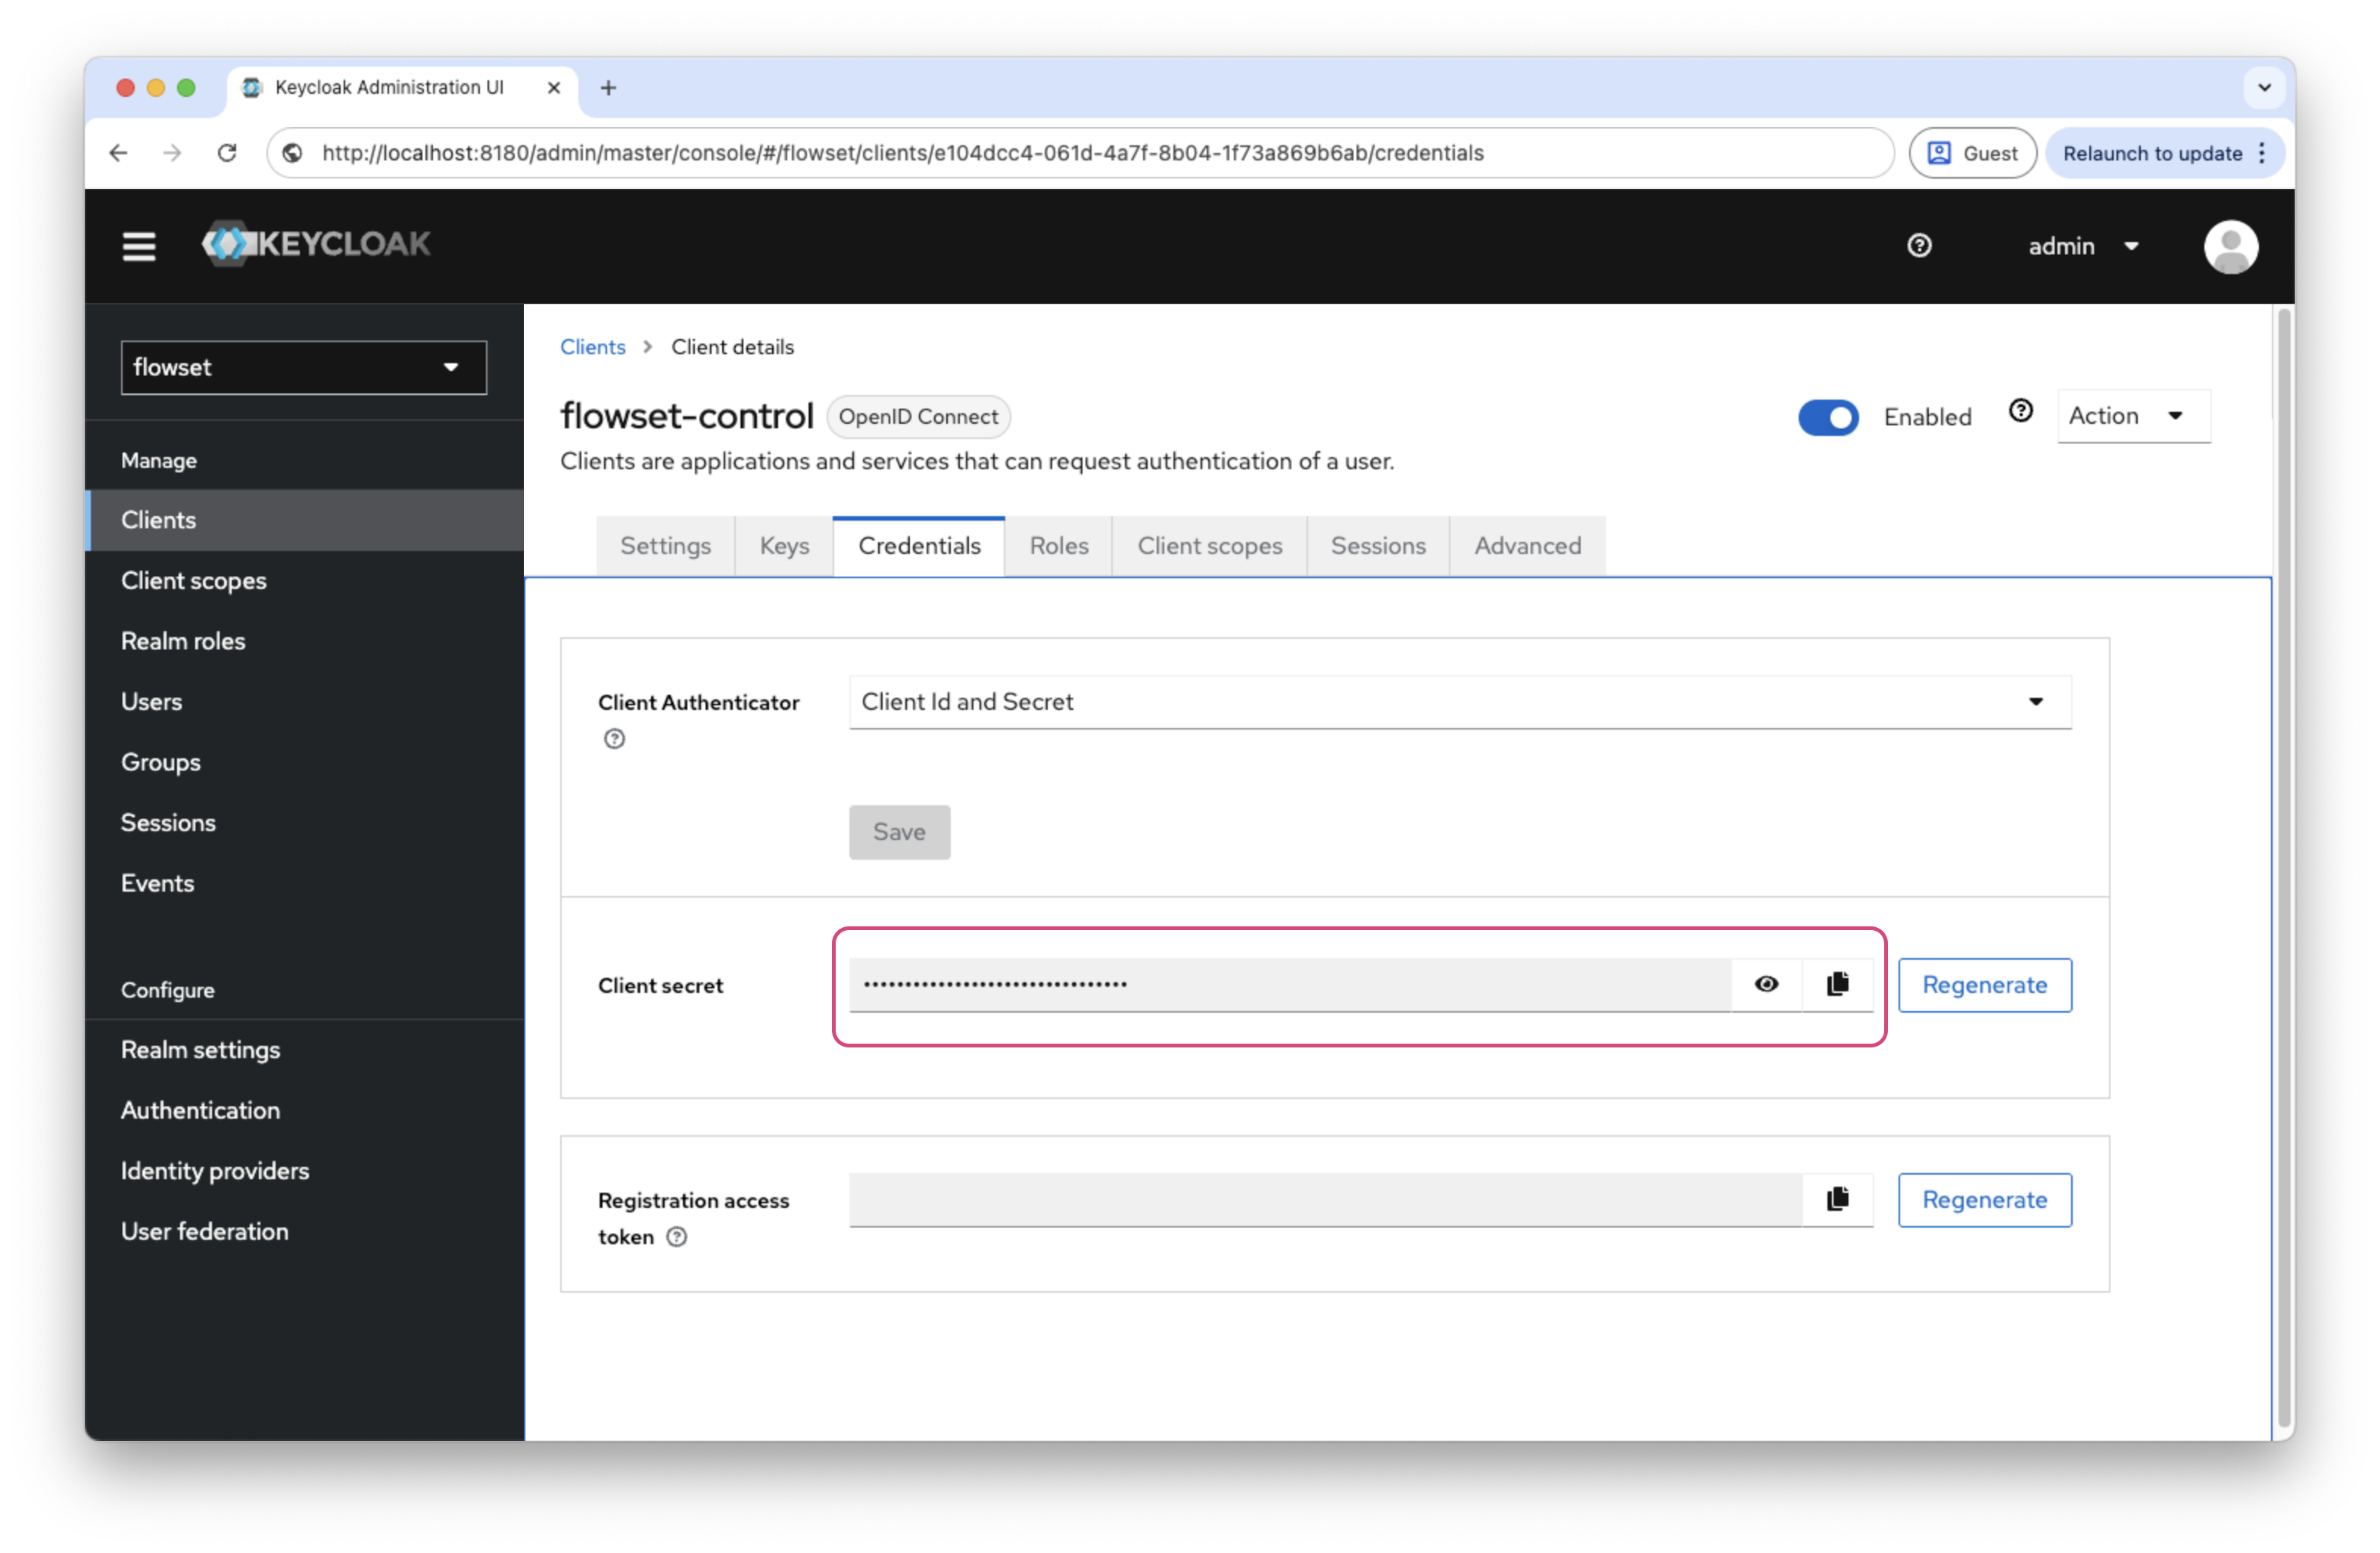
After saving the client, go to the Credentials tab and copy the Client Secret. This secret will be used in the Flowset Control configuration.
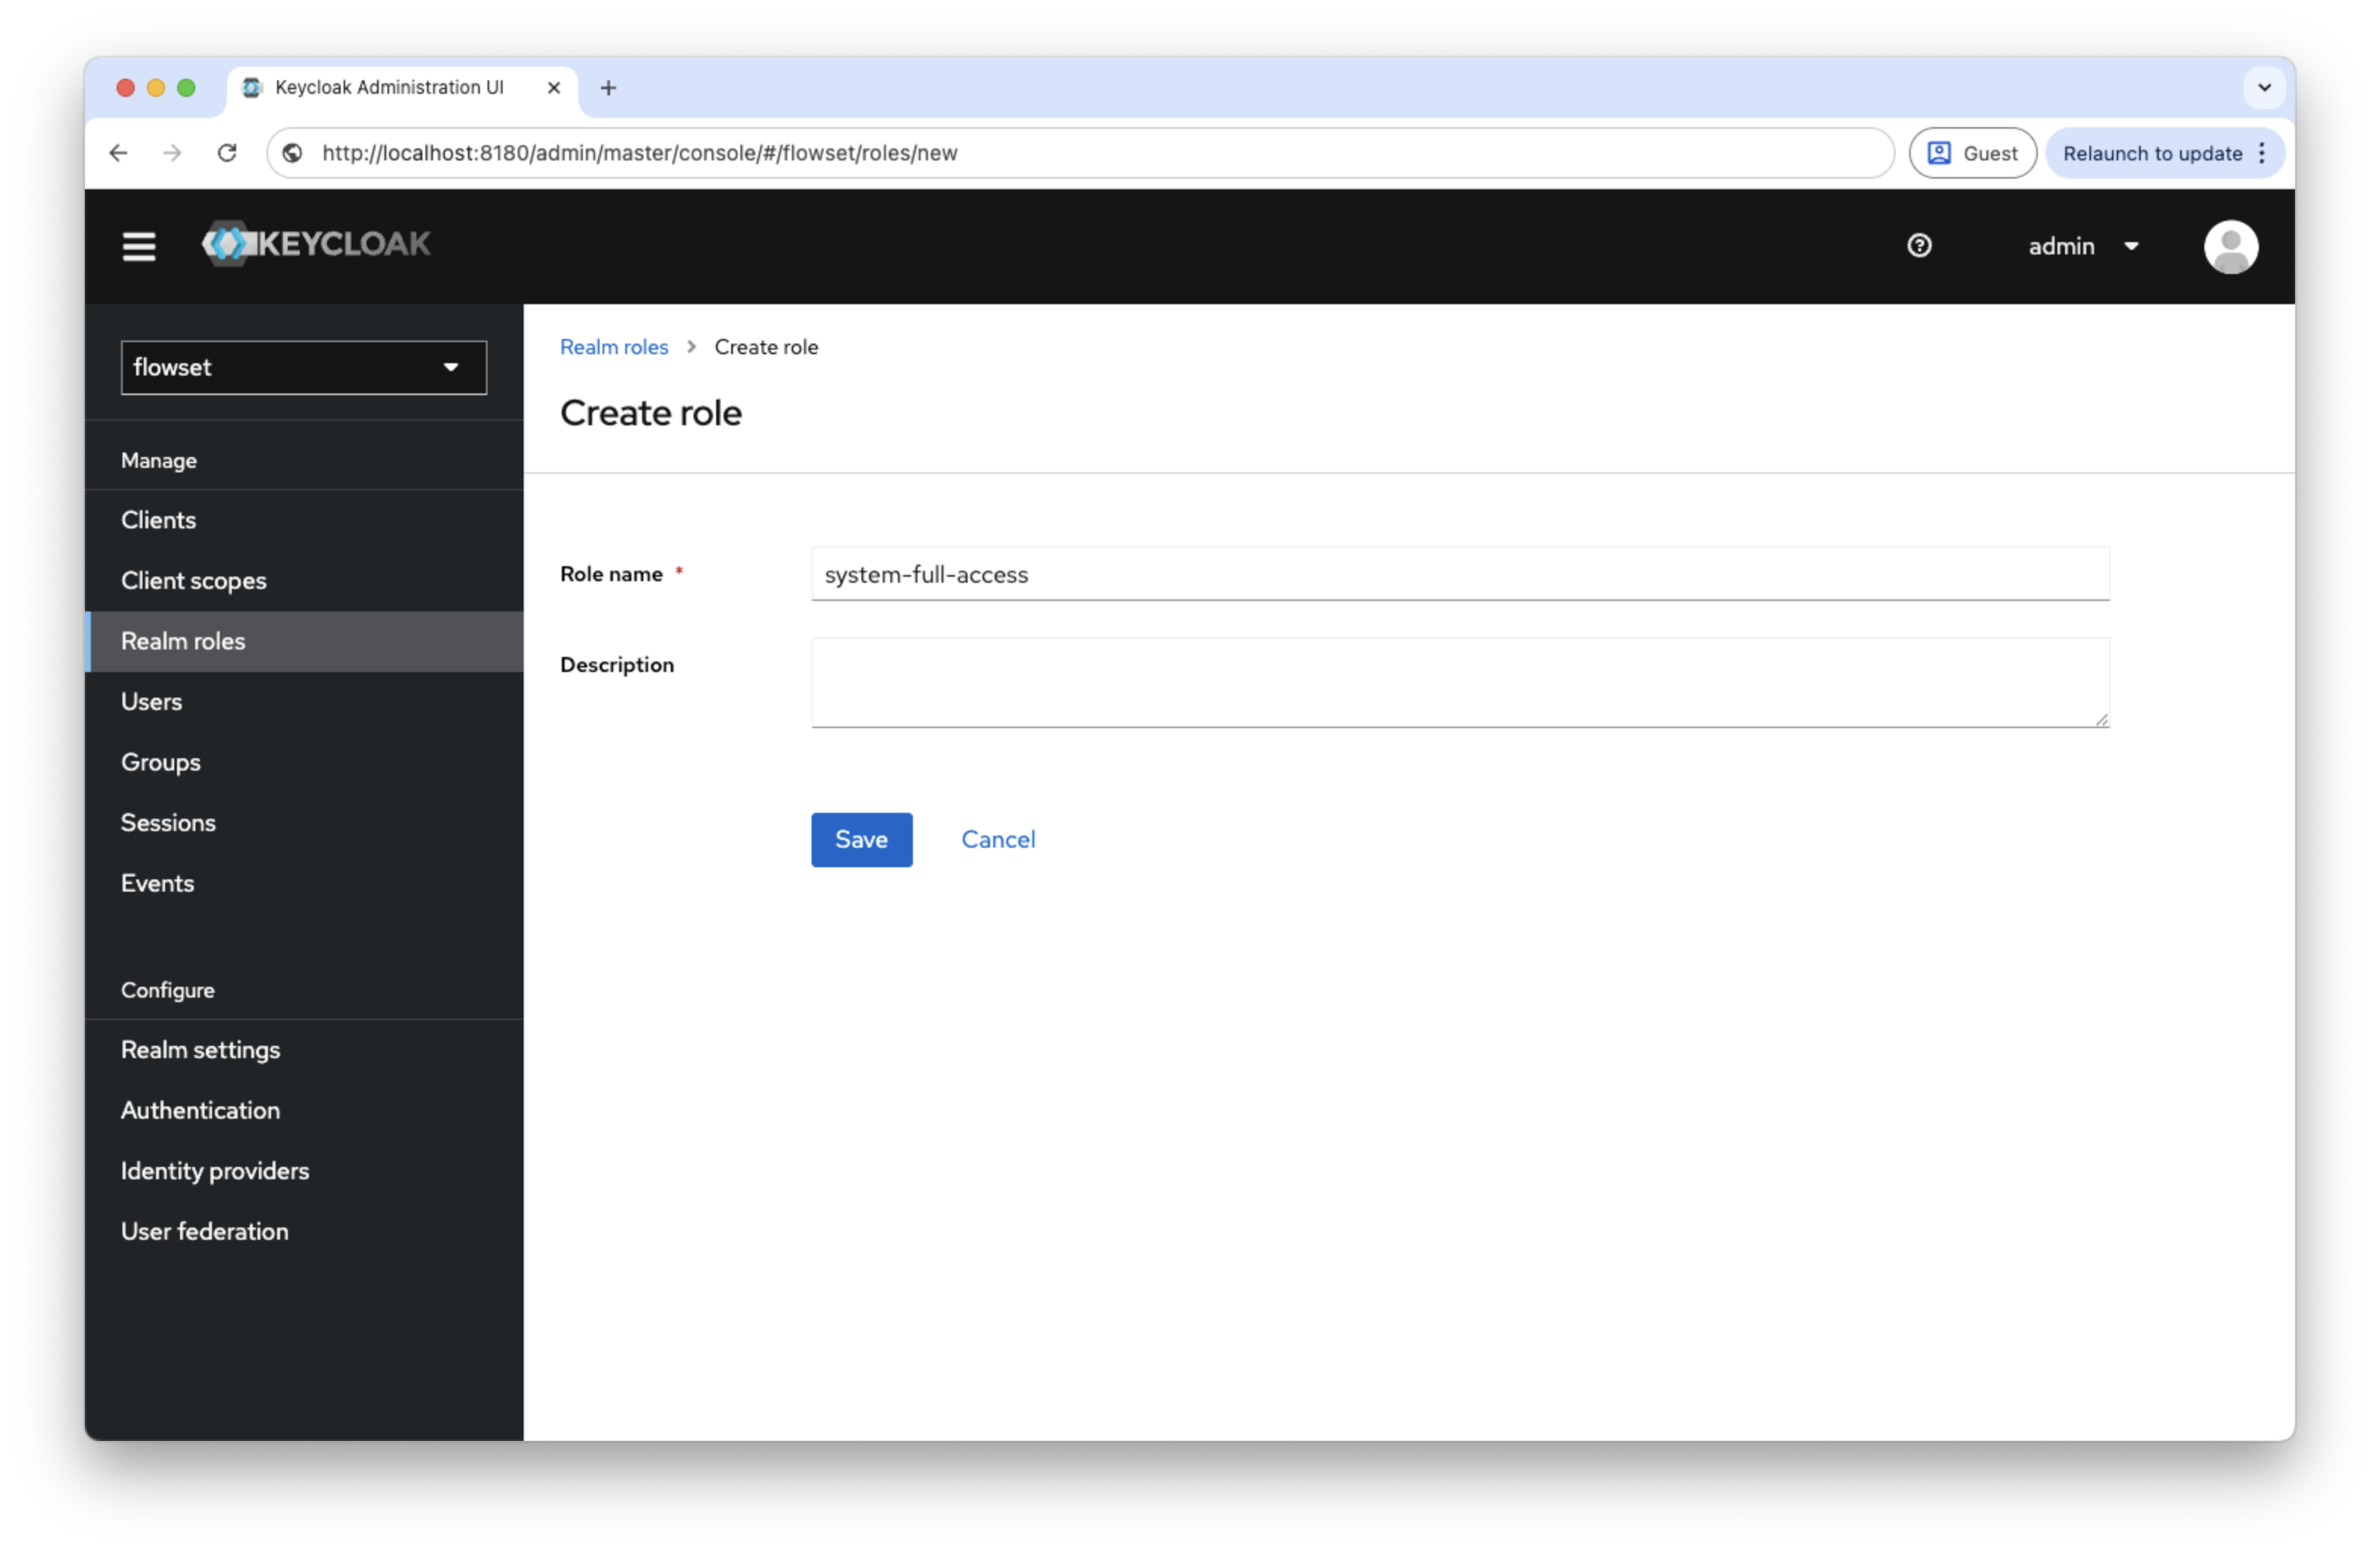
Creating Roles
Roles in Keycloak must match the role codes used in Jmix/Flowset Control.
-
Open Realm roles → Add Role.
-
Enter a role name, for example
system-full-access. -
Save the changes.
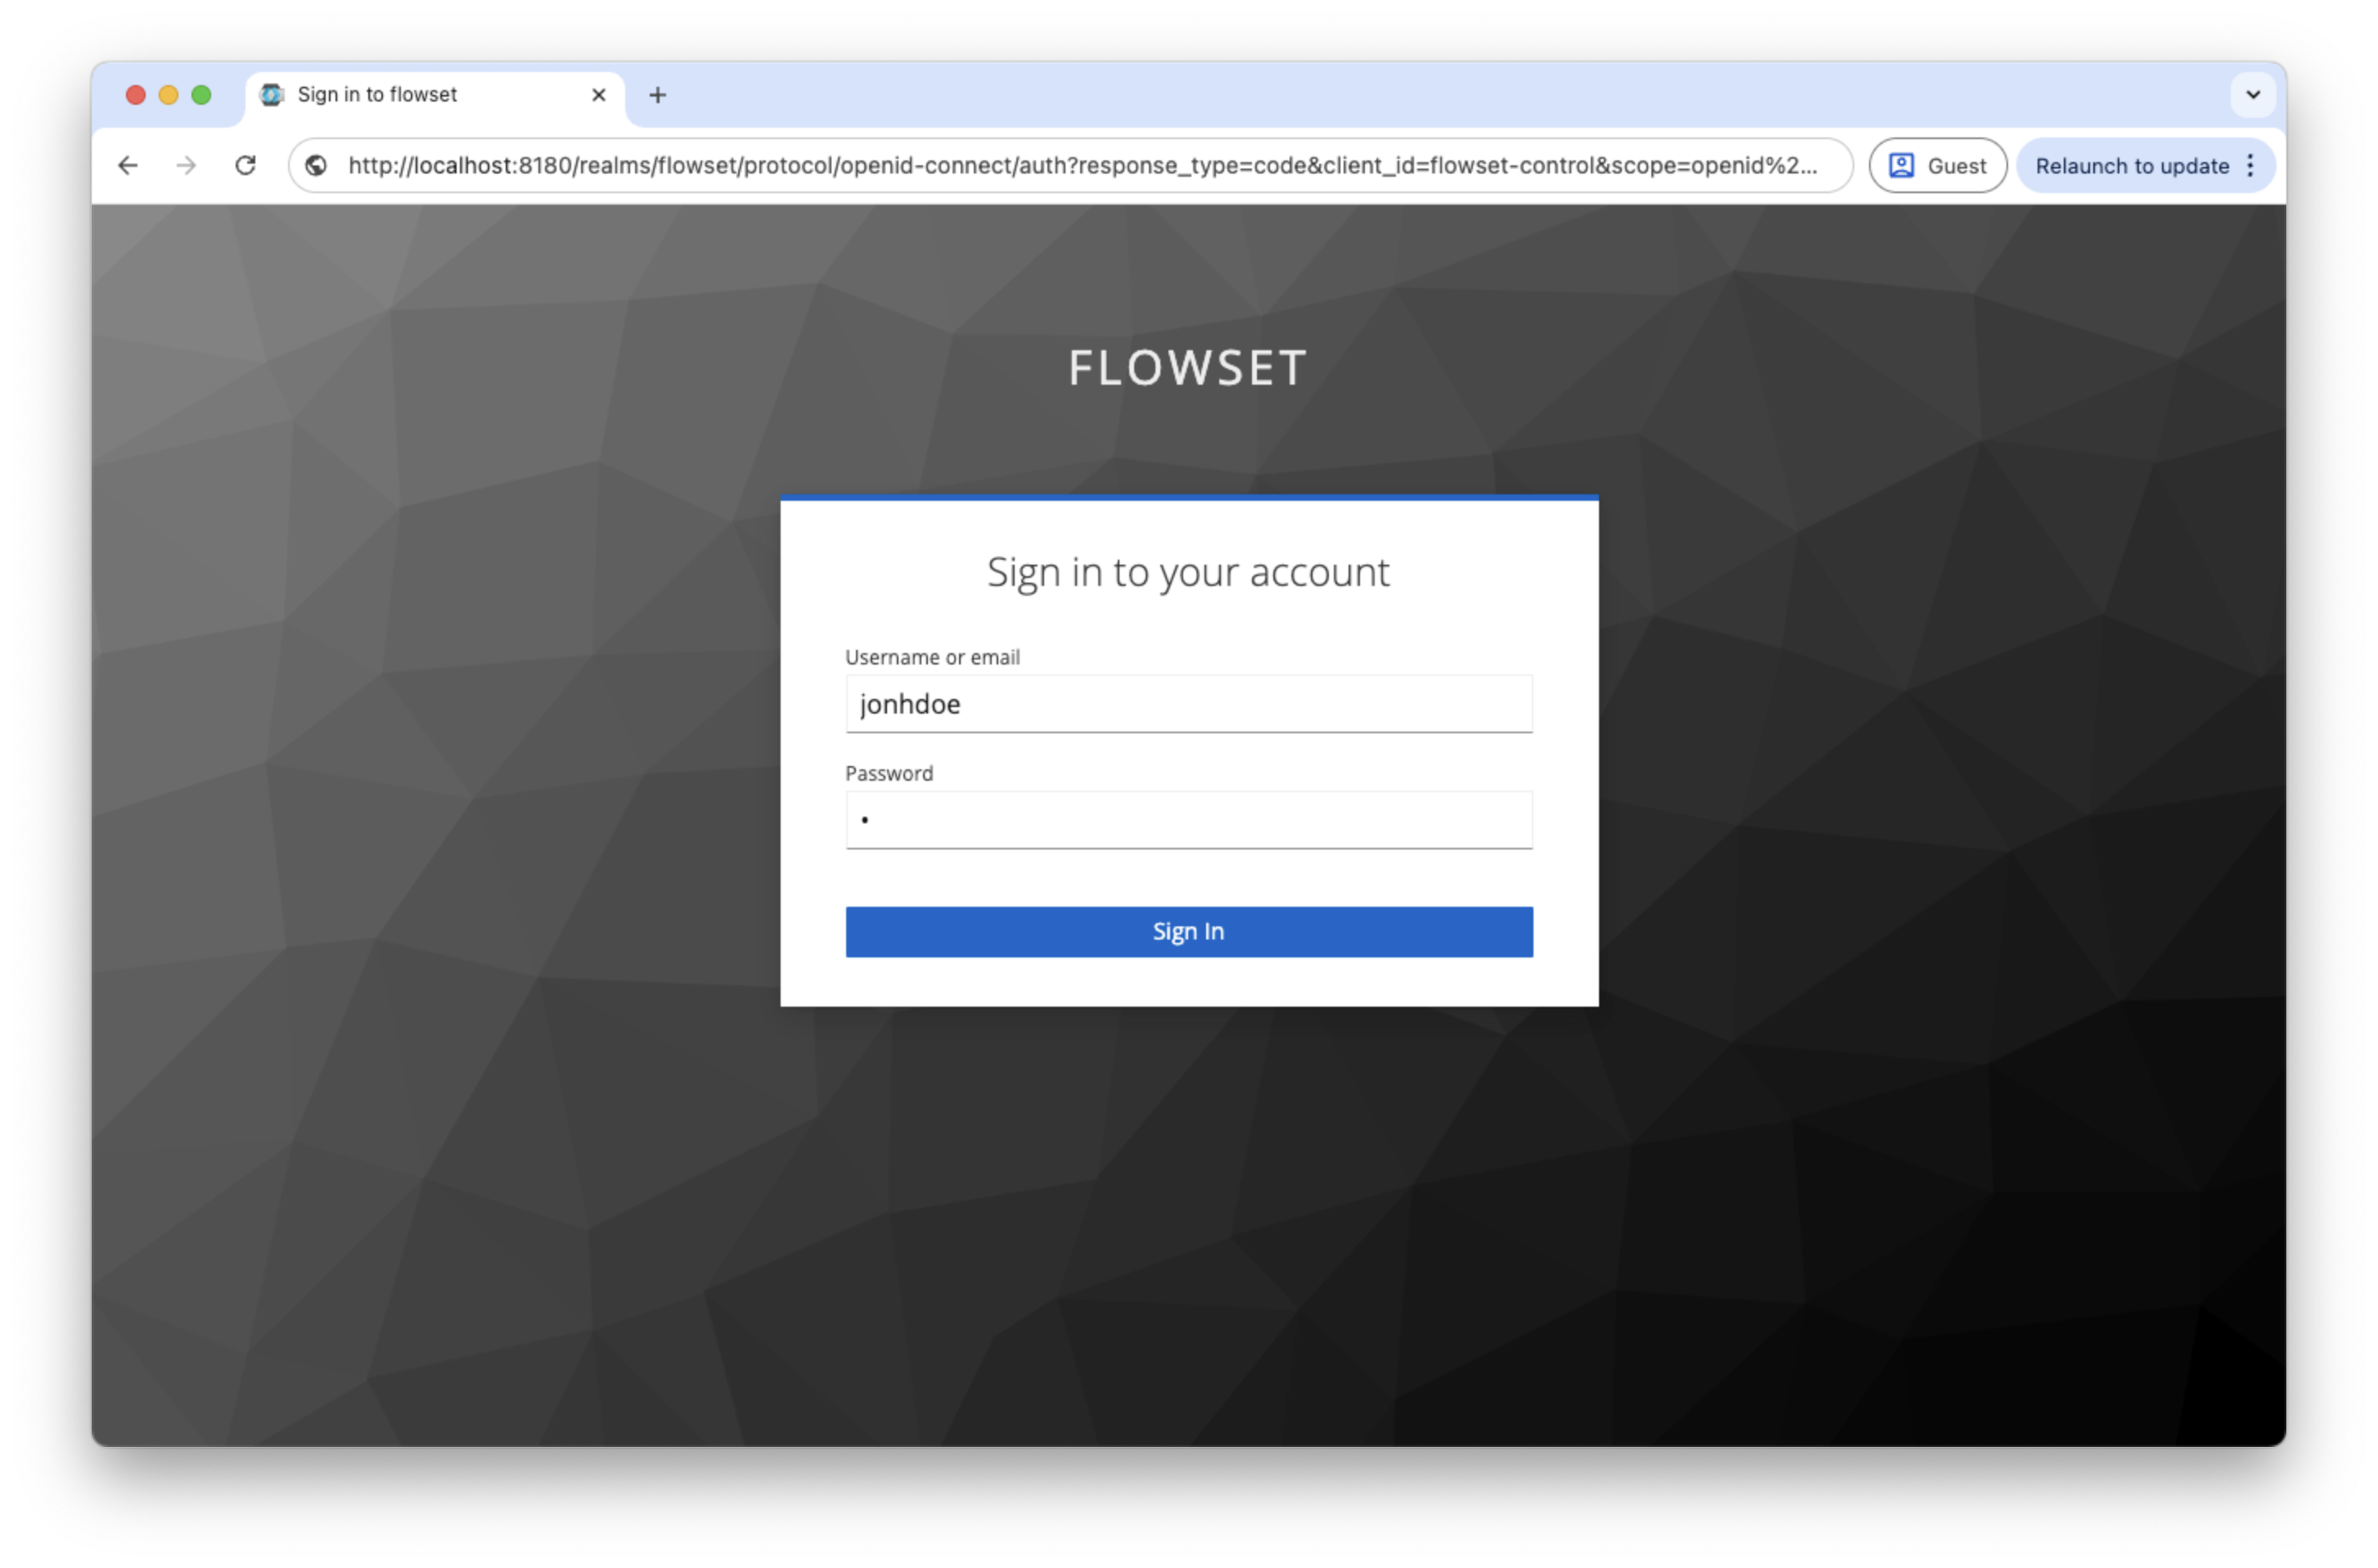
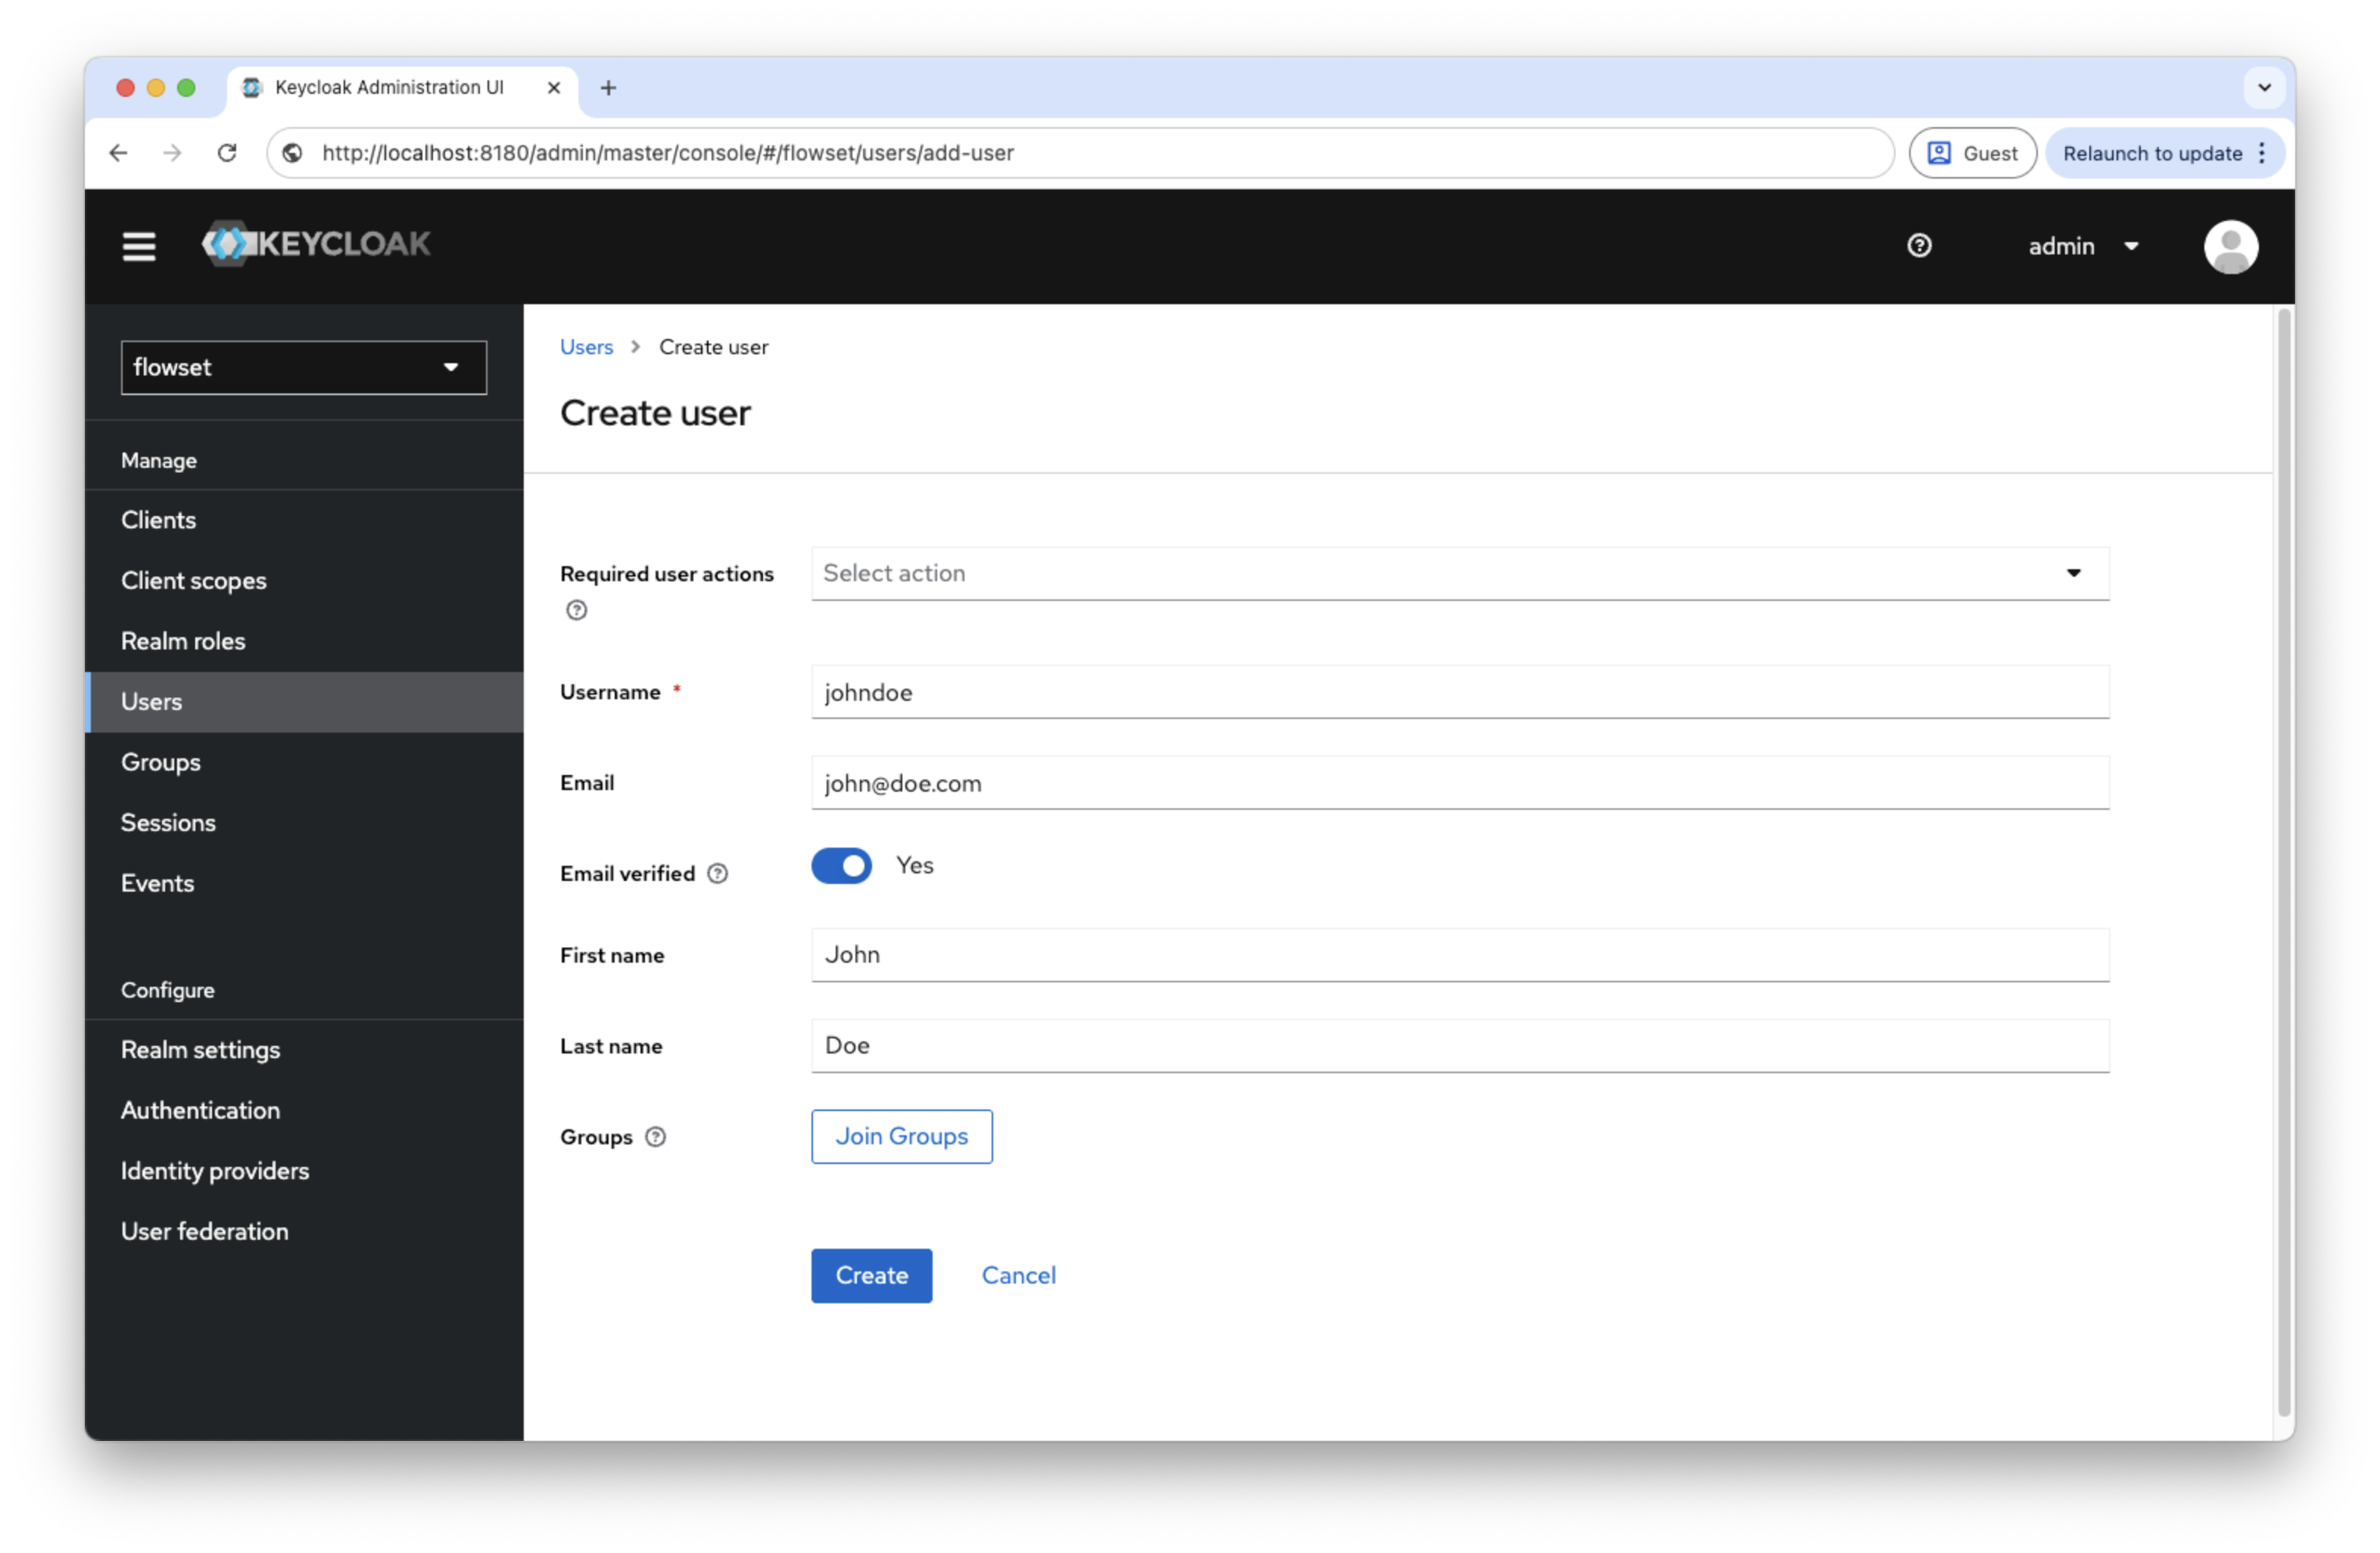
Creating a User
-
Open Users → Add User.
-
Enter a username, for example
johndoe. -
Save.
After saving:
-
On the Credentials tab, set a password for the user.
-
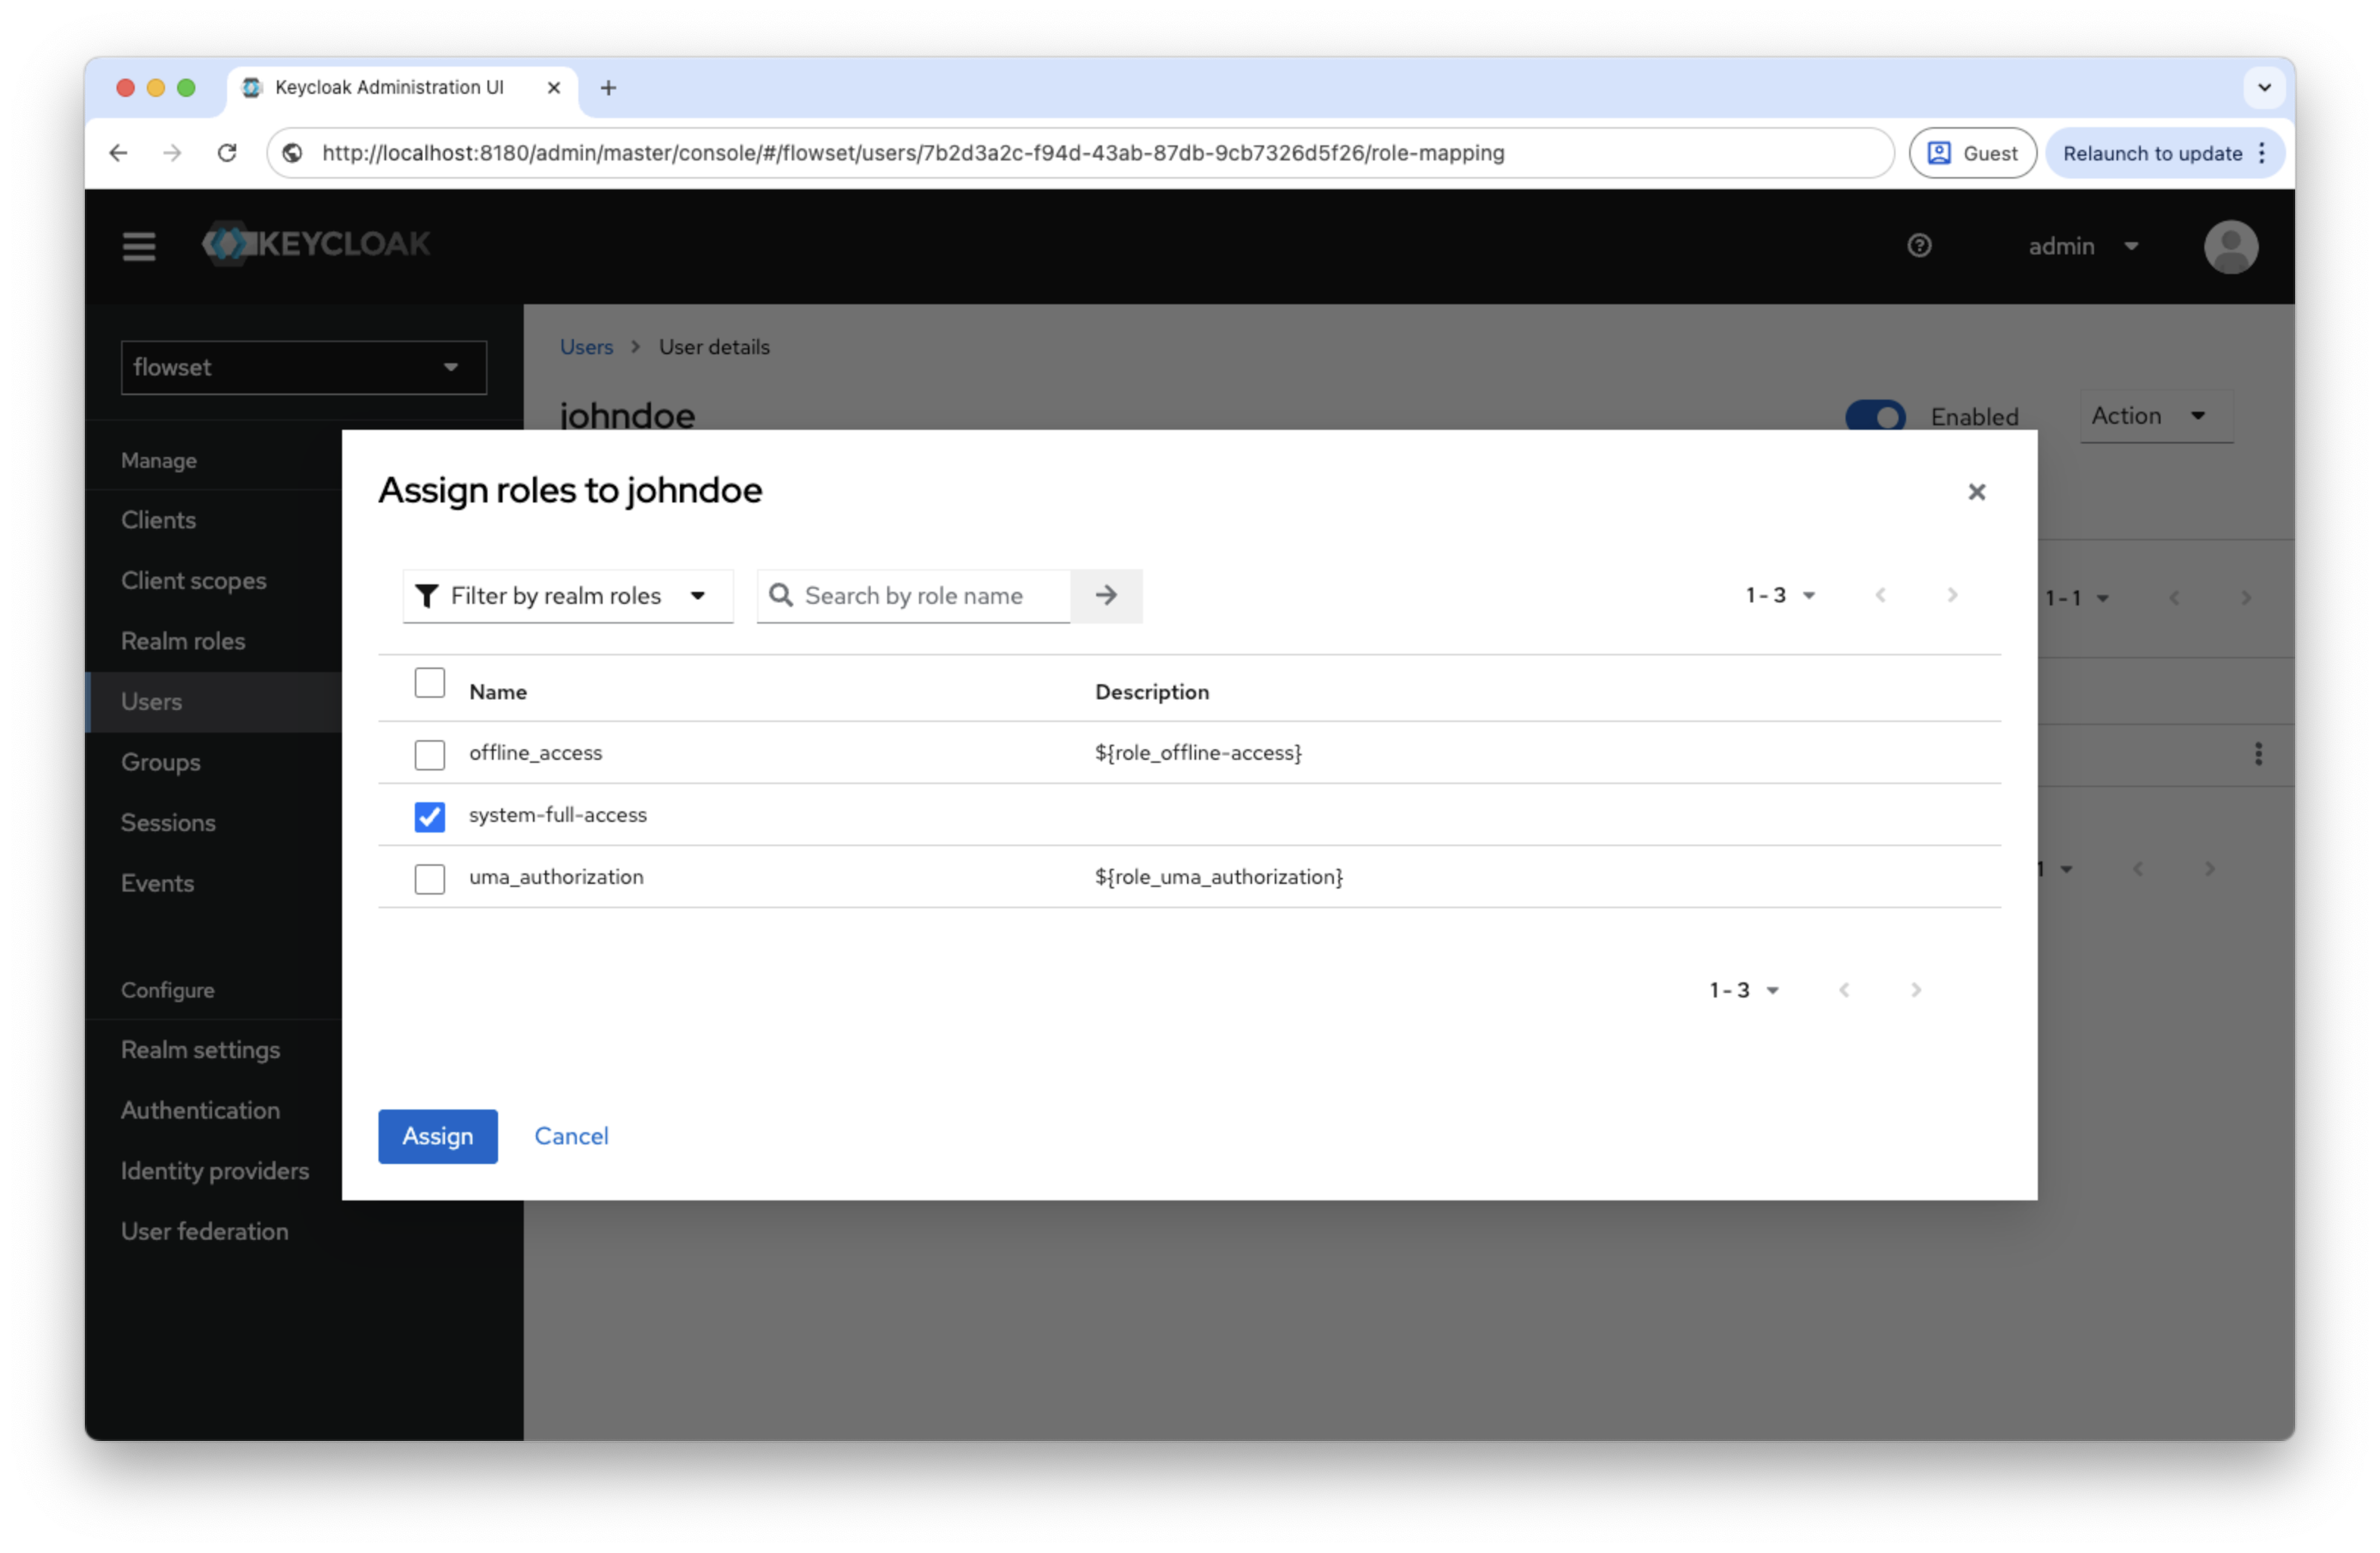
On the Role Mappings tab, assign the
system-full-accessrole.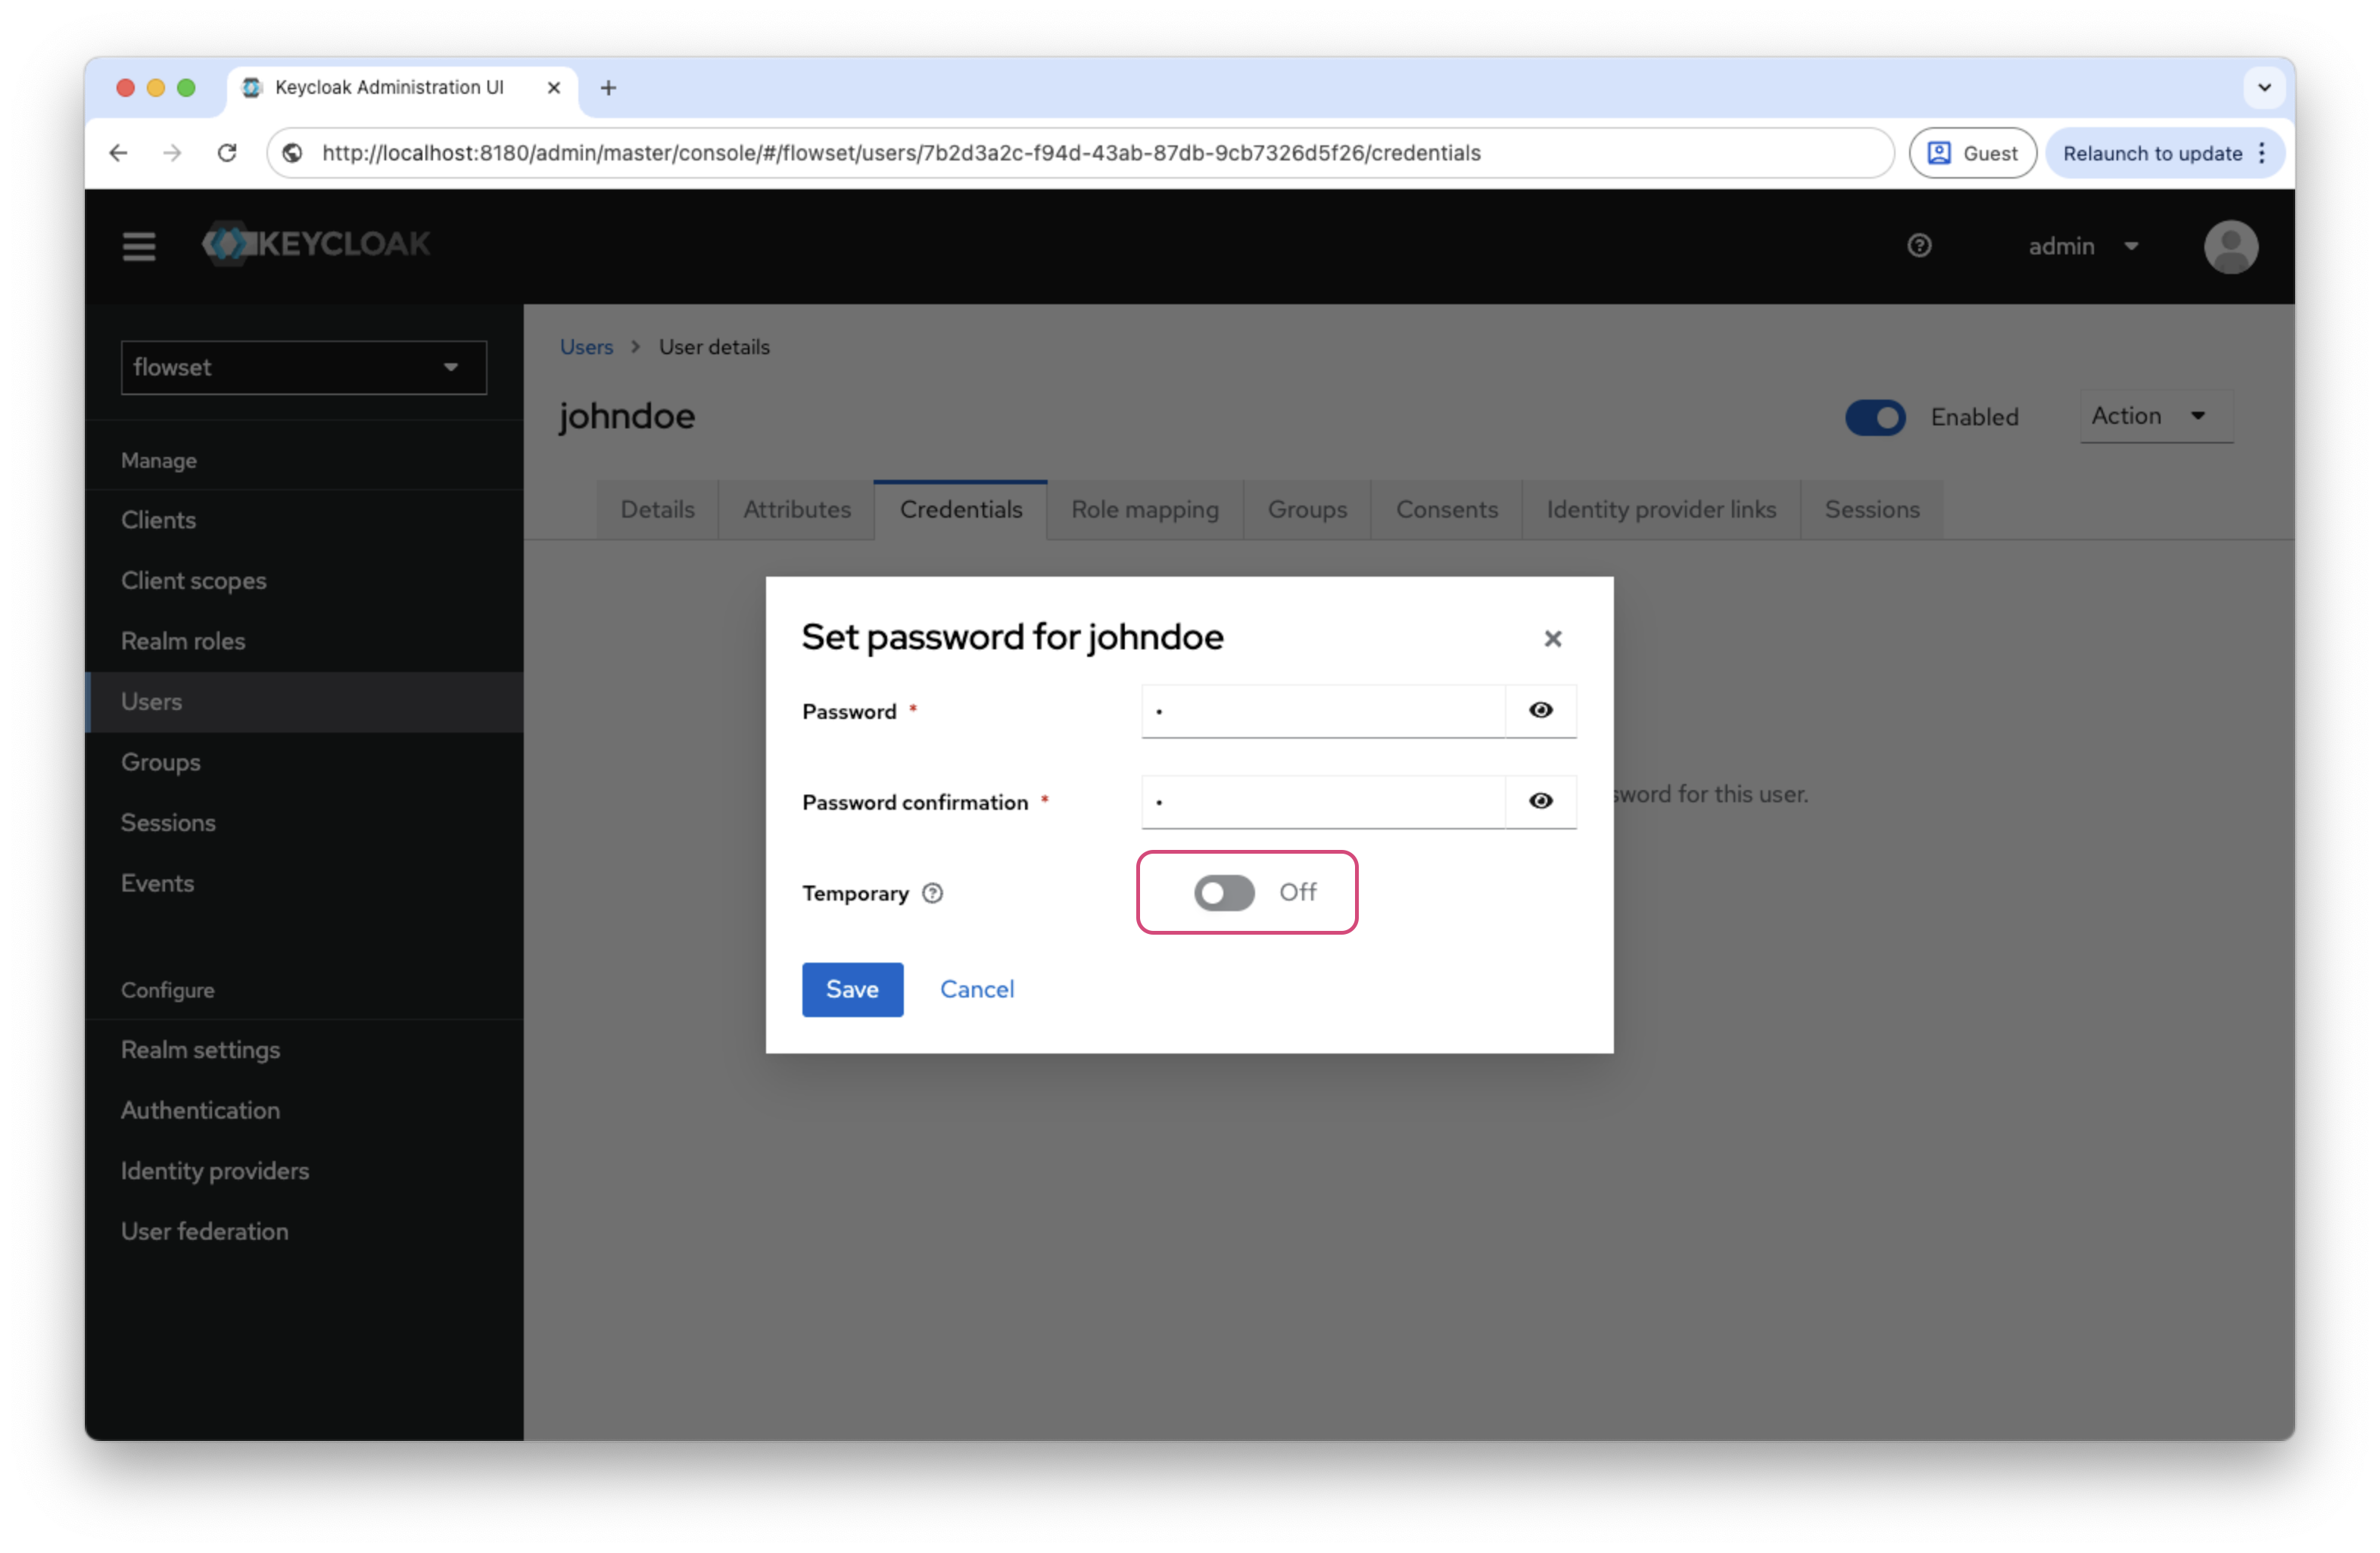
-
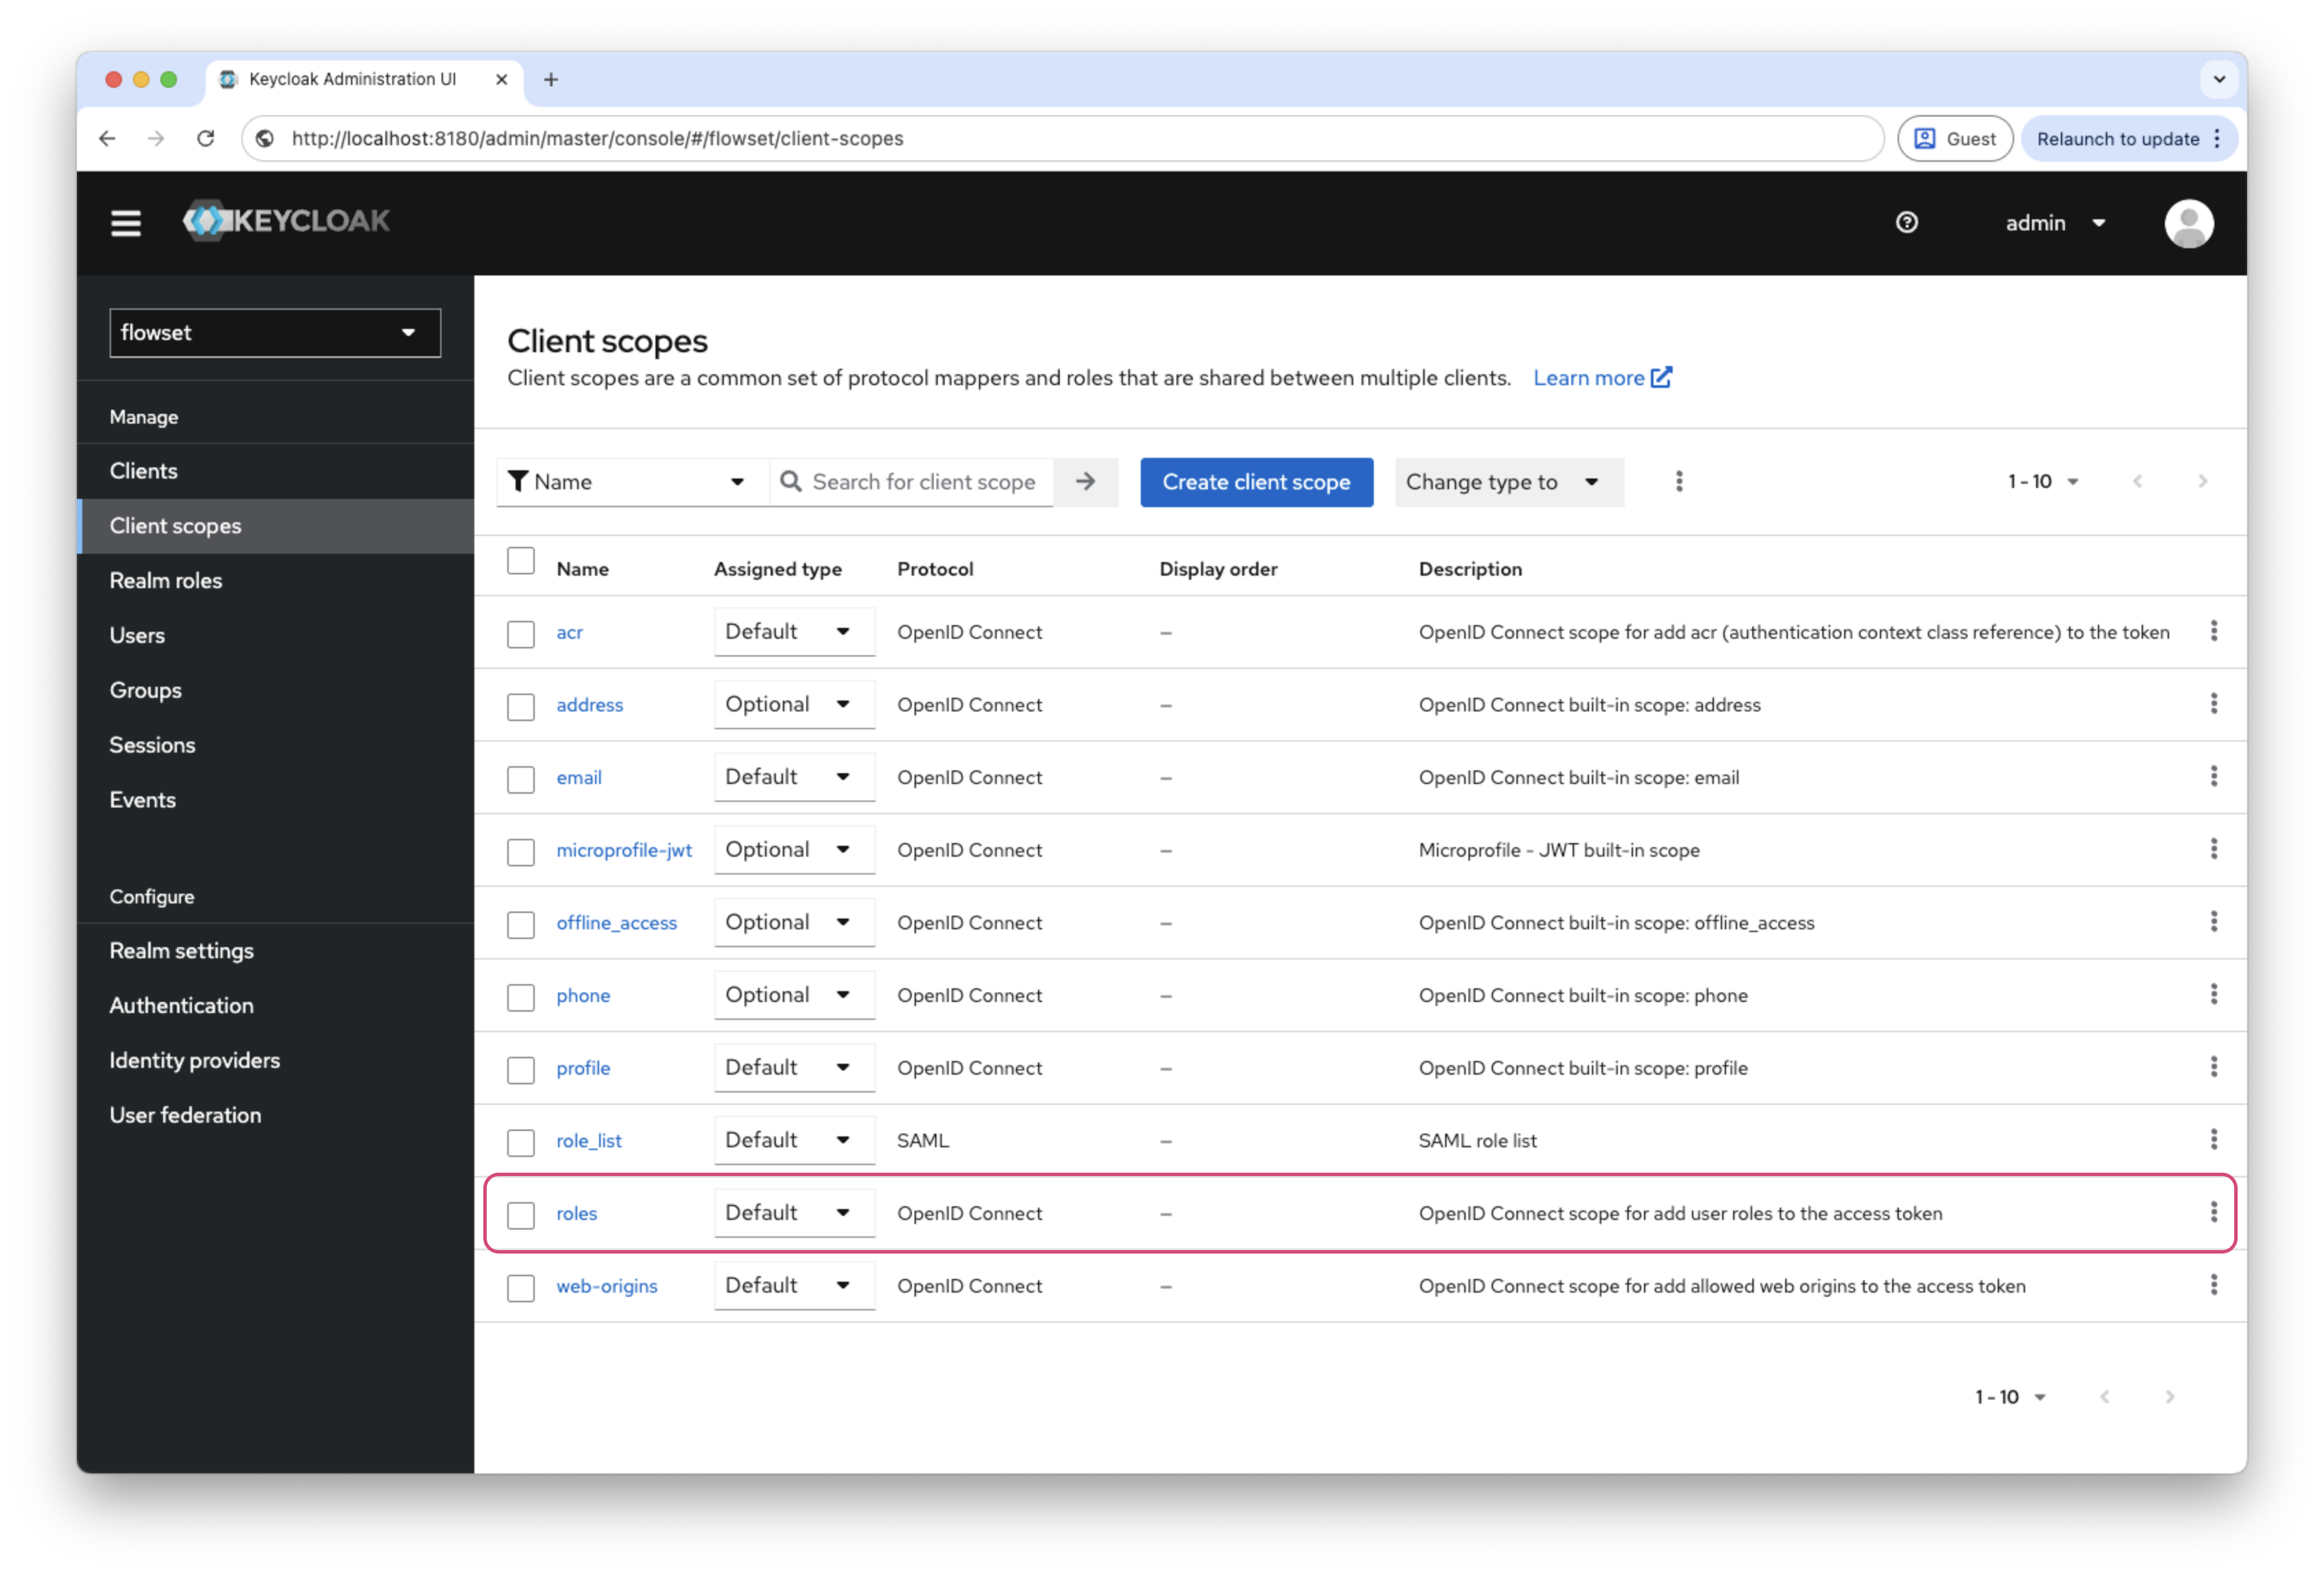
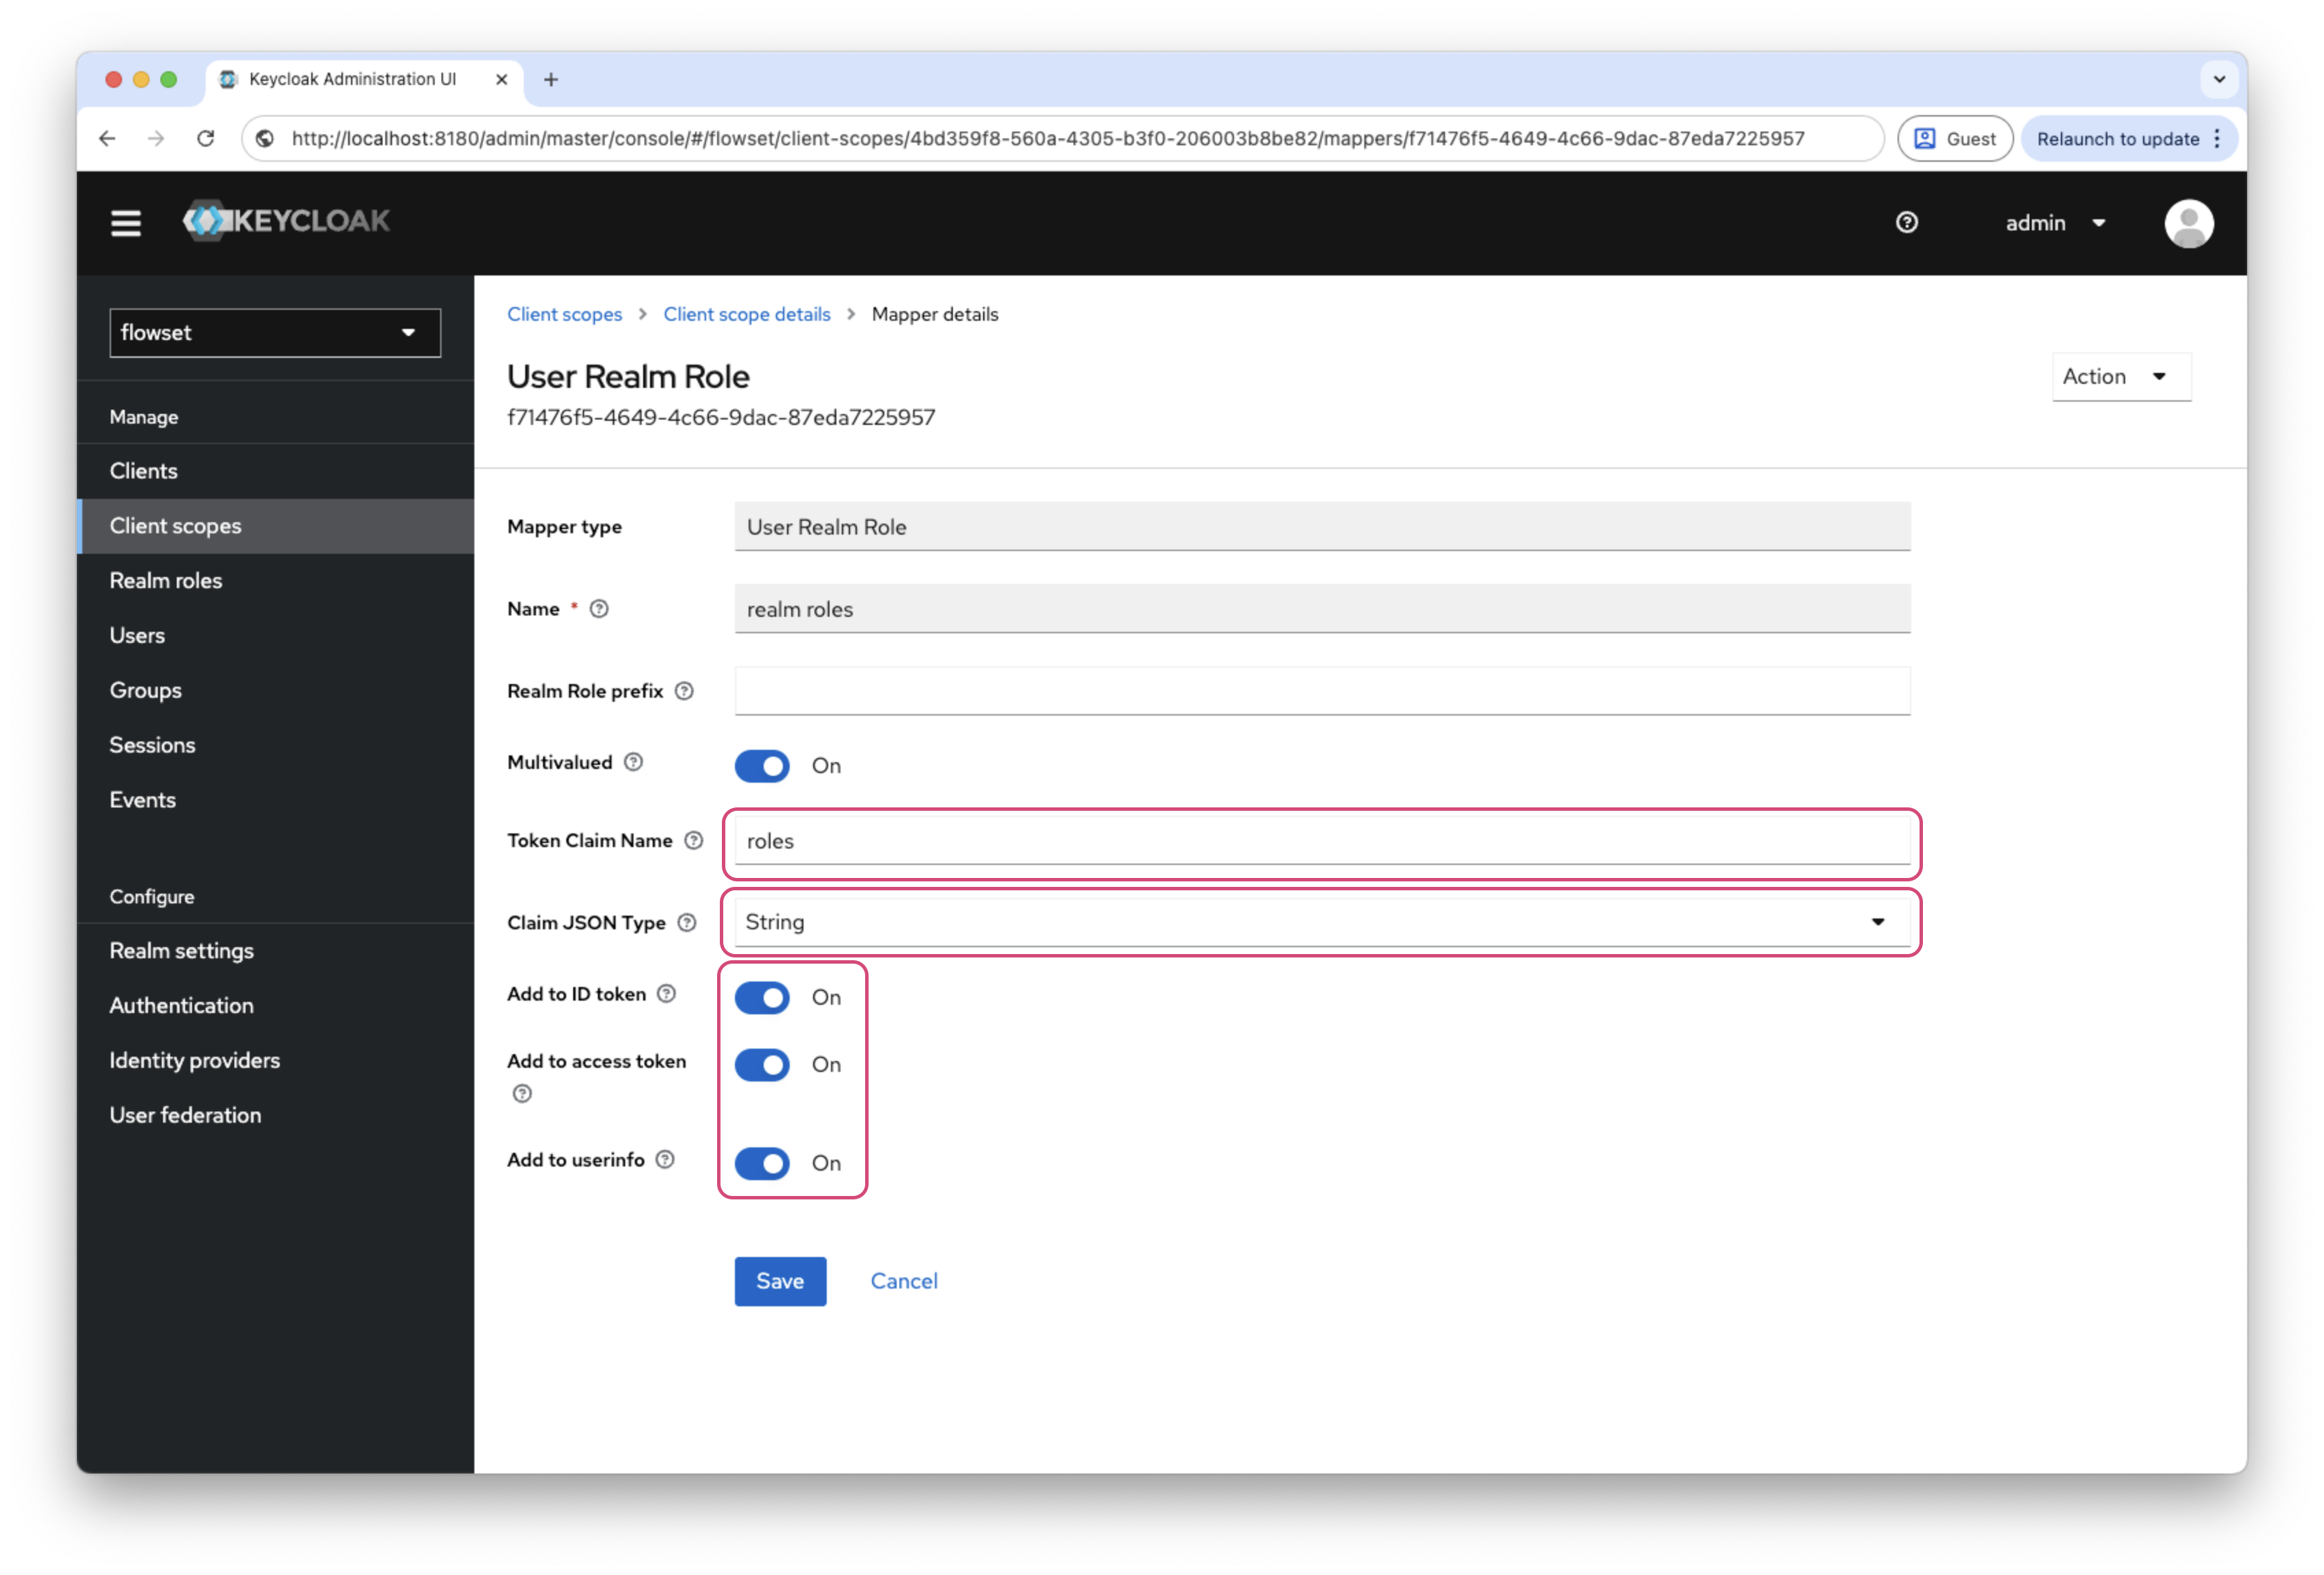
Configuring a Role Mapper
To ensure roles are included in the ID Token, create a mapper:
-
Go to Client scopes →
roles→ Mappers →realm roles. -
Click Create and fill in the fields:
Field Value Mapper Type
User Realm RoleToken Claim Name
realm rolesClaim JSON Type
StringAdd to ID token
ONAdd to access token
ONAdd to userinfo
ON